
Andy
1/1400 scale Negh'var build journal (DONE!)
-
andyh
- Can-Do Captain

- Posts: 877
- Joined: Tue Apr 22, 2014 11:08 pm
- Location: Adelaide, South Australia
Re: 1/1400 scale Negh'var build journal
I wish I had bought one of them  Much better size than the Skyhooks one.
Andy
Andy
-
novahobbies

- Crafty Commodore

- Posts: 1389
- Joined: Sun Mar 16, 2014 6:10 pm
Re: 1/1400 scale Negh'var build journal
All these decals are home brew. I'm a little disappointed in the yellow striping, It's nearly invisible against the green. That should have been done with white decal paper I suppose. All the other decals seem to be pretty good.
-
novahobbies
- Crafty Commodore
- Posts: 1389
- Joined: Sun Mar 16, 2014 6:10 pm
Re: 1/1400 scale Negh'var build journal
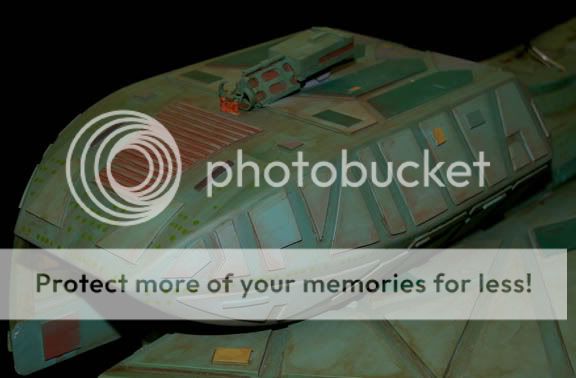
Progress, and a stumbling block. But first the progress.
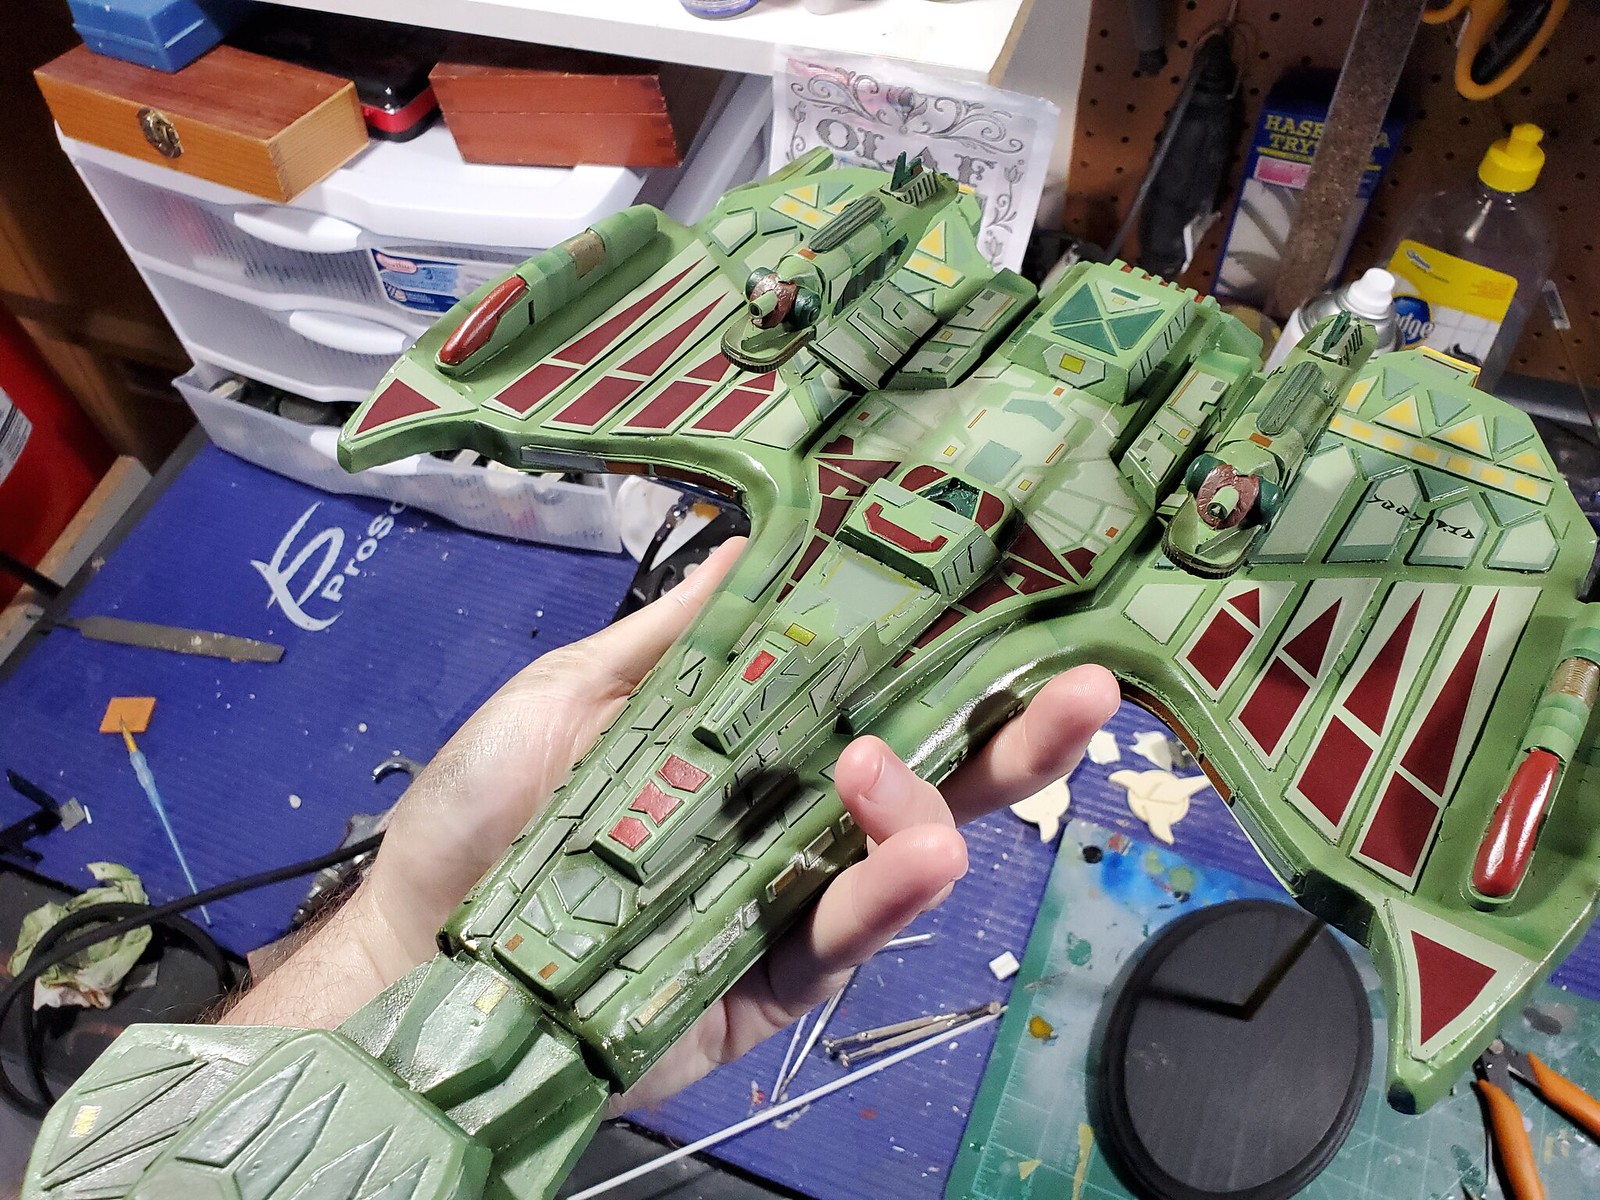
Got the wing-top gun blister pods sorted. I used a poor man's lathe and some carving foam to get them shaped:

They look better painted, I promise.


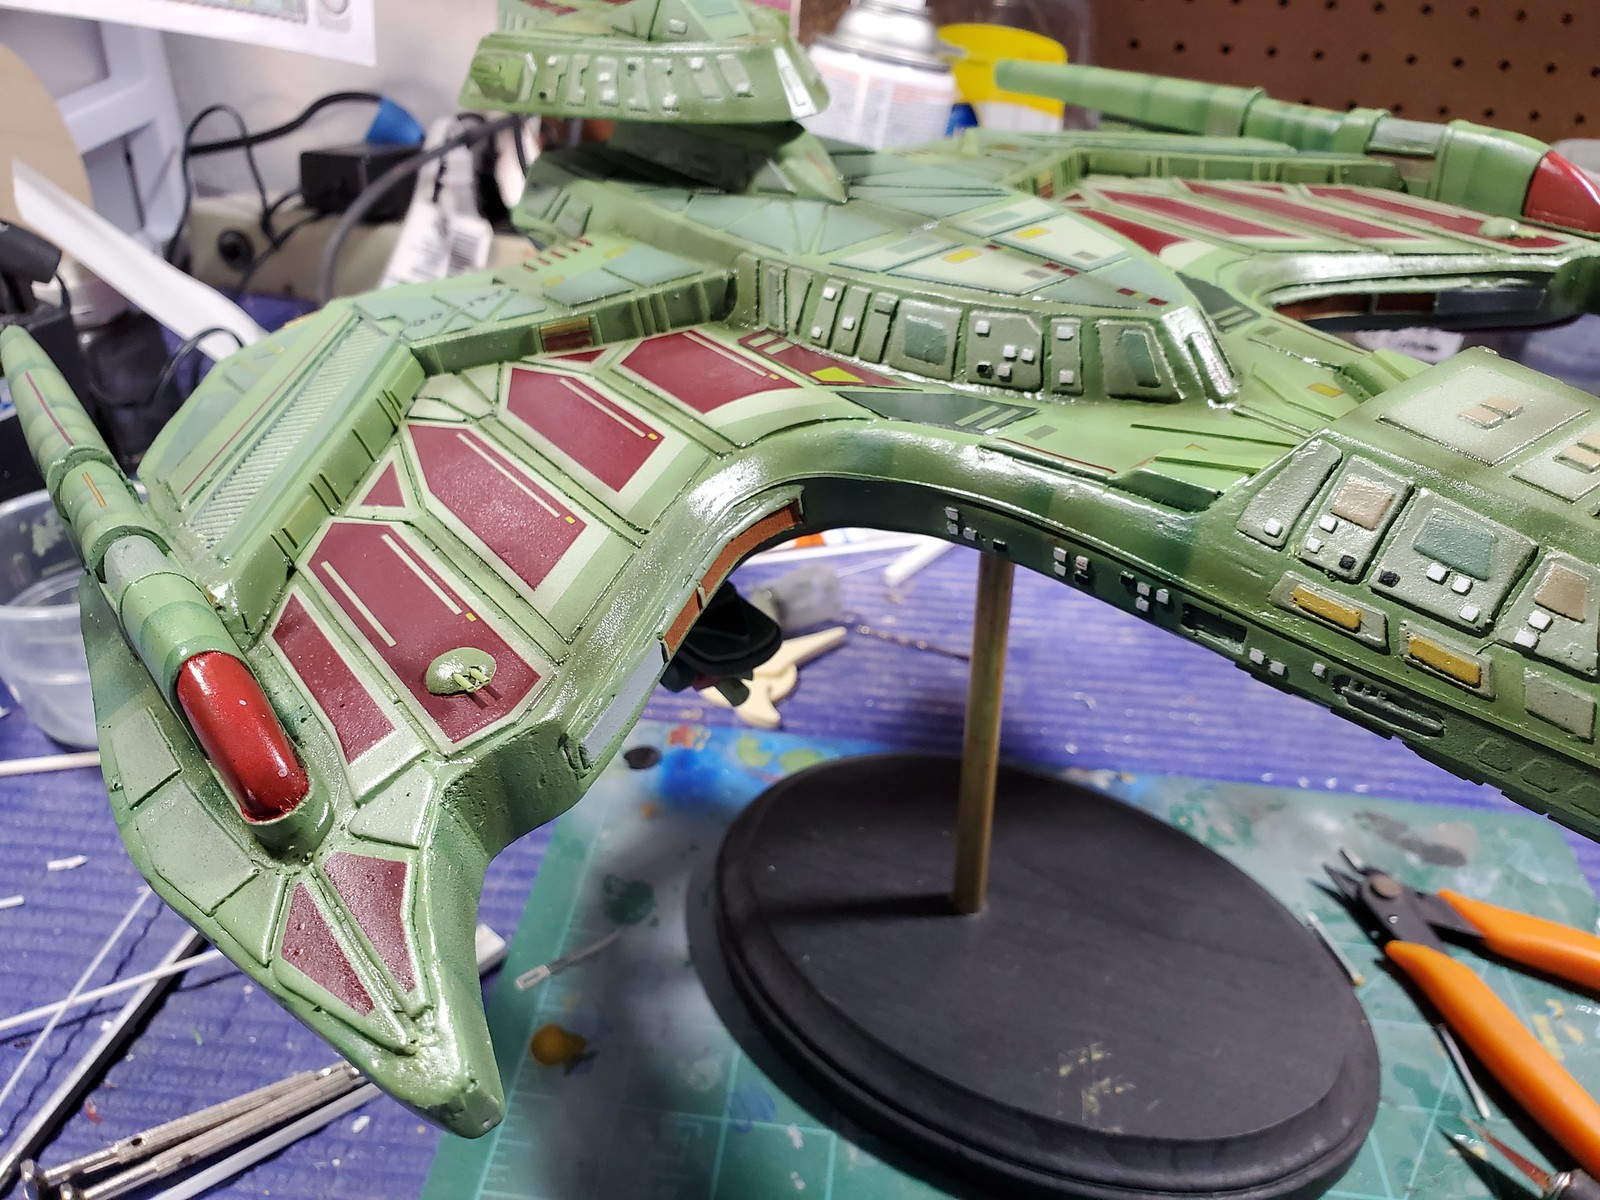
I designed a new center disruptor as well. From what I've learned, there were at least two, most likely THREE, versions of the center gun, but there are very few clear shots of any of them. I decided to pick some elements from the different guns that I liked and basically made my own design. The wingtip guns were easily modified from the original kit parts, just shave the incorrect round guns down to a pill shape, then re-scribe the edges.

I gave those parts a primer and base coat, installed them, and now it's time for the fun stuff -- WEATHERING. Last night I grabbed my airbrush, some Tamiya smoke, and started in defining some panel areas and shadows.


Next up, we've got some washes to do.....but the DIRTY kind. Looking forward it! Now, as to the stumbling block: The Negh'var has a greeblie/disruptor/thingamajig underneath the cobra head hull that is a fairly simple item to build - but it's wrapped in a triangular photoetch that looks like radiator panels / drain grating material. Unfortunately I can't find a good substitute for that photoetch, so I may be stuck trying to make it. I'm going to just continue finishing out the model without that gun for now since it's essentially a plant-on part that I can come back and add later. Just another excuse to get off my duff and get back to figuring out how to make my own damn photoetch.
Got the wing-top gun blister pods sorted. I used a poor man's lathe and some carving foam to get them shaped:
They look better painted, I promise.
I designed a new center disruptor as well. From what I've learned, there were at least two, most likely THREE, versions of the center gun, but there are very few clear shots of any of them. I decided to pick some elements from the different guns that I liked and basically made my own design. The wingtip guns were easily modified from the original kit parts, just shave the incorrect round guns down to a pill shape, then re-scribe the edges.
I gave those parts a primer and base coat, installed them, and now it's time for the fun stuff -- WEATHERING. Last night I grabbed my airbrush, some Tamiya smoke, and started in defining some panel areas and shadows.
Next up, we've got some washes to do.....but the DIRTY kind. Looking forward it! Now, as to the stumbling block: The Negh'var has a greeblie/disruptor/thingamajig underneath the cobra head hull that is a fairly simple item to build - but it's wrapped in a triangular photoetch that looks like radiator panels / drain grating material. Unfortunately I can't find a good substitute for that photoetch, so I may be stuck trying to make it. I'm going to just continue finishing out the model without that gun for now since it's essentially a plant-on part that I can come back and add later. Just another excuse to get off my duff and get back to figuring out how to make my own damn photoetch.
-
Resin-Modeller

- Can-Do Captain
- Posts: 923
- Joined: Sun Sep 30, 2012 6:29 pm
- Location: United Kingdom
- Contact:
Re: 1/1400 scale Negh'var build journal
It looks amazing
RESIN MODELLER
1/2500 and 1/1400 Scale Star Trek Modeller. New Models monthly.
Full listings can be found here and are dispatched across the globe!
1/2500 and 1/1400 Scale Star Trek Modeller. New Models monthly.
Full listings can be found here and are dispatched across the globe!
-
ProfArturo

- Can-Do Captain
- Posts: 624
- Joined: Sun Mar 25, 2018 1:06 pm
Re: 1/1400 scale Negh'var build journal
That model really has a great sense of scale to it.
-
novahobbies
- Crafty Commodore
- Posts: 1389
- Joined: Sun Mar 16, 2014 6:10 pm
Re: 1/1400 scale Negh'var build journal
Thank you both! It's getting damn close, got the rest of the washes done, now it's down to a couple decals on the wing-top blisters, a dullcote, and later on when I figure out the photoetch thing, that final plant-on gun. Everything but the gun will be done by this weekend.
-
Markus
- Legendary LT Commander

- Posts: 166
- Joined: Wed Oct 10, 2018 5:56 pm
Re: 1/1400 scale Negh'var build journal
That is looking really really good!
Do you have any reference pictures of the photoetched greeble you still need? If it is just radiator grill or grate pattern material, there are probably model railroad detail parts that come close. I use HO scale etched brass walkways from planomodelproducts.com as one of my standard greeble and texture sources. Another tip, Plano's 36" radiator grill (part 475) is what I use for my Kelvin era deflector dishes. Their radiator intake shutters also make fantastic impulse engine nozzles.
Do you have any reference pictures of the photoetched greeble you still need? If it is just radiator grill or grate pattern material, there are probably model railroad detail parts that come close. I use HO scale etched brass walkways from planomodelproducts.com as one of my standard greeble and texture sources. Another tip, Plano's 36" radiator grill (part 475) is what I use for my Kelvin era deflector dishes. Their radiator intake shutters also make fantastic impulse engine nozzles.
-
novahobbies
- Crafty Commodore
- Posts: 1389
- Joined: Sun Mar 16, 2014 6:10 pm
Re: 1/1400 scale Negh'var build journal
YOU.......YOU.....!!! You may have just hit it right on the head. Stand by......Markus wrote: ↑Thu May 23, 2019 5:56 pm That is looking really really good!
Do you have any reference pictures of the photoetched greeble you still need? If it is just radiator grill or grate pattern material, there are probably model railroad detail parts that come close. I use HO scale etched brass walkways from planomodelproducts.com as one of my standard greeble and texture sources. Another tip, Plano's 36" radiator grill (part 475) is what I use for my Kelvin era deflector dishes. Their radiator intake shutters also make fantastic impulse engine nozzles.
-
novahobbies
- Crafty Commodore
- Posts: 1389
- Joined: Sun Mar 16, 2014 6:10 pm
Re: 1/1400 scale Negh'var build journal
Allright, this might work...but it might be too small, too. Either way I think I'm going to order it as a backup.....heh. Thanks!! Part 181....
https://www.planomodelproducts.com/dieseld_scq.html
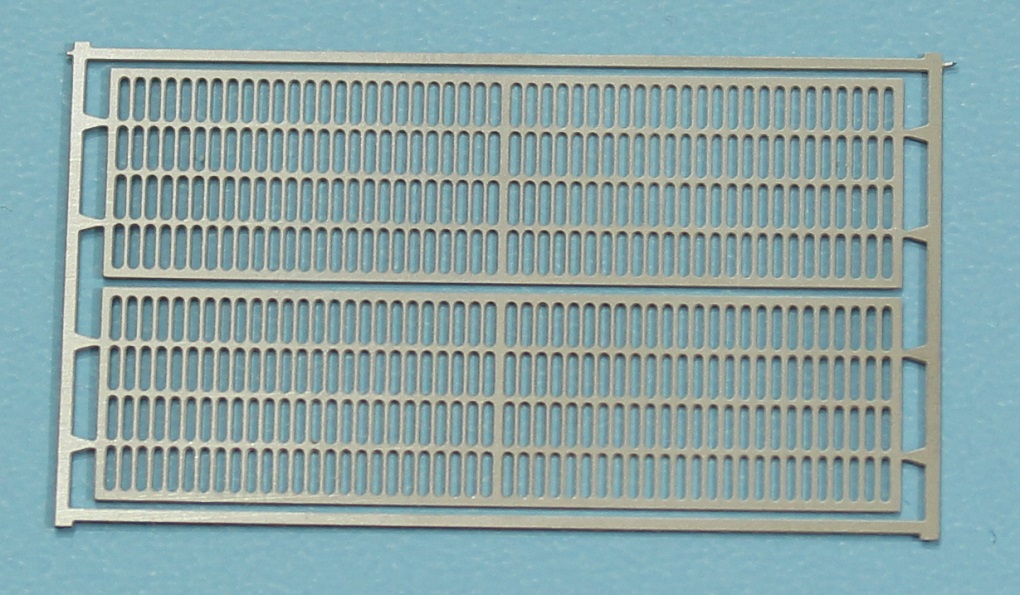
https://www.planomodelproducts.com/dieseld_scq.html
-
novahobbies
- Crafty Commodore
- Posts: 1389
- Joined: Sun Mar 16, 2014 6:10 pm
Re: 1/1400 scale Negh'var build journal
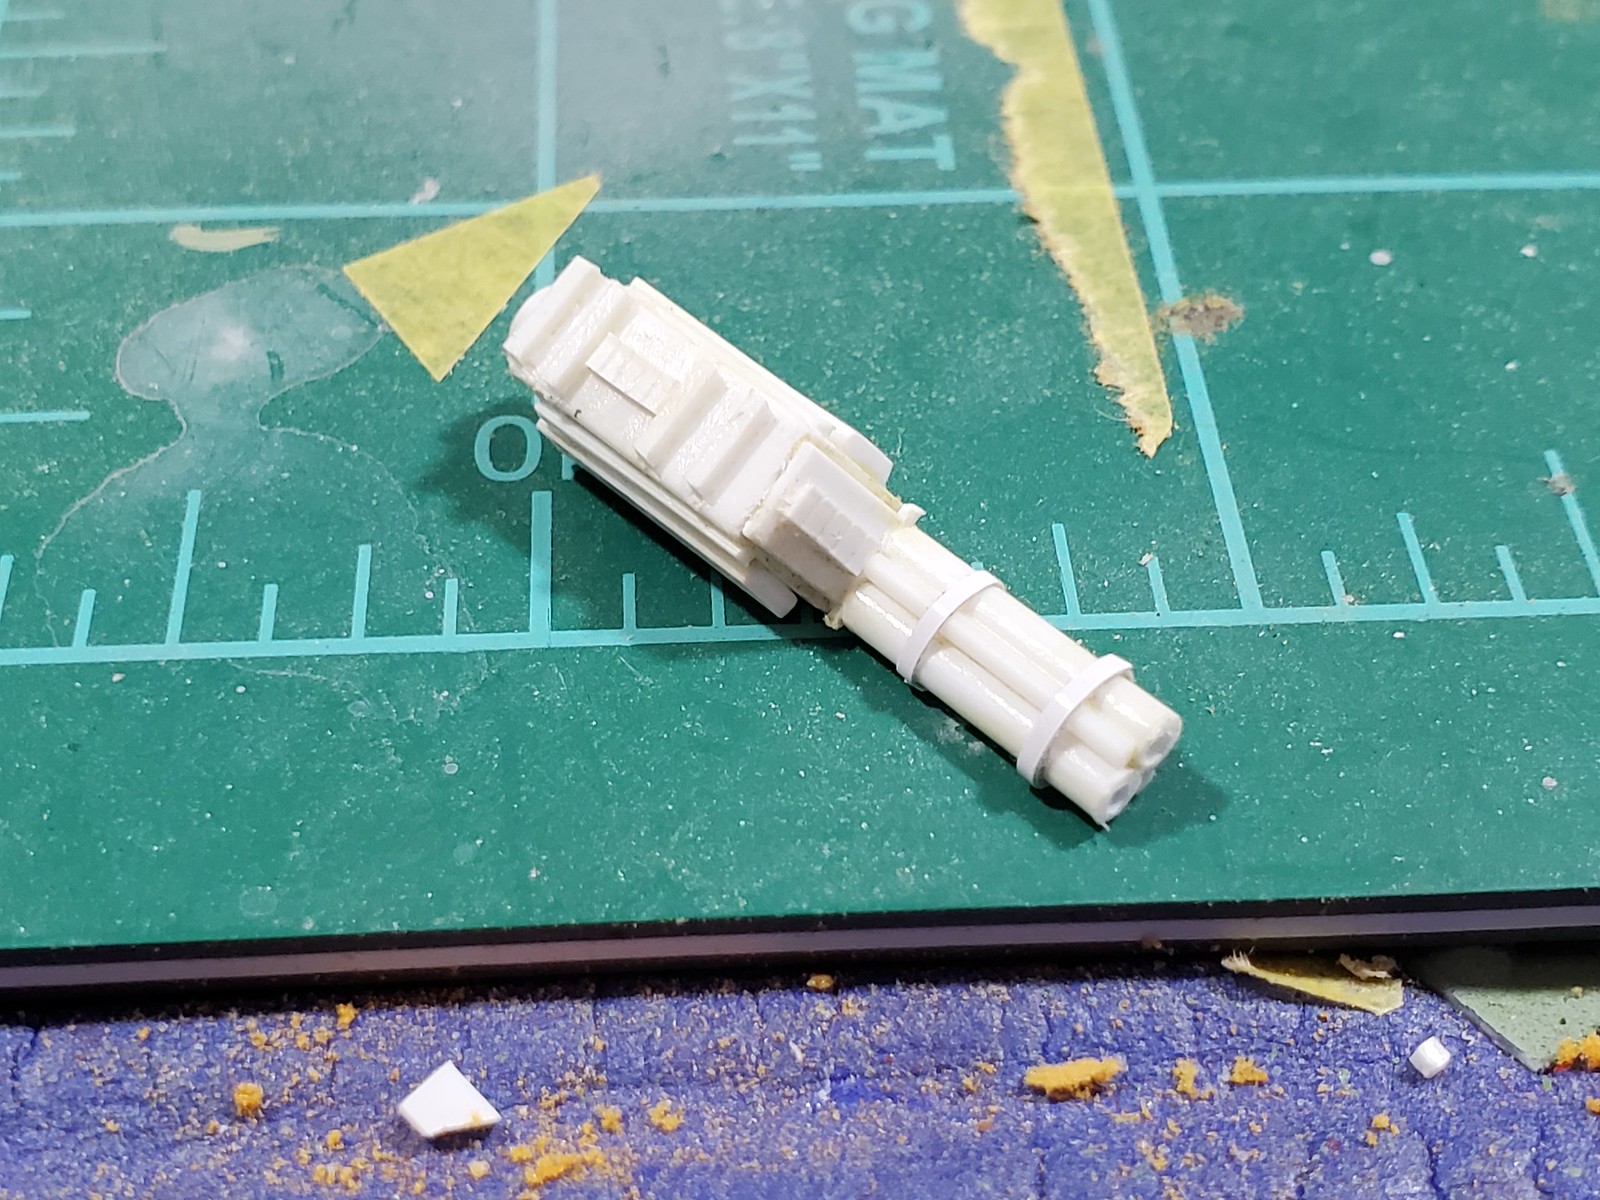
Here's one of the best images of it. From what I can gather, it's fairly simple. There's a greeblie'd rectangular box in back, leading to a triangular spire that's wrapped in the grille photoetch that has some easy rod details at the vertices, with a split targeting ring...thing...in the front. As you can see, it's not a difficult part to make, but the grille detail might need to be home-etched to get the right look.
I'm going to take 4 pieces of .080 triangle rod and make a .16" size trangular part with them. I tried this with some .125 triangle rod I already own, but .125 was too narrow, and .25 (the size when built out of 4) was too wide. The .080 should be here next week.
I'm going to take 4 pieces of .080 triangle rod and make a .16" size trangular part with them. I tried this with some .125 triangle rod I already own, but .125 was too narrow, and .25 (the size when built out of 4) was too wide. The .080 should be here next week.
