
Buy the right denomination for the printer you should be fine.novahobbies wrote: ↑Wed May 01, 2019 6:50 pm For acetate, you are correct. But this is just plain transparency sheet, which you can buy for either laser or inkjet printers.
1/1400 scale Negh'var build journal (DONE!)
-
Tesral

- Administrator

- Posts: 4937
- Joined: Tue Dec 18, 2012 12:58 pm
- Location: Dearborn, Mi -- at my desk.
- Contact:
Re: 1/1400 scale Negh'var build journal
Garry AKA --Phoenix-- Rising above the Flames.
"I saw it done on Voyager" is no excuse for anything, even breathing.
"I saw it done on Voyager" is no excuse for anything, even breathing.
-
novahobbies

- Crafty Commodore

- Posts: 1389
- Joined: Sun Mar 16, 2014 6:10 pm
Re: 1/1400 scale Negh'var build journal
Still moving along here! I got a little distracted with the B'rel class birds of prey (I mean who wouldn't?) but I've still been poking along with the Negh'var. I've been spending some time digging through search engines, and bending the ear of a certain Doug we all know and love, to get some more detailed images of the original studio model. I identified some areas on the resin kit that needed extra detail added, and some spots where the paint job on the studio model differs from a lot of the material I had available back in the early aughts when this model was originally built.
Cobra head panels got their darker paint added:

And some of the tan sand is being painted on to the neck as well. Also added some red to the warp engines, because I was getting tired of staring at layers of green:

Starting to rough in some of the more obvious missing panels.


Those were the easy ones. After that, I got into the weeds. Turns out there's a fair amount of simple plant-on detail on the studio model, just stuff to add visual interest. The studio model is also pretty heavily weathered with a rust wash, and the scribed styrene plant-on detail is good to get some contrast with washes like that. I started out with the most intricate new details:

And then moved out:


I also spent some time last week in Corel, drawing up a supplemental decal sheet for the missing details as well. Last night I primered all the new white plastic and added the kit-provided greeblies on the back of the rear pod, and this week I should be able to apply my green base coat to the new details and go back to touch up some of the voids I filled with putty last week. I have also yet to scratch build a new center disruptor spire, or add new wing guns. But I'll get to them soon. So....day by day, it's getting closer!
Cobra head panels got their darker paint added:
And some of the tan sand is being painted on to the neck as well. Also added some red to the warp engines, because I was getting tired of staring at layers of green:
Starting to rough in some of the more obvious missing panels.
Those were the easy ones. After that, I got into the weeds. Turns out there's a fair amount of simple plant-on detail on the studio model, just stuff to add visual interest. The studio model is also pretty heavily weathered with a rust wash, and the scribed styrene plant-on detail is good to get some contrast with washes like that. I started out with the most intricate new details:
And then moved out:
I also spent some time last week in Corel, drawing up a supplemental decal sheet for the missing details as well. Last night I primered all the new white plastic and added the kit-provided greeblies on the back of the rear pod, and this week I should be able to apply my green base coat to the new details and go back to touch up some of the voids I filled with putty last week. I have also yet to scratch build a new center disruptor spire, or add new wing guns. But I'll get to them soon. So....day by day, it's getting closer!
-
Markus
- Legendary LT Commander

- Posts: 166
- Joined: Wed Oct 10, 2018 5:56 pm
Re: 1/1400 scale Negh'var build journal
This is looking really good! The additional panels really bring out the sense of scale, making it look like a properly large starship. What's the history behind the base model kit? Was it commercially produced at some point, or was it a limited private party thing?
-
novahobbies
- Crafty Commodore
- Posts: 1389
- Joined: Sun Mar 16, 2014 6:10 pm
Re: 1/1400 scale Negh'var build journal
It was commercially available. I sold it briefly myself before I passed all the molding and casting over to Federation Models. It wasn't on the market for long though.....probably 2 to 3 years I'd guess. The master is still around, currently in Del's hands, but it has a lot of cleanup to do to get it back into fighting shape to be remolded so I don't know when he'll get to it. The one I'm building now is one of the castings Tracy did; my original casting I pulled for myself (the one the boxart was based on) actually went to Dennis from Starcrafts as a gift.Markus wrote: ↑Tue May 07, 2019 6:12 pm This is looking really good! The additional panels really bring out the sense of scale, making it look like a properly large starship. What's the history behind the base model kit? Was it commercially produced at some point, or was it a limited private party thing?
-
novahobbies
- Crafty Commodore
- Posts: 1389
- Joined: Sun Mar 16, 2014 6:10 pm
Re: 1/1400 scale Negh'var build journal
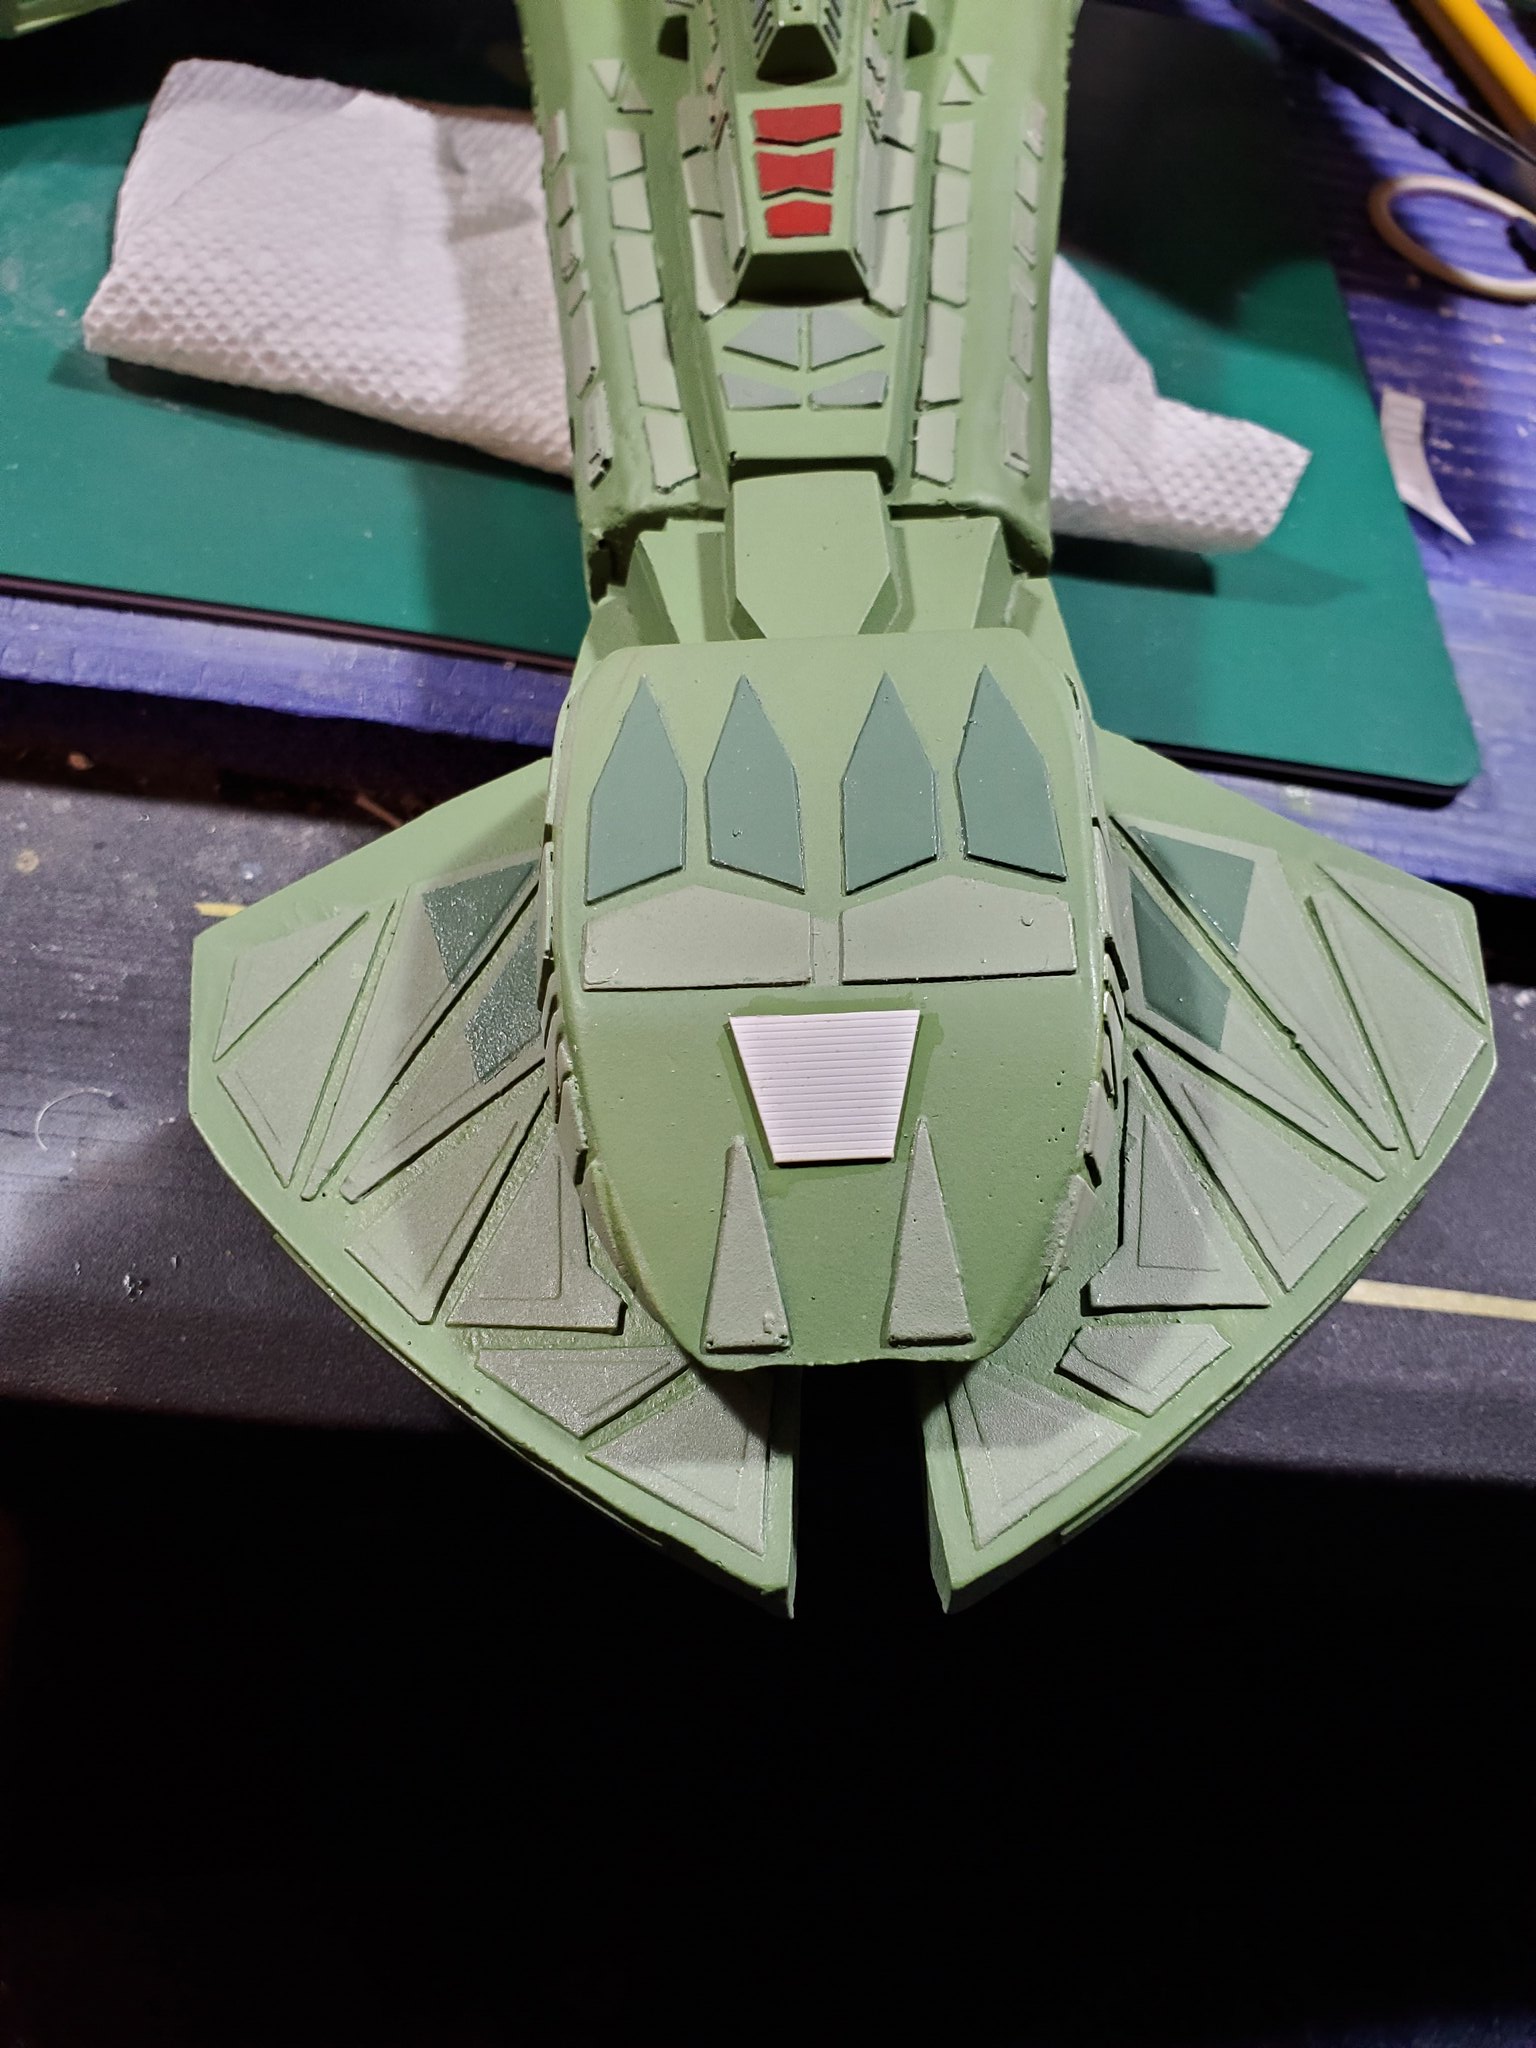
Weekly update! It's been a fairly productive week, and the finish line is starting to come into sight. Still no red panels, but....well, you be the judge. Kind of a pic-heavy post, hope you don't mind.
First up, I got all the new detail blended in to the base coat:

Next, I put the big boy aside and grabbed the lower disruptor cannons to start adding their contrasting panels:

Once the gun pylons were done, I glued those on, then masked and painted the lower dark yellow panels on the bottom of the wings:


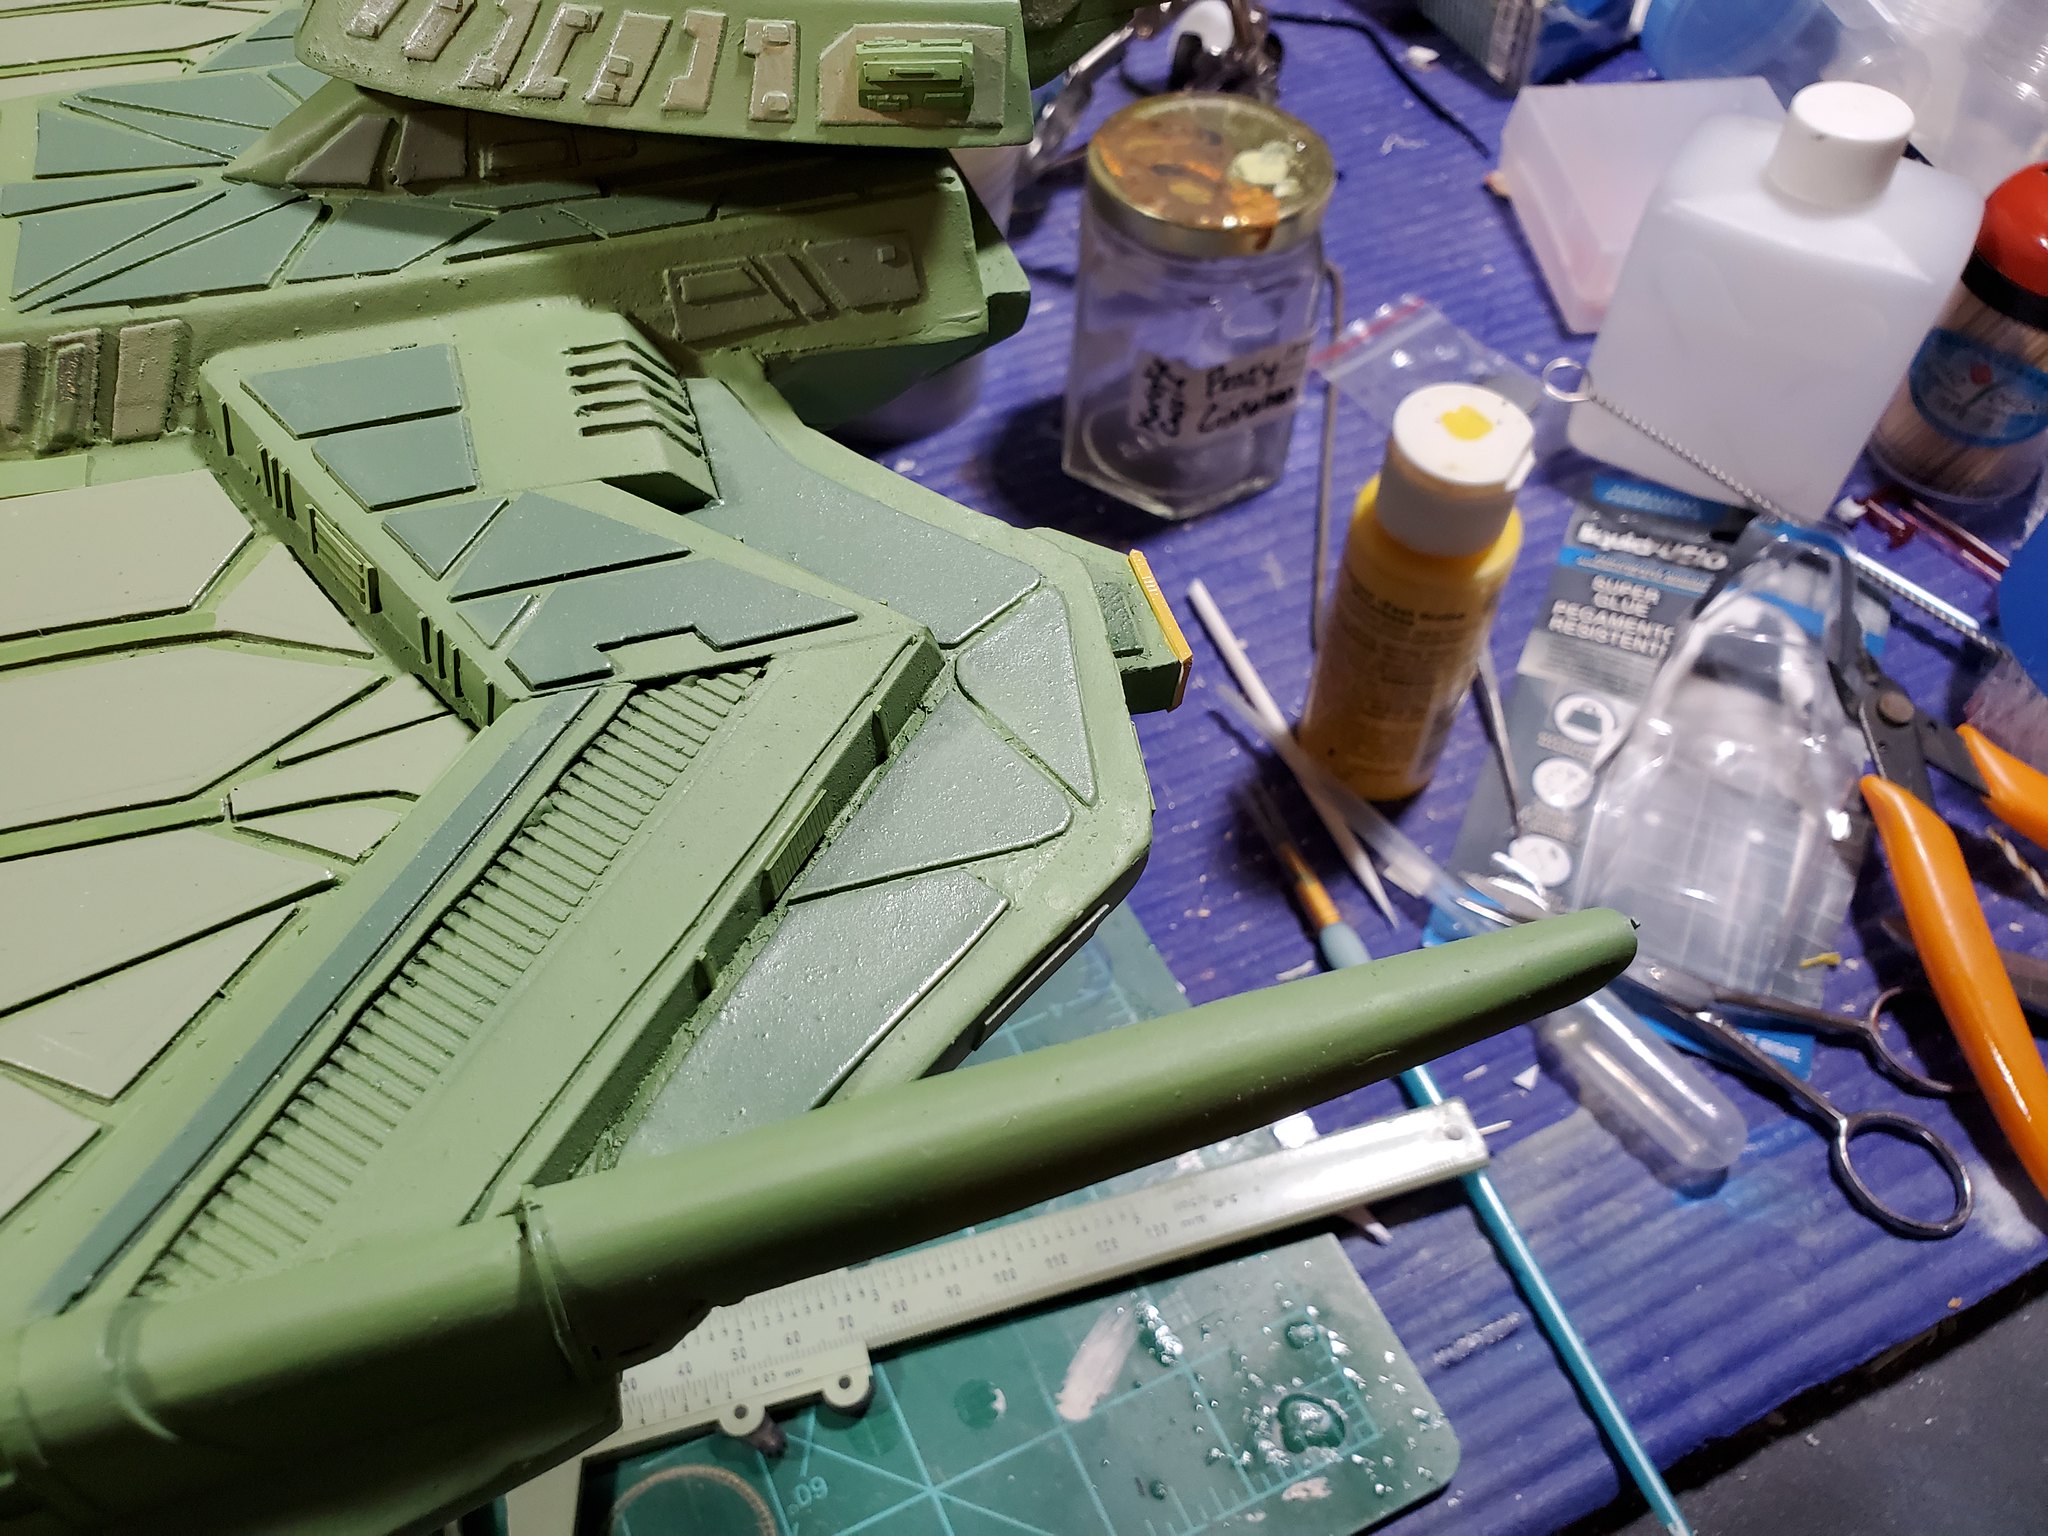
While I was doing that, I noticed there was some detail missing around the impulse engines. There is supposed to be a raised scribed strip surrounding the ends of the engine exhaust that's painted yellow. I cut a small strip from a scribed sheet and got busy:
I really liked that dark yellow I mixed for the lower panels, so I decided to use it for the yellow details on the upper hull:

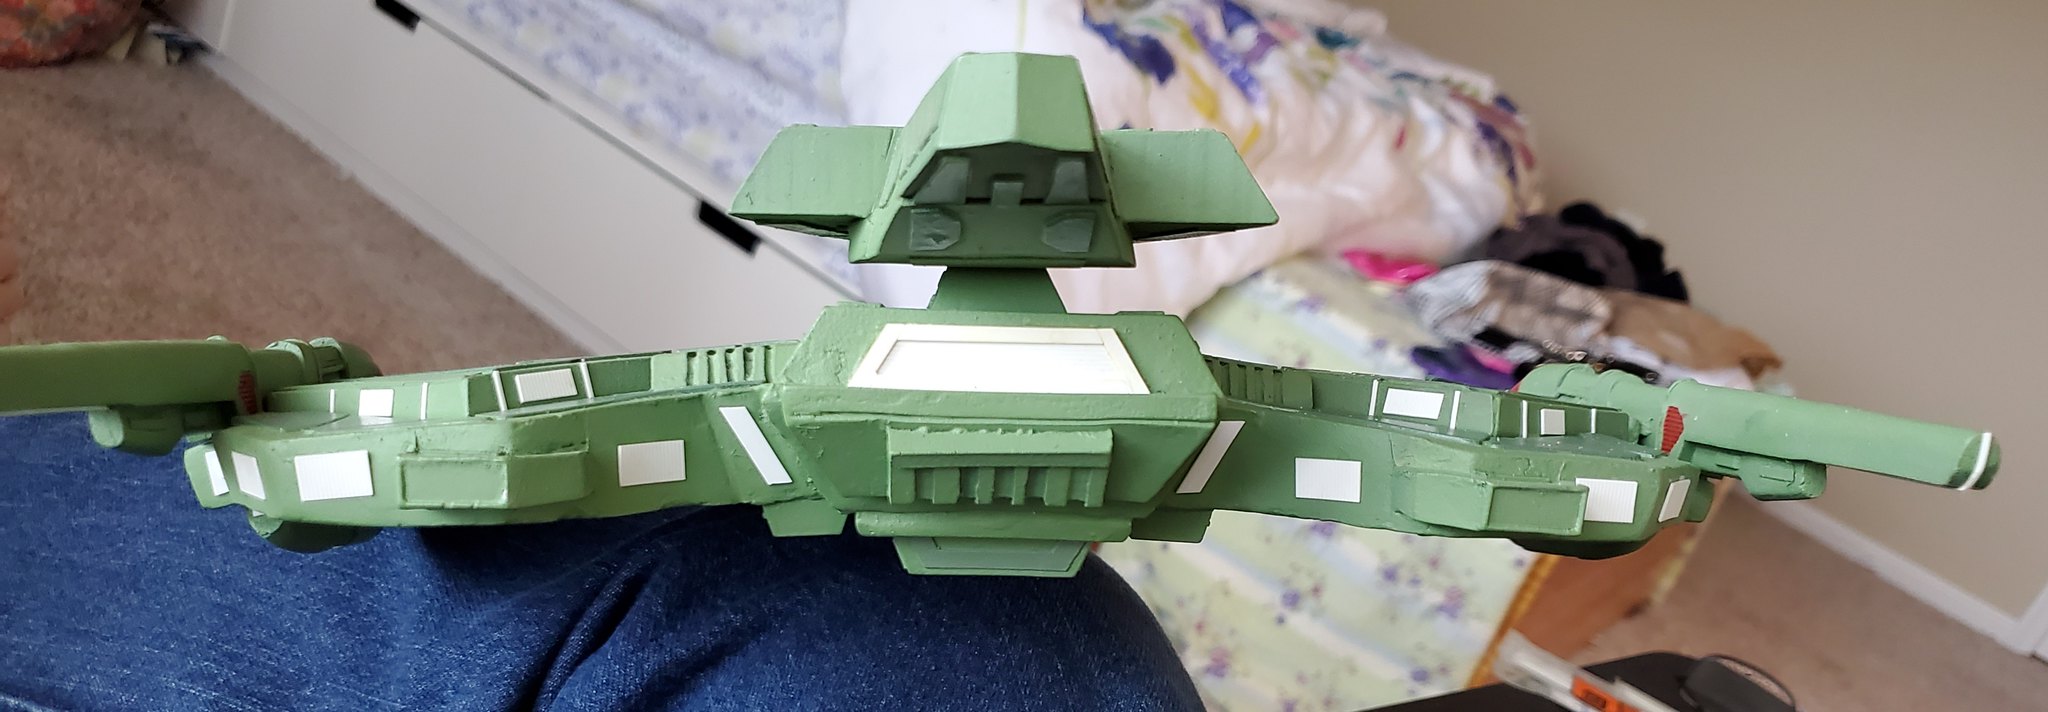
....and then I went ahead and mated the disruptors onto the lower pylons. The girl has her guns!!

Next, I took a breath and did something new for me: feather panels. The Negh'var is a big ship and there's a lot of open space, so the studio model has a lot of airbrushed panel lines to break up some of those big flat planes. Most specifically, the outer edges of the wings, the upper and lower warp engines, and even the disruptor guns have darker colored airbrushed lines that need to be copied. I've never done this on a model, even though I technically new how.....so I just said a little prayer and got to it.
Now maybe I shouldn't have done this for the first time on such a big and somewhat rare model, but carpe diem, I say! Besides, I already knew this wasn't a model I'd try to win any awards with. It won't be perfect...but it'll be MINE. So I'm happy.
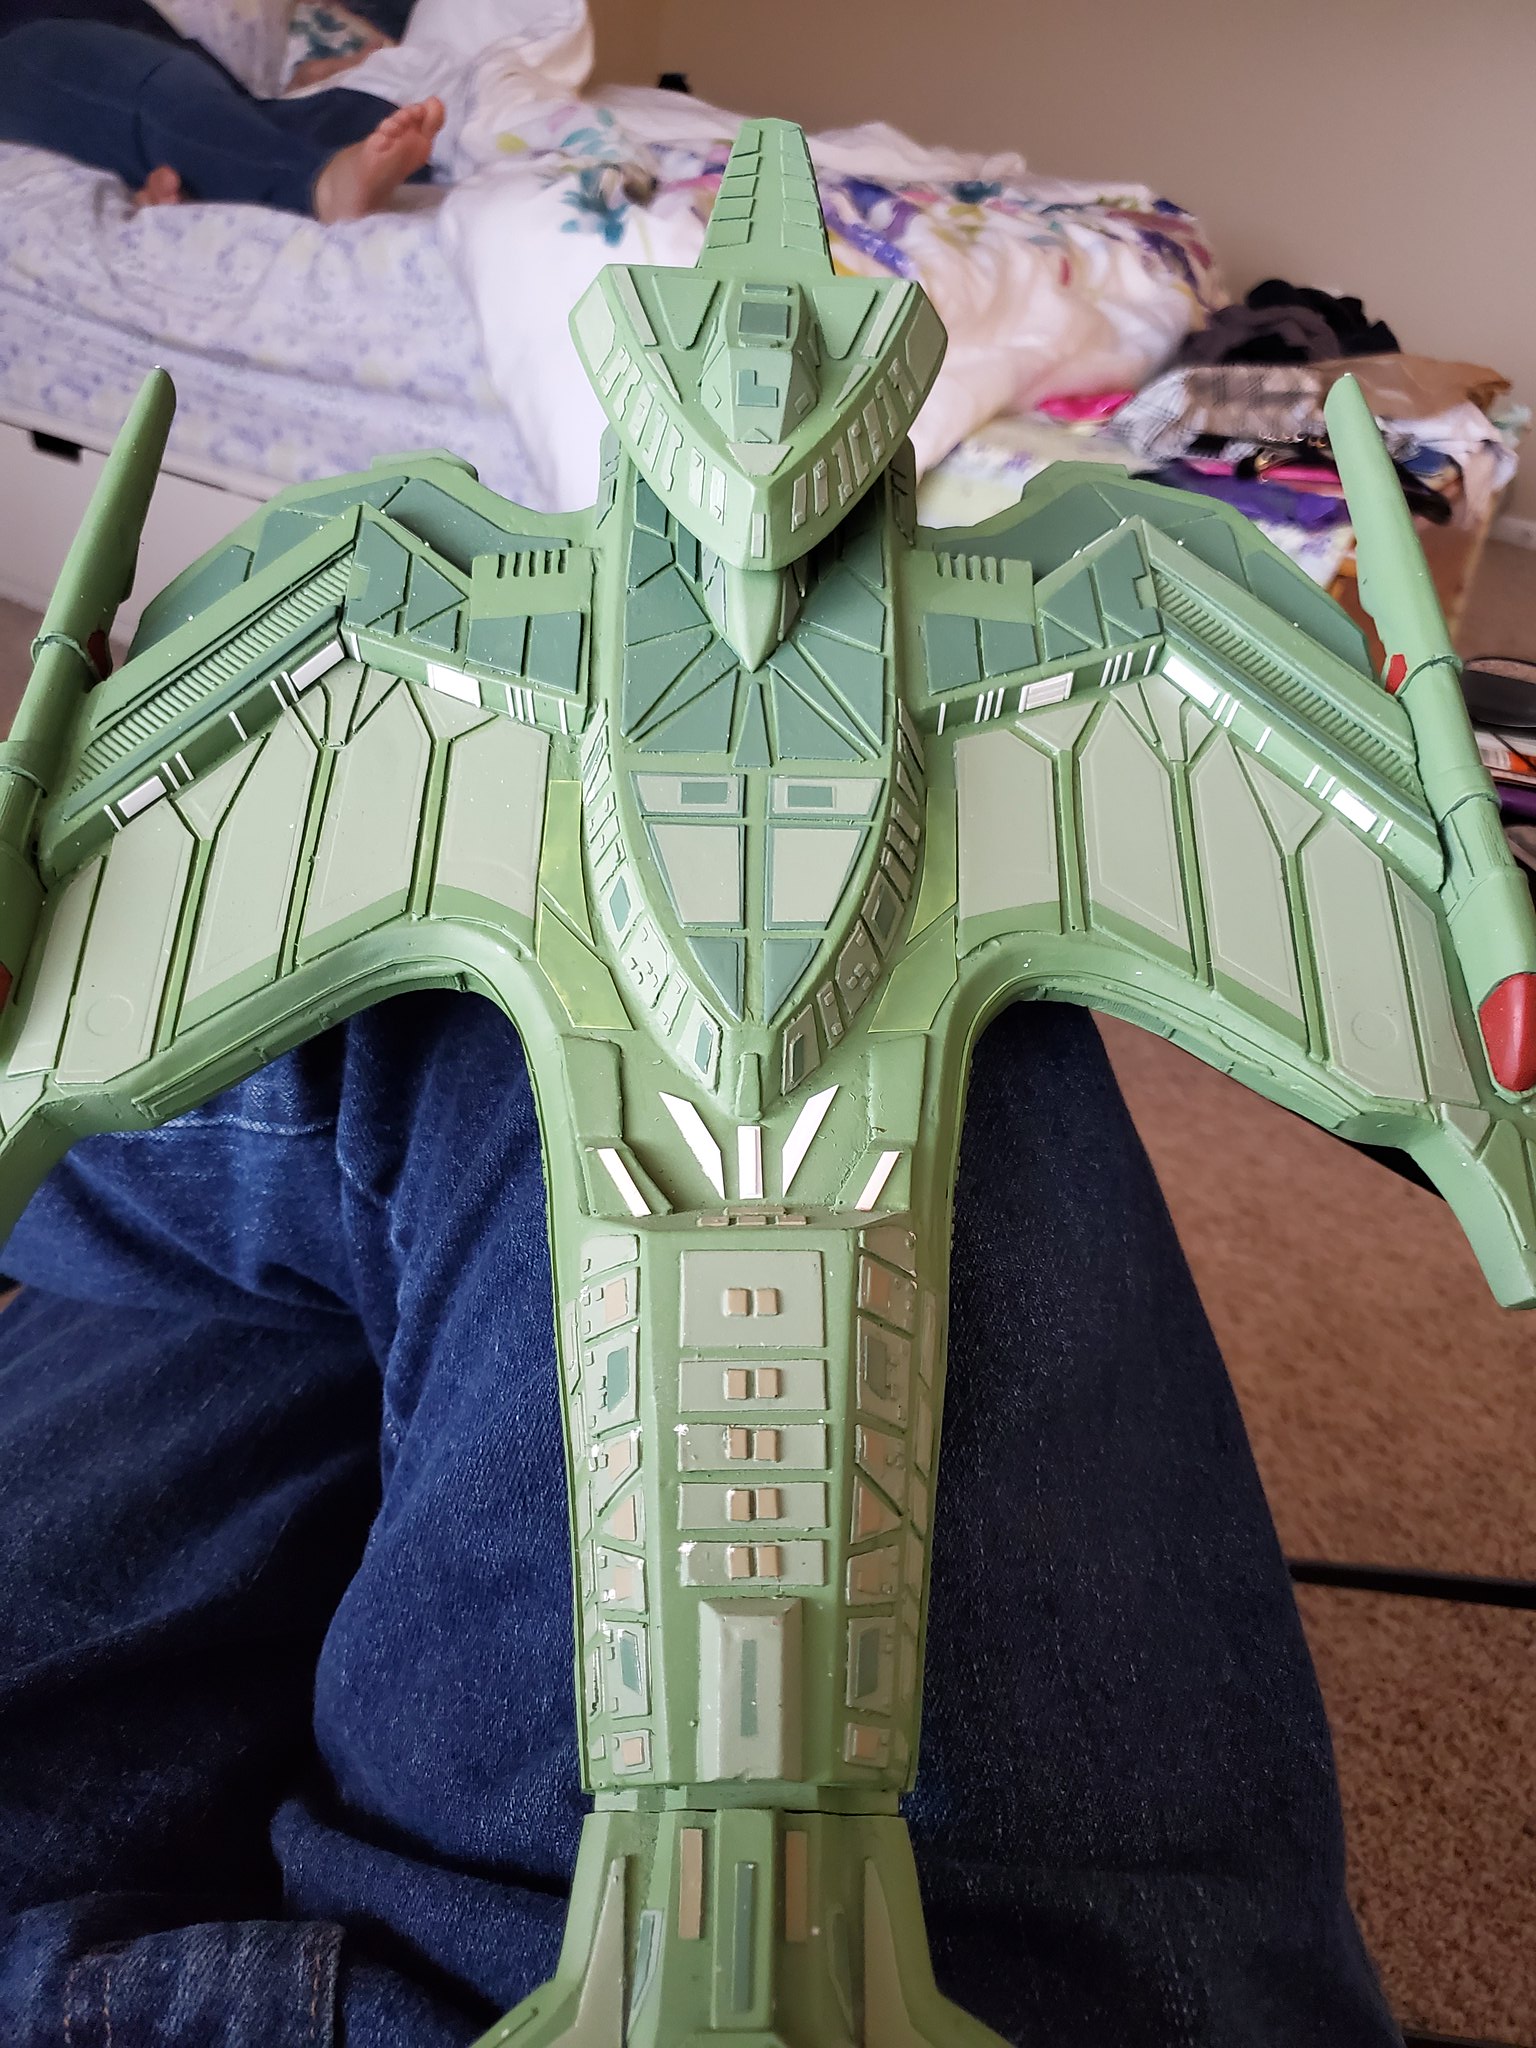
Got the ones on the warp engines and sides done...

The gun panels.....

And then I brought some more around on the body, following roughly what I could see on the studio mini. I just added a few more for fun. EDIT: I still haven't sorted out that bottom mounting hole. It's ugly AF, gotta get it cleaned.


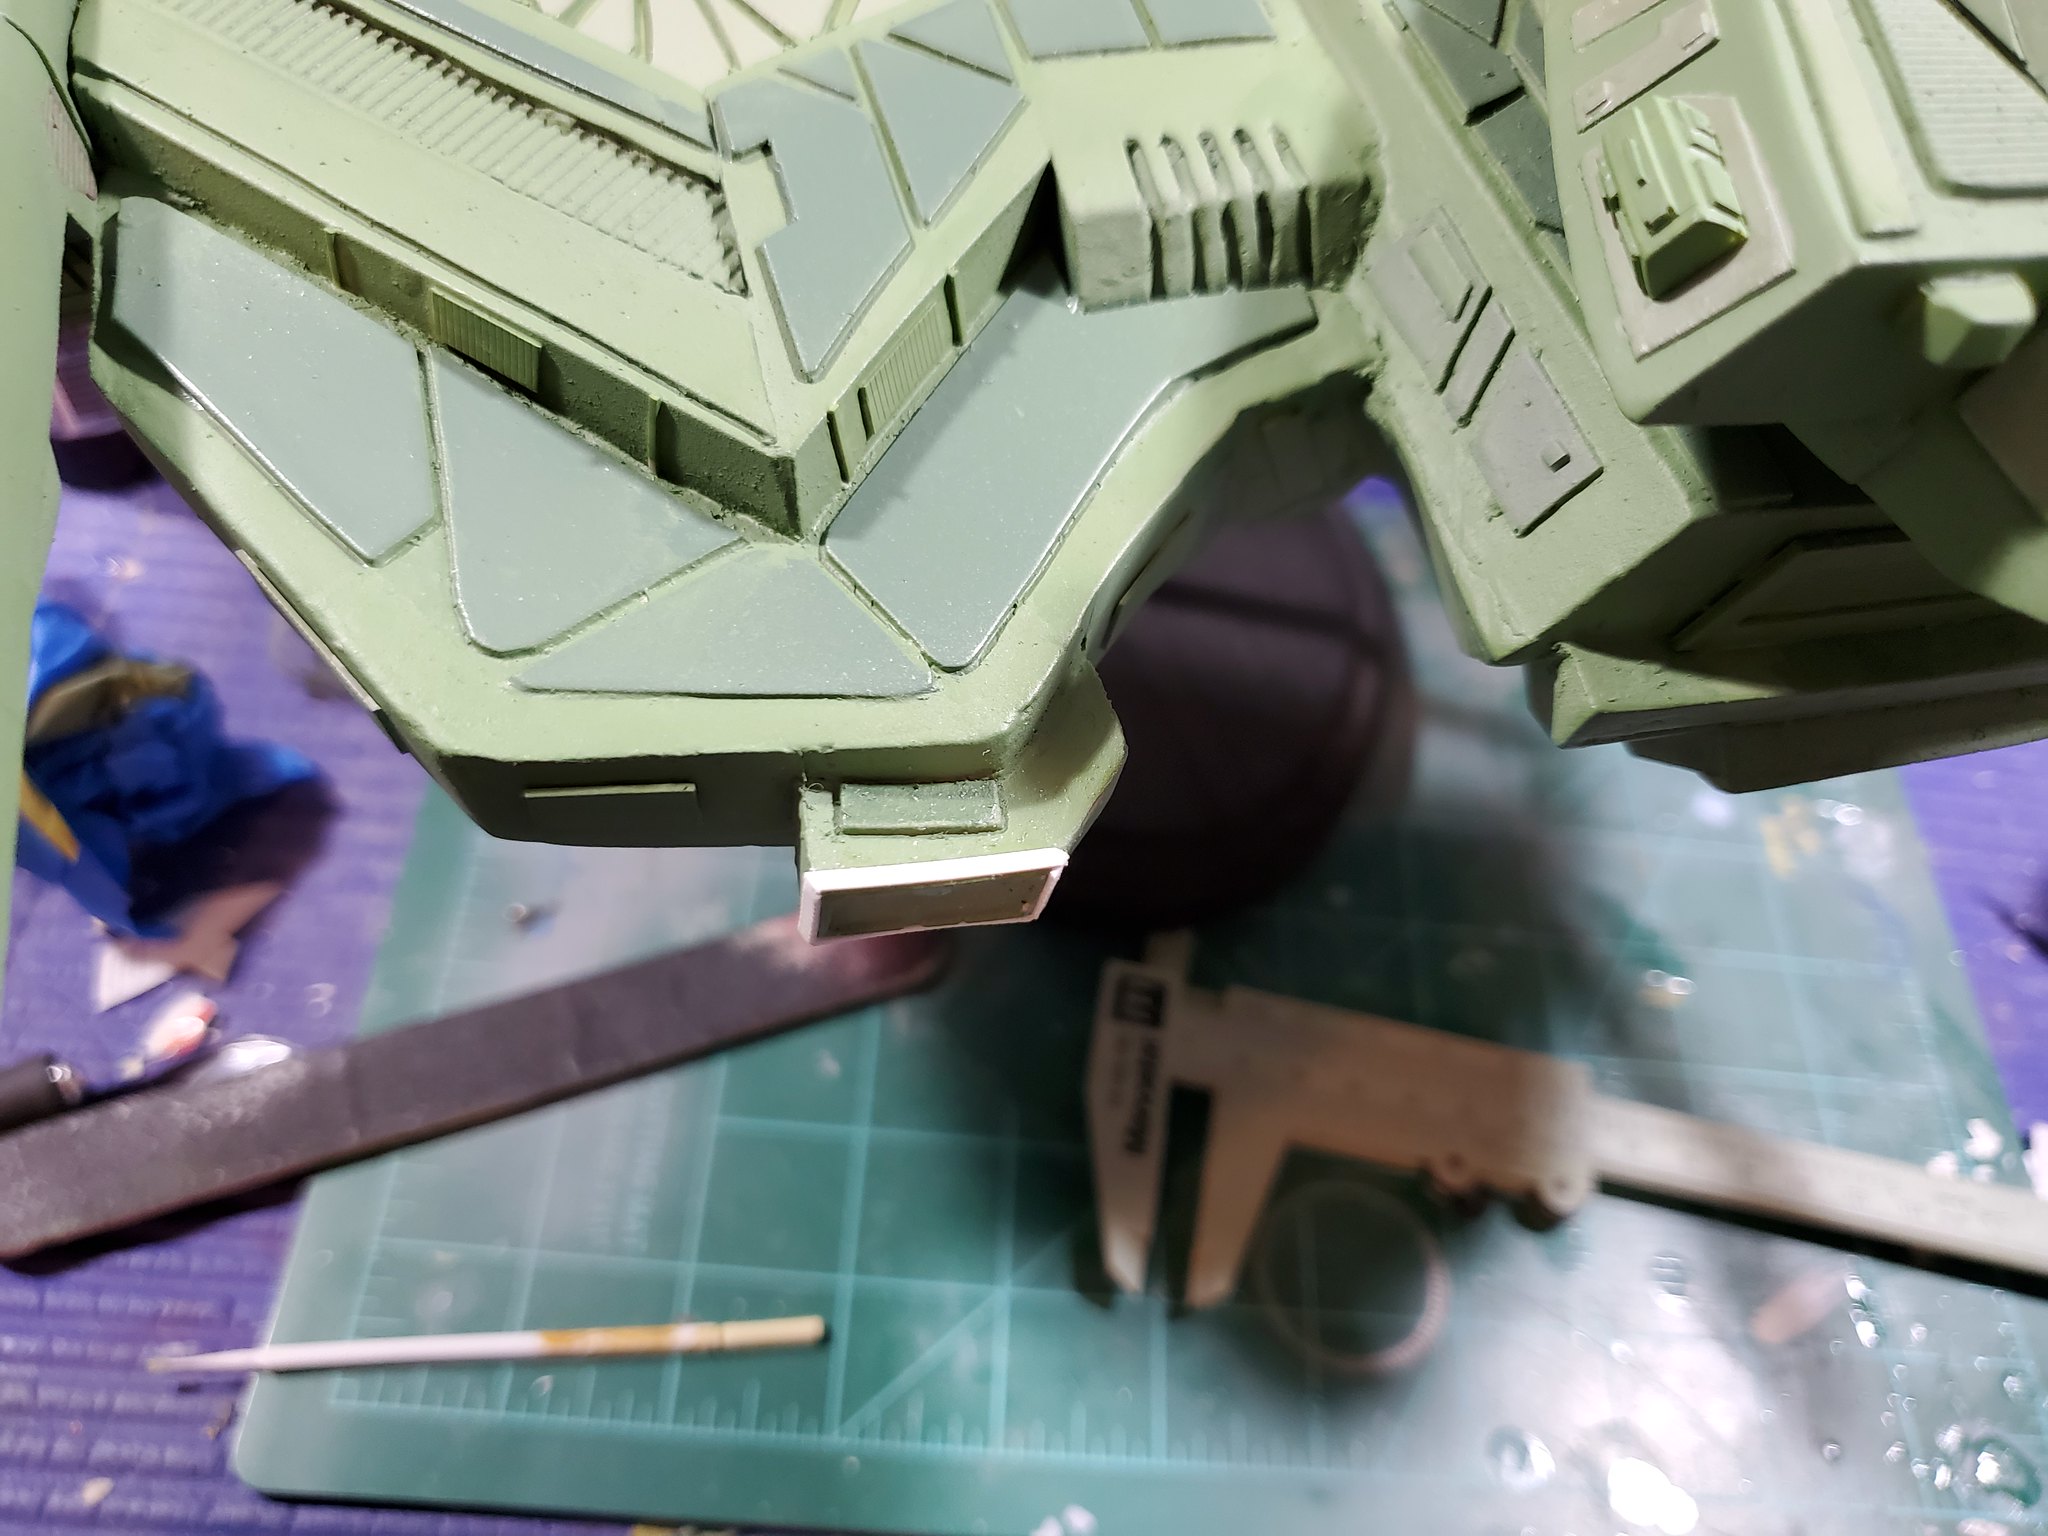
Next up? Time to start in on some orange panels and rust colored details! Started with the front vents...


....and thinned it out to start washes for the rust colored side panels of the warp engines (these will also get some green drybrush later, so this is rough)

And then, just for fun, I took a stacked group shot. Negh'var, Vor'cha, K'tinga, and B'rel all piggybacked!
 20190512_134032 by Richard Rayl, on Flickr
That's it for the week. From here on out, I have some windows to paint in, then a new front disruptor spire, wing-top dome shaped phaser blisters, and wing-tip guns to scratchbuild (the original kit-supplied parts are inaccurate when compared to the new images that have come out). After that the red detail panels will be applied via decals, as well as assorted small details. Once the decals are on and sealed, I'll get started on the REAL fun - washes and weathering!
As always, there are more pics on my flikr page: https://flic.kr/s/aHskQFpXK4
First up, I got all the new detail blended in to the base coat:
Next, I put the big boy aside and grabbed the lower disruptor cannons to start adding their contrasting panels:
Once the gun pylons were done, I glued those on, then masked and painted the lower dark yellow panels on the bottom of the wings:
While I was doing that, I noticed there was some detail missing around the impulse engines. There is supposed to be a raised scribed strip surrounding the ends of the engine exhaust that's painted yellow. I cut a small strip from a scribed sheet and got busy:
I really liked that dark yellow I mixed for the lower panels, so I decided to use it for the yellow details on the upper hull:
....and then I went ahead and mated the disruptors onto the lower pylons. The girl has her guns!!
Next, I took a breath and did something new for me: feather panels. The Negh'var is a big ship and there's a lot of open space, so the studio model has a lot of airbrushed panel lines to break up some of those big flat planes. Most specifically, the outer edges of the wings, the upper and lower warp engines, and even the disruptor guns have darker colored airbrushed lines that need to be copied. I've never done this on a model, even though I technically new how.....so I just said a little prayer and got to it.
Now maybe I shouldn't have done this for the first time on such a big and somewhat rare model, but carpe diem, I say!
Got the ones on the warp engines and sides done...
The gun panels.....
And then I brought some more around on the body, following roughly what I could see on the studio mini. I just added a few more for fun. EDIT: I still haven't sorted out that bottom mounting hole. It's ugly AF, gotta get it cleaned.
Next up? Time to start in on some orange panels and rust colored details! Started with the front vents...
....and thinned it out to start washes for the rust colored side panels of the warp engines (these will also get some green drybrush later, so this is rough)
And then, just for fun, I took a stacked group shot. Negh'var, Vor'cha, K'tinga, and B'rel all piggybacked!
20190512_134032 by Richard Rayl, on FlickrThat's it for the week. From here on out, I have some windows to paint in, then a new front disruptor spire, wing-top dome shaped phaser blisters, and wing-tip guns to scratchbuild (the original kit-supplied parts are inaccurate when compared to the new images that have come out). After that the red detail panels will be applied via decals, as well as assorted small details. Once the decals are on and sealed, I'll get started on the REAL fun - washes and weathering!
As always, there are more pics on my flikr page: https://flic.kr/s/aHskQFpXK4
-
novahobbies
- Crafty Commodore
- Posts: 1389
- Joined: Sun Mar 16, 2014 6:10 pm
Re: 1/1400 scale Negh'var build journal
She's starting to look like a starship! Windows painted in, grey panels on the arms and vents painted in, and the red panel decals are applied! I have some touchup paint to do, a few more detail decals to add, just accent panels and whatnot. Hopefully I can get started on weathering this weekend.


-
Kratok

- Perhaps today IS a good day to model

- Posts: 749
- Joined: Sun Sep 09, 2012 10:16 pm
Re: 1/1400 scale Negh'var build journal
The red and yellow panels really bring her to life.
Enjoying this immensely. WIsh I had picked one up when I had the chance....
Are you going to add the round disruptor turrets on the upper wings, and/or the smaller ones under the bridge wings?
Enjoying this immensely. WIsh I had picked one up when I had the chance....
Are you going to add the round disruptor turrets on the upper wings, and/or the smaller ones under the bridge wings?
-
novahobbies
- Crafty Commodore
- Posts: 1389
- Joined: Sun Mar 16, 2014 6:10 pm
Re: 1/1400 scale Negh'var build journal
Thanks! Yes, there are a few more parts to add that I'll need to scratchbuild. The kit provided wingtip disruptors I originally built aren't accurate (they're round when they should be rounded off rectangular/capsule shaped) so those will need to be redone, and then I have the center disruptor gun to rebuild and the two rounded blister guns on the tops of the wings. I pulled out my 1/144 scale B-29 bomber model to see if those blister pods would work, and it was JUUUST a little too large for that area. Shoot. Gonna poor-man-lathe it with some carving foam and a drill I guess. And the last part I know I'm adding is the minigun-looking disruptor on the bottom center of the cobra head pod.
I know there's SOMETHING under the bridge wings, but I haven't decided if I'm adding anything there since it's extremely hard to see exactly what we're looking at. The bridge module isn't glued, though, in case I decided to wing it and add something generic.
I borked up the model a little last night.....went to add some yellow stripes on the back of the wings via paint, did not have the tape down hard enough, and the paint bled EVERYWHERE. Managed to get most of it cleaned off, but then just walked the Eff away before I screwed something else up. I'll try again tonight. What can I say, some days, the bear gets you....
-
novahobbies
- Crafty Commodore
- Posts: 1389
- Joined: Sun Mar 16, 2014 6:10 pm
Re: 1/1400 scale Negh'var build journal
Here are a couple pictures from before the bork-up, though. I've been going in and adding my detail decals...lots of little panels and stripes. Gonna look so fresh and so clean before I get in there and grunge it up.


-
cosika321
- Legendary LT Commander
- Posts: 162
- Joined: Sun Sep 30, 2012 3:22 am
- Location: Parma, OH USA
Re: 1/1400 scale Negh'var build journal
That looks really good! Where are the panel decals from? Did you make them, or are they available someplace?
I have one of these kits in the closet o' doom, and also 2 of the smaller Skyhook kits.
I have one of these kits in the closet o' doom, and also 2 of the smaller Skyhook kits.