
Ok so, I am feeling a bit better. Sat at my desk tonight and commited "Cardinal Sin number one..." I removed all parts from there sprus!!
However how else am I to do a dry fit?!? Well im neither impressed or dissapointed by this kit. It is deffinitly an amt model. Parts are good, with consistant thickness in plastic. However fit leaves something to be desired. I will be removing the locater pins, an will have some seam filling and sanding before painting can even be thought of.
So now to find some fresh filler, and get to work over the next couple days... till later ( ill have pics up tomorrow)
newbie contest oob build, round 2 "Defiant" "Withdrawn"
-
curt
- Charismatic Commander

- Posts: 298
- Joined: Sun Sep 08, 2013 8:40 pm
-
curt
- Charismatic Commander
- Posts: 298
- Joined: Sun Sep 08, 2013 8:40 pm
Re: newbie contest oob build, round 2 "Defiant"
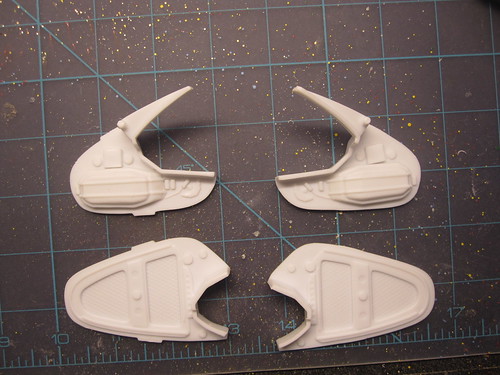
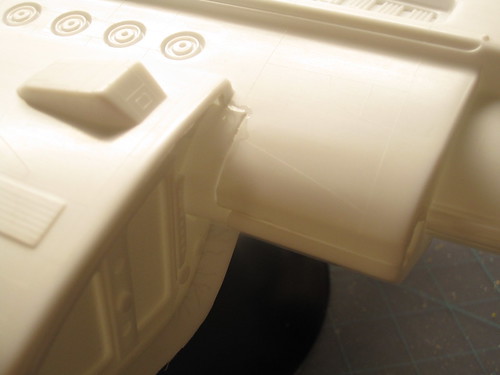
Got some more work done today. Removing a little flash, and dry fitting parts. Also a little putty work on injector pin marks. The Photo I have to show is the engine parts being modified by removing locator pins so that the parts will fit with minimal gaps. so as to minimize the amount of puttying needed.
So far overall feeling on this kit.... It isn't bad, for an AMT. The fit could be better, but I have seen Worse. I don't feel round 2 modified the kit in anyway, other then putting in a different stand. but not having an original release to compare to it is difficult to say.
I will be getting a second kit, and the DLM parts to light it in the future however. I feel this kit would make an excellent kit to get my feet wet in lighting.
-
curt
- Charismatic Commander
- Posts: 298
- Joined: Sun Sep 08, 2013 8:40 pm
Re: newbie contest oob build, round 2 "Defiant"
Ok got my kit glued up tonight....
What can i say. Its amt! Gaps galore, i will deffinitly have time in this filling and sanding. Its very dissapointing that round 2 didnt address these issues for the repop. Ill take pics after work tonight.
What can i say. Its amt! Gaps galore, i will deffinitly have time in this filling and sanding. Its very dissapointing that round 2 didnt address these issues for the repop. Ill take pics after work tonight.
-
RogueWolf

- Velutinous Vice Admiral

- Posts: 2872
- Joined: Sun Sep 30, 2012 3:49 pm
- Location: NL, Canada
Re: newbie contest oob build, round 2 "Defiant"
Look for these kits in a few months;
Defiant Shuttlebay;
https://www.picturetrail.com/sfx/album/view/3726695
Accurate Bridge;
https://www.picturetrail.com/sfx/album/view/3726625
Defiant Shuttlebay;
https://www.picturetrail.com/sfx/album/view/3726695
Accurate Bridge;
https://www.picturetrail.com/sfx/album/view/3726625
-
el gato

- Fatidical Fleet Admiral

- Posts: 6050
- Joined: Thu Apr 04, 2013 8:41 pm
- Location: In a land whose boundaries are that of imagination
Re: newbie contest oob build, round 2 "Defiant"
Looks good!curt wrote:Got some more work done today. Removing a little flash, and dry fitting parts. Also a little putty work on injector pin marks. The Photo I have to show is the engine parts being modified by removing locator pins so that the parts will fit with minimal gaps. so as to minimize the amount of puttying needed.
So far overall feeling on this kit.... It isn't bad, for an AMT. The fit could be better, but I have seen Worse. I don't feel round 2 modified the kit in anyway, other then putting in a different stand. but not having an original release to compare to it is difficult to say.
I will be getting a second kit, and the DLM parts to light it in the future however. I feel this kit would make an excellent kit to get my feet wet in lighting.
RogueWolf wrote:I've sacrificed many dozens (maybe even hundreds) of gummy bears to the dark modeling gods to grant me my wish... but I fear my offerings only amuse them, not appease them.
-
curt
- Charismatic Commander
- Posts: 298
- Joined: Sun Sep 08, 2013 8:40 pm
Re: newbie contest oob build, round 2 "Defiant"
Thanks el gato, taking the tabs off isn't the hard part. The challenge with the kit is all the damn seams and gaps in the panels to deal with! Full set are here;
https://www.flickr.com/photos/99179608@ ... 501202665/
But here are a couple images;
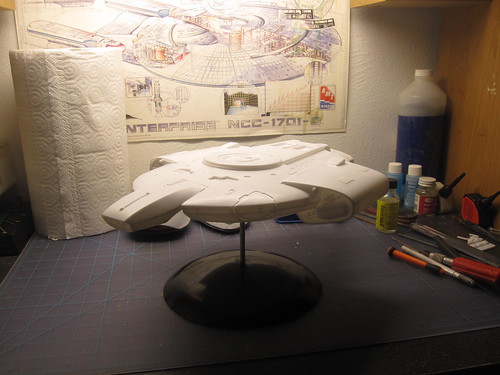
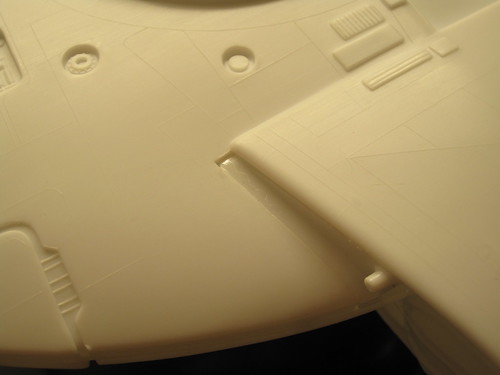
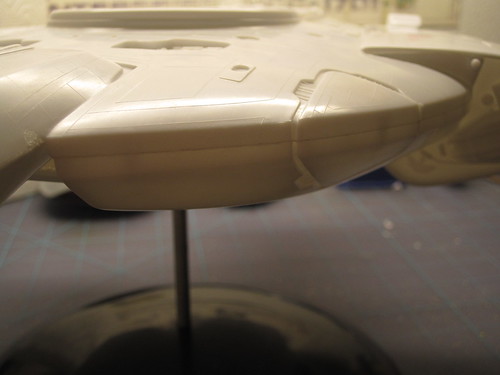
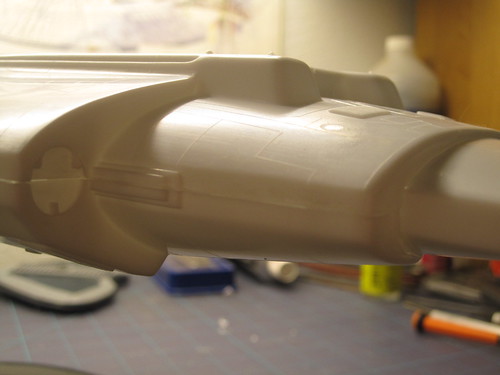
This kit goes together in an hour. However I hope that with filling sanding priming, sanding, filling some more, then sanding some more primer sealer, base and the detail paint... i can get done by the deadline! Oh and decals... though I am not using all of the decals as they are to be intended.
https://www.flickr.com/photos/99179608@ ... 501202665/
But here are a couple images;
This kit goes together in an hour. However I hope that with filling sanding priming, sanding, filling some more, then sanding some more primer sealer, base and the detail paint... i can get done by the deadline! Oh and decals... though I am not using all of the decals as they are to be intended.
-
el gato
- Fatidical Fleet Admiral
- Posts: 6050
- Joined: Thu Apr 04, 2013 8:41 pm
- Location: In a land whose boundaries are that of imagination
Re: newbie contest oob build, round 2 "Defiant"
Sorry, I didn't explain myself.  Sometimes you have undesirable or unexpected consequences when a styrene part is modified.* Removal of the pin, flash or excess plastic may create unsightly blemishes, tears, dips and holes. One can be as careful as possible in separating the plastic and it can still go awry because of the bonds the plastic has made at the molecular level. What I do is cut well above the area I want to remove and sand. Sometimes I'm still left with a $#%!@# stub that I can't sand away to save my life. What I was complimenting was how well you did with this problem. The pieces look like they were cast that way.
* Which I would include removing part of the tree because the plastic doesn't know it has component parts. It thinks of itself as one giant piece.
* Which I would include removing part of the tree because the plastic doesn't know it has component parts. It thinks of itself as one giant piece.
RogueWolf wrote:I've sacrificed many dozens (maybe even hundreds) of gummy bears to the dark modeling gods to grant me my wish... but I fear my offerings only amuse them, not appease them.
-
curt
- Charismatic Commander
- Posts: 298
- Joined: Sun Sep 08, 2013 8:40 pm
Re: newbie contest oob build, round 2 "Defiant"
Yes you are correct. though I have been fortunate in working with polystyrene and not had many problems.
So I figure time for an update!
After not touching her for a couple weeks due to work an being depressed, I got to her last night.I filled the seems best I could a couple weeks ago.
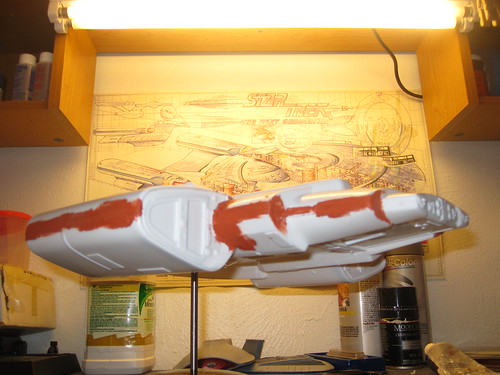
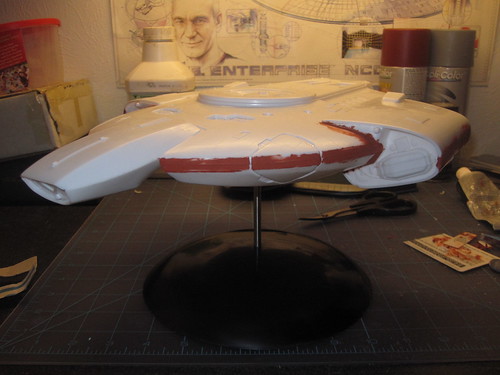
Then last night, I sanded them down, and washed her in dawn and warm water to remove residue last night. Then let her dry. This afternoon I went out to the garage to spray the first coat of High build Primer.
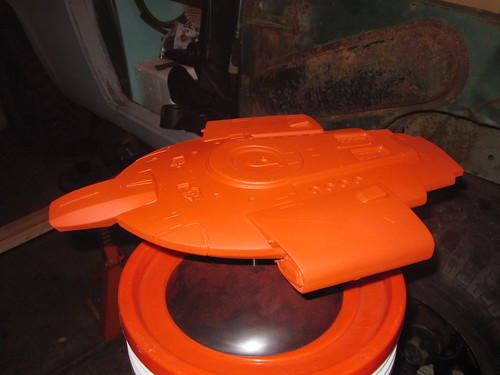
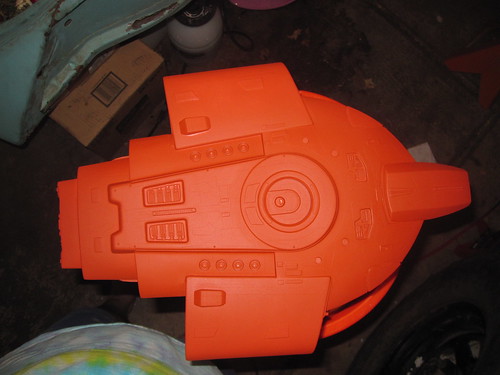
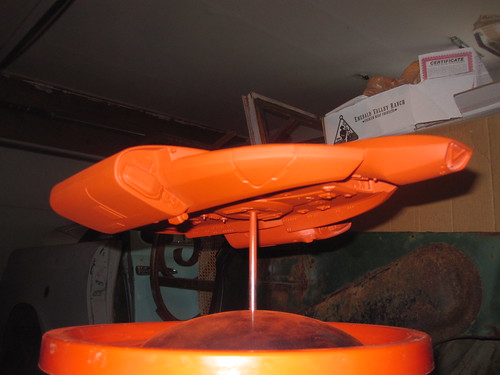
Tonight will move to wet sanding seems and addressing areas that need to be re filled. Dry again over night and I should be spraying the sanding sealer, and base coat tomorrow.
This Kit is not coming out perfect by any means. the fit is Horrible from the factory, an very disappointing. It will however make a good ceiling model when finished. I will hopefully make the deadline on this as I am to my favorite part. PAINT!!! we will see how it all goes. I will be using most of the decals but not all depends on my time and mood as to what all I will put on.
Till later,
Curt
As always, Full size Pictures can be Viewed here,
https://www.flickr.com/photos/99179608@ ... 501202665/
So I figure time for an update!
After not touching her for a couple weeks due to work an being depressed, I got to her last night.I filled the seems best I could a couple weeks ago.
Then last night, I sanded them down, and washed her in dawn and warm water to remove residue last night. Then let her dry. This afternoon I went out to the garage to spray the first coat of High build Primer.
Tonight will move to wet sanding seems and addressing areas that need to be re filled. Dry again over night and I should be spraying the sanding sealer, and base coat tomorrow.
This Kit is not coming out perfect by any means. the fit is Horrible from the factory, an very disappointing. It will however make a good ceiling model when finished. I will hopefully make the deadline on this as I am to my favorite part. PAINT!!! we will see how it all goes. I will be using most of the decals but not all depends on my time and mood as to what all I will put on.
Till later,
Curt
As always, Full size Pictures can be Viewed here,
https://www.flickr.com/photos/99179608@ ... 501202665/
-
zookman
- Crafty Commodore

- Posts: 1481
- Joined: Fri Nov 09, 2012 2:29 am
Re: newbie contest oob build, round 2 "Defiant"
omg a vulcan defiant lol doesnt that go against their peacefull nature lol
-
curt
- Charismatic Commander
- Posts: 298
- Joined: Sun Sep 08, 2013 8:40 pm
Re: newbie contest oob build, round 2 "Defiant"
Hey Its the only color primer I had  , lol...