
Airline executives are hyperventilating. You could get twice the number of rows if you don't mind cutting passenger legs off and definitely at least six seats to the row as arm room is not necessary either. How can you make money with that much passenger comfort?
Sue is waiting for the day Airlines just hang people on hooks.
Spindrift from Land of the Giants by Polar Lights
-
Tesral

- Administrator

- Posts: 4937
- Joined: Tue Dec 18, 2012 12:58 pm
- Location: Dearborn, Mi -- at my desk.
- Contact:
Re: Spindrift from Land of the Giants by Polar Lights
Garry AKA --Phoenix-- Rising above the Flames.
"I saw it done on Voyager" is no excuse for anything, even breathing.
"I saw it done on Voyager" is no excuse for anything, even breathing.
-
trekriffic

- Admiral of the Fleet

- Posts: 2746
- Joined: Mon Oct 01, 2012 4:16 pm
Re: Spindrift from Land of the Giants by Polar Lights
Yeah. They could have packed another 8 seats into that cabin easily; maybe more if they went with smaller seats and less arm and leg room as you say. I think the idea behind so few seats was that the cost was very expensive so perhaps the airline felt they could offset the lack of seats by charging triple the price? Who knows.Tesral wrote:Airline executives are hyperventilating. You could get twice the number of rows if you don't mind cutting passenger legs off and definitely at least six seats to the row as arm room is not necessary either. How can you make money with that much passenger comfort?
Sue is waiting for the day Airlines just hang people on hooks.
"You broke your little ships."
My albums on flickr: https://www.flickr.com/photos/29607470@N08/sets/
My albums on flickr: https://www.flickr.com/photos/29607470@N08/sets/
-
Tesral
- Administrator
- Posts: 4937
- Joined: Tue Dec 18, 2012 12:58 pm
- Location: Dearborn, Mi -- at my desk.
- Contact:
Re: Spindrift from Land of the Giants by Polar Lights
Hollyweird vs real life. They wanted room to play around in the cabin and not pay a cast of dozens..trekriffic wrote: Yeah. They could have packed another 8 seats into that cabin easily; maybe more if they went with smaller seats and less arm and leg room as you say. I think the idea behind so few seats was that the cost was very expensive so perhaps the airline felt they could offset the lack of seats by charging triple the price? Who knows.
Garry AKA --Phoenix-- Rising above the Flames.
"I saw it done on Voyager" is no excuse for anything, even breathing.
"I saw it done on Voyager" is no excuse for anything, even breathing.
-
trekriffic
- Admiral of the Fleet
- Posts: 2746
- Joined: Mon Oct 01, 2012 4:16 pm
Re: Spindrift from Land of the Giants by Polar Lights
Exactly!Tesral wrote:Hollyweird vs real life. They wanted room to play around in the cabin and not pay a cast of dozens..trekriffic wrote: Yeah. They could have packed another 8 seats into that cabin easily; maybe more if they went with smaller seats and less arm and leg room as you say. I think the idea behind so few seats was that the cost was very expensive so perhaps the airline felt they could offset the lack of seats by charging triple the price? Who knows.
"You broke your little ships."
My albums on flickr: https://www.flickr.com/photos/29607470@N08/sets/
My albums on flickr: https://www.flickr.com/photos/29607470@N08/sets/
-
MSgtUSAFRet

- Can-Do Captain

- Posts: 531
- Joined: Wed Jun 15, 2016 5:49 pm
- Location: Houston, TX
Re: Spindrift from Land of the Giants by Polar Lights
This is looking great, Steve!
As always, I'm learning lots as the feet, well more like the "thread", of the Master!!
Hey, isn't he a Time Lord?!


Keep going!
Steve
As always, I'm learning lots as the feet, well more like the "thread", of the Master!!
Hey, isn't he a Time Lord?!
Keep going!
Steve
-
Tesral
- Administrator
- Posts: 4937
- Joined: Tue Dec 18, 2012 12:58 pm
- Location: Dearborn, Mi -- at my desk.
- Contact:
Re: Spindrift from Land of the Giants by Polar Lights
A thought just popped into my head. Being that it was a rare location I looked carefully.
I have seen a number of the Star Wars shooting models. They all share a single trait in they have no glass in the glass. This gives you a better view into the cockpit or cabin as the case might be, as glass does not scale well, and it prevents unwanted glare from the lights.
Did you plan to put the transparencies into the Spindrift? Clear styrene is not that clear and highly distorting, I'm thinking you might be better off without it.
Garry AKA --Phoenix-- Rising above the Flames.
"I saw it done on Voyager" is no excuse for anything, even breathing.
"I saw it done on Voyager" is no excuse for anything, even breathing.
-
trekriffic
- Admiral of the Fleet
- Posts: 2746
- Joined: Mon Oct 01, 2012 4:16 pm
Re: Spindrift from Land of the Giants by Polar Lights
Haven't mounted the passenger cabin windows yet. The bow windows are in though.Tesral wrote:A thought just popped into my head. Being that it was a rare location I looked carefully.
I have seen a number of the Star Wars shooting models. They all share a single trait in they have no glass in the glass. This gives you a better view into the cockpit or cabin as the case might be, as glass does not scale well, and it prevents unwanted glare from the lights.
Did you plan to put the transparencies into the Spindrift? Clear styrene is not that clear and highly distorting, I'm thinking you might be better off without it.
"You broke your little ships."
My albums on flickr: https://www.flickr.com/photos/29607470@N08/sets/
My albums on flickr: https://www.flickr.com/photos/29607470@N08/sets/
-
trekriffic
- Admiral of the Fleet
- Posts: 2746
- Joined: Mon Oct 01, 2012 4:16 pm
Re: Spindrift from Land of the Giants by Polar Lights
Greetings again fellow LOTG fans. Got a lot done last week while I was off work.
Not everything went so smoothly; I had to tear the top parts of the hull off and the lower half re-glue them after gluing them down.
The first time was because the passenger cabin window insert on the starboard side broke free from the inside of the upper forward hull piece. I'd glued it in with epoxy but with the curvature of the hull and some flexing it experienced while I was gluing it down (with Testors cement and CA) to the lower hull the epoxy broke loose and the insert slid down into the hull. So I ripped the hull apart, found the rogue clear insert and glued both in with more epoxy followed by Gorilla Glue which is polyurethane based. It's their brown glue. That stuff foams up as it dries so you want to be careful and not get carried away with it. Once that dried I had a hard as rock bond and the inserts stayed put without further incident.
The second time I had to rip off the back upper hull after sealing everything up. I did a light test and half the engine flashers were out! Also, the lights at the front of the ship above the pilot's control console didn't work!??? So I pulled her back end apart and totally rewired the Tenacontrols board wires and the circuits for the pilot cabin lights, oh, and the dome on top of the ship would only stay on for about 5 seconds before going out! After re-wiring it stays on for about 30 seconds. Anyway, it always comes back on again when I first turn on the power. I think the problem is I forgot I had soldered a resistor onto the dome LED circuit early on during this build and mistakenly attached a second resistor further on down the line when I started soldering the wires to power. So the dome LEDs have twice the number of resistors than it should have. Still, 30 seconds gives me enough time to snap photos with the light on so not a total disaster. The pilot cabin circuit was intermittent due to a bad solder joint. It was fixed and the lights stayed on. Now the hull is glued back together and I am engaged with sanding the putty I needed to use to close some rather hideous seams.
Anyway, here are some photos to bring you guys up to date...
The first test fit of the aft upper hull went well...
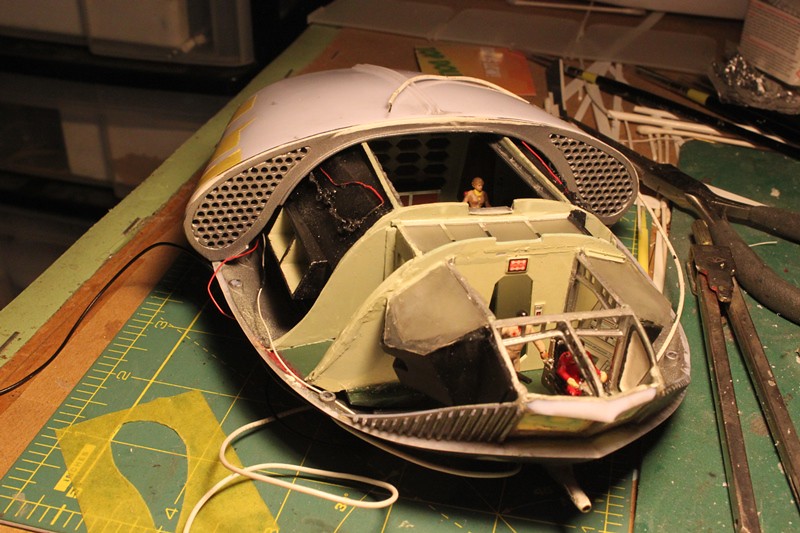 Aft Upper Hull Test Fit by trekriffic, on Flickr
Using .015 clear styrene sheet I cut a bulkhead to run down the center of the aft "engine bay". Holes were drilled in it for LED mounting. I left the anti-scratch film on it to act as a diffuser:
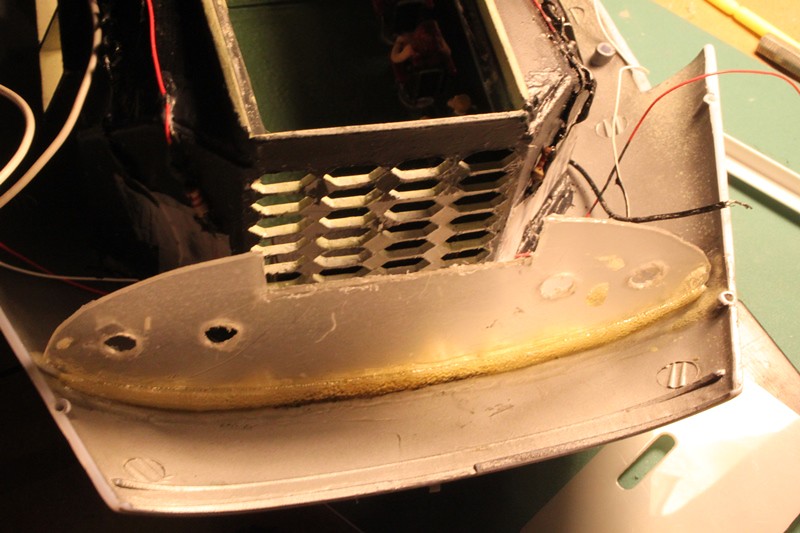 Center LED Wall by trekriffic, on Flickr
A rectangle of clear red styrene was trimmed to fit the aft passenger cabin light wall:
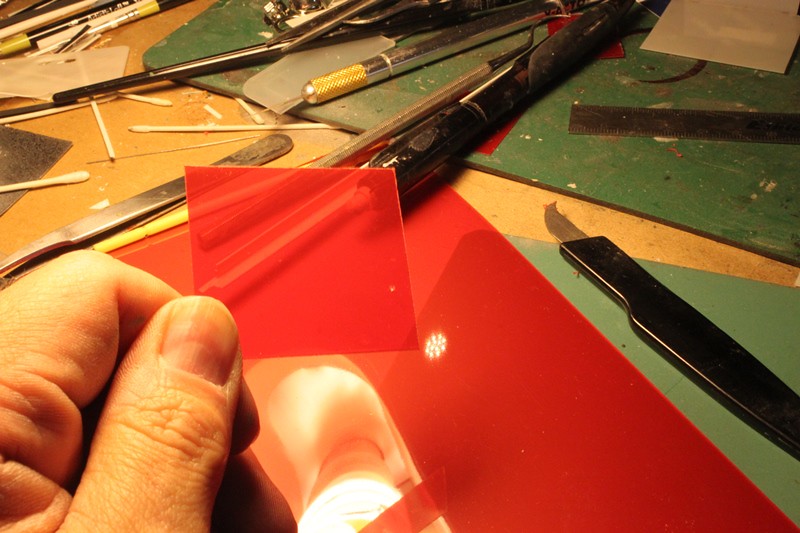 Red Transparent Styrene by trekriffic, on Flickr
Placing the clear red panel behind the wall and holding it up to the light makes for a nice red glow:
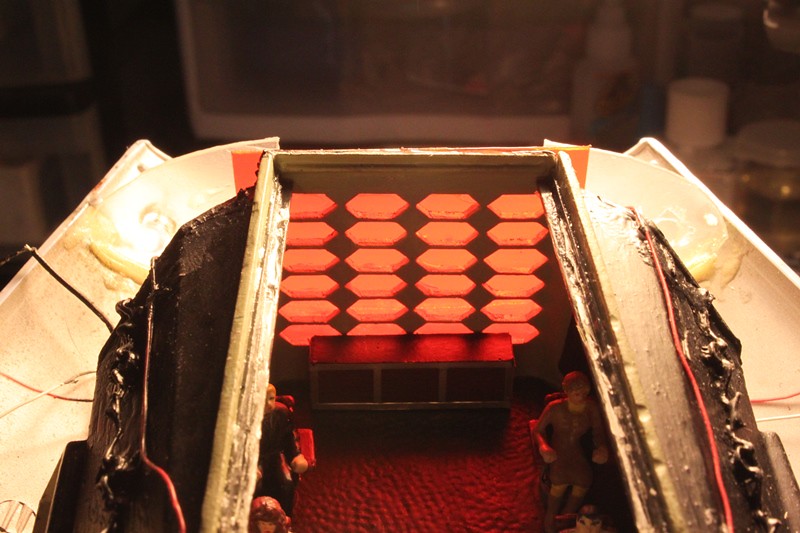 Passenger Engine Glow Wall Lit by trekriffic, on Flickr
Two Red LEDs will attach to Tenacontrols Board and slowly pulse up and down. Here is the underside of the panel after coating with liquid electical tape. The panel will mount low on the wall behind the long storage cabinet at the back of the passenger cabin:
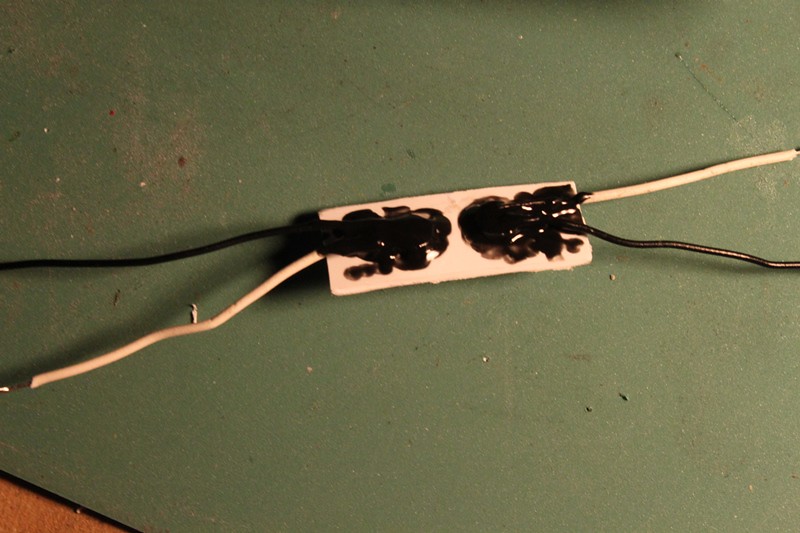 LEDs for Aft Glow Wall by trekriffic, on Flickr
The panel was covered with aluminum tape and glued between the clear bulkhead and the engine glow wall:
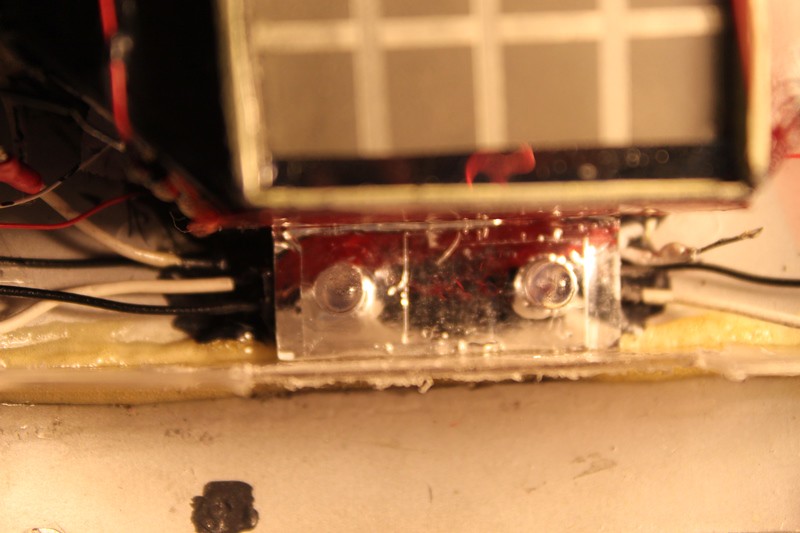 Pair of LEDs in Place Behind Wall by trekriffic, on Flickr
Panels were cut from clear red styrene sheet using paper templates. Elmer's clear craft glue works well to glue them in place behind the engine exhaust vents:
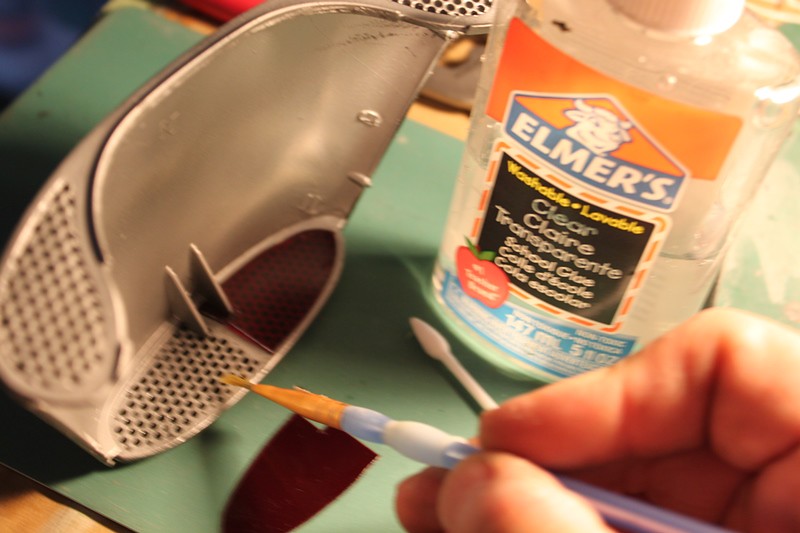 Clear Red Panels for Engine Vents by trekriffic, on Flickr
Gorilla glue was used for added strength to hold the passenger cabin windows firmly in place. The glue expands like a foam and dries rock hard. Only a little is needed:
 Windows Glued Into Upper Forward Hull by trekriffic, on Flickr
The passenger cabin windows were masked and the edges sealed with Future to protect them during the next steps. A fine black enamel paint pen was run along the inside of the frames to look like black weatherstripping:
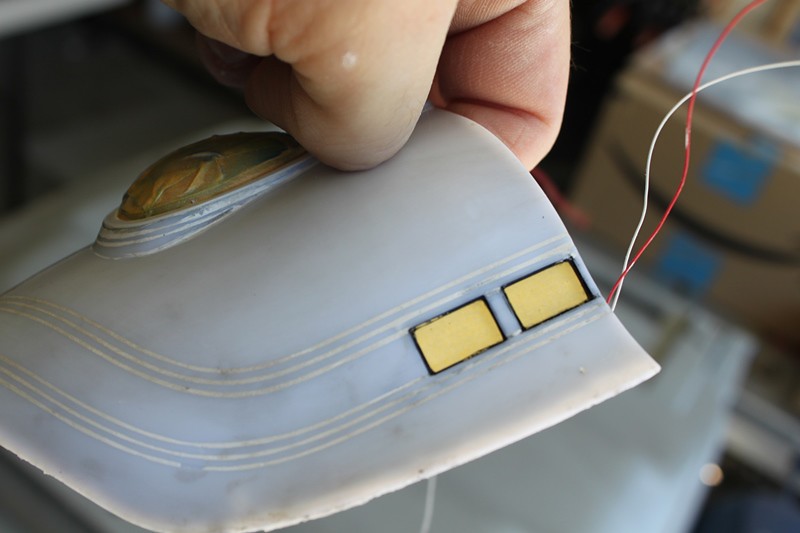 Window Masking by trekriffic, on Flickr
Lots of wires to be soldered. Here I use "helping hands" to hold an LED up tight to the wire while I solder it to the positive leg:
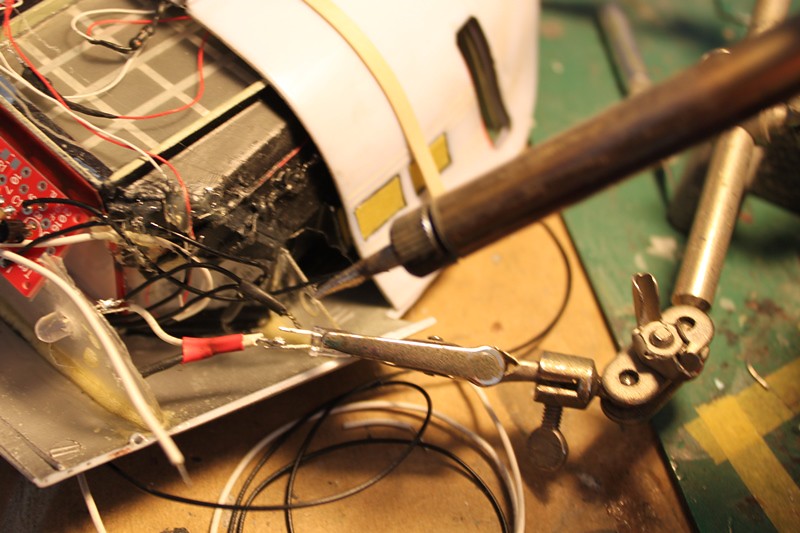 Soldering by trekriffic, on Flickr
I created a slanted shelf by bending the diffuser panel plastic at an angle. The panel was made from milk jug plastic and sits behind the red clear panel that attaches to the back of the wall at the rear of the passenger compartment:
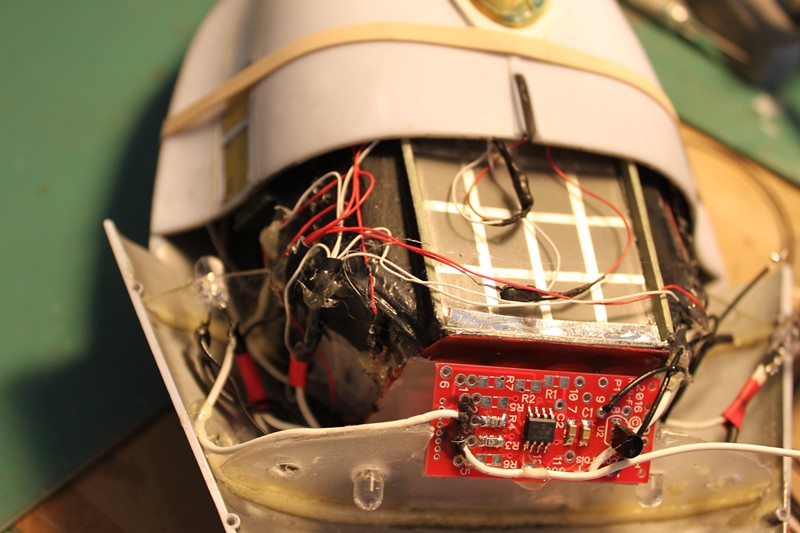 Tenacontrols Board Placement by trekriffic, on Flickr
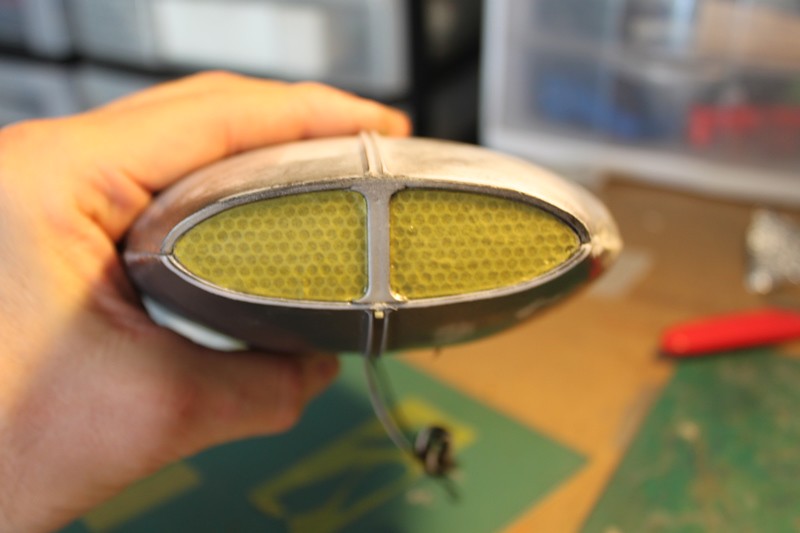
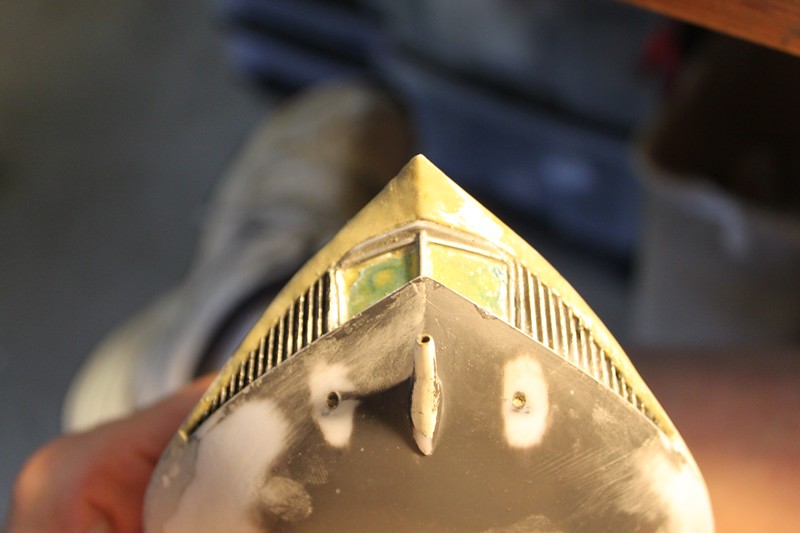
This is how the bow looks after you glue the back end of the forward upper hull to the lower hull. The upper hull needs to be forced down over the top of the window frame in the front to try and cover this large gap:
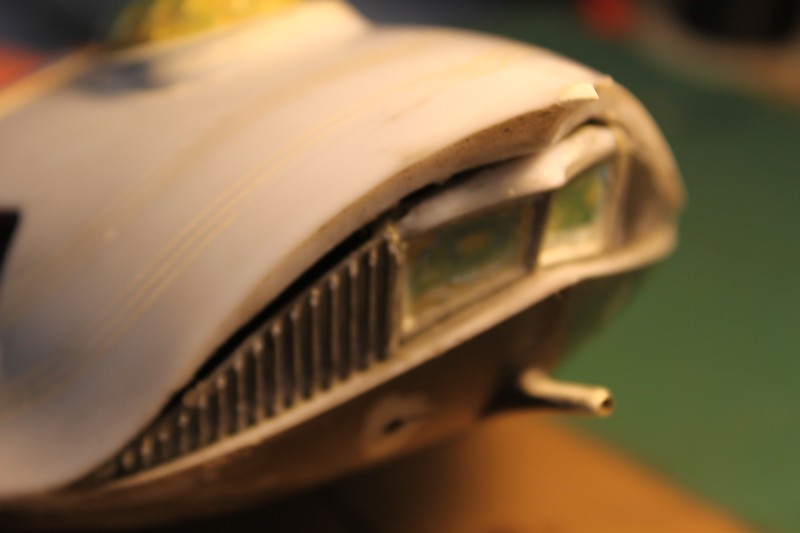 Upper Bow Window and Grill Seam by trekriffic, on Flickr
More to come...
Not everything went so smoothly; I had to tear the top parts of the hull off and the lower half re-glue them after gluing them down.
The first time was because the passenger cabin window insert on the starboard side broke free from the inside of the upper forward hull piece. I'd glued it in with epoxy but with the curvature of the hull and some flexing it experienced while I was gluing it down (with Testors cement and CA) to the lower hull the epoxy broke loose and the insert slid down into the hull. So I ripped the hull apart, found the rogue clear insert and glued both in with more epoxy followed by Gorilla Glue which is polyurethane based. It's their brown glue. That stuff foams up as it dries so you want to be careful and not get carried away with it. Once that dried I had a hard as rock bond and the inserts stayed put without further incident.
The second time I had to rip off the back upper hull after sealing everything up. I did a light test and half the engine flashers were out! Also, the lights at the front of the ship above the pilot's control console didn't work!??? So I pulled her back end apart and totally rewired the Tenacontrols board wires and the circuits for the pilot cabin lights, oh, and the dome on top of the ship would only stay on for about 5 seconds before going out! After re-wiring it stays on for about 30 seconds. Anyway, it always comes back on again when I first turn on the power. I think the problem is I forgot I had soldered a resistor onto the dome LED circuit early on during this build and mistakenly attached a second resistor further on down the line when I started soldering the wires to power. So the dome LEDs have twice the number of resistors than it should have. Still, 30 seconds gives me enough time to snap photos with the light on so not a total disaster. The pilot cabin circuit was intermittent due to a bad solder joint. It was fixed and the lights stayed on. Now the hull is glued back together and I am engaged with sanding the putty I needed to use to close some rather hideous seams.
Anyway, here are some photos to bring you guys up to date...
The first test fit of the aft upper hull went well...
Aft Upper Hull Test Fit by trekriffic, on FlickrUsing .015 clear styrene sheet I cut a bulkhead to run down the center of the aft "engine bay". Holes were drilled in it for LED mounting. I left the anti-scratch film on it to act as a diffuser:
Center LED Wall by trekriffic, on FlickrA rectangle of clear red styrene was trimmed to fit the aft passenger cabin light wall:
Red Transparent Styrene by trekriffic, on FlickrPlacing the clear red panel behind the wall and holding it up to the light makes for a nice red glow:
Passenger Engine Glow Wall Lit by trekriffic, on FlickrTwo Red LEDs will attach to Tenacontrols Board and slowly pulse up and down. Here is the underside of the panel after coating with liquid electical tape. The panel will mount low on the wall behind the long storage cabinet at the back of the passenger cabin:
LEDs for Aft Glow Wall by trekriffic, on FlickrThe panel was covered with aluminum tape and glued between the clear bulkhead and the engine glow wall:
Pair of LEDs in Place Behind Wall by trekriffic, on FlickrPanels were cut from clear red styrene sheet using paper templates. Elmer's clear craft glue works well to glue them in place behind the engine exhaust vents:
Clear Red Panels for Engine Vents by trekriffic, on FlickrGorilla glue was used for added strength to hold the passenger cabin windows firmly in place. The glue expands like a foam and dries rock hard. Only a little is needed:
Windows Glued Into Upper Forward Hull by trekriffic, on FlickrThe passenger cabin windows were masked and the edges sealed with Future to protect them during the next steps. A fine black enamel paint pen was run along the inside of the frames to look like black weatherstripping:
Window Masking by trekriffic, on FlickrLots of wires to be soldered. Here I use "helping hands" to hold an LED up tight to the wire while I solder it to the positive leg:
Soldering by trekriffic, on FlickrI created a slanted shelf by bending the diffuser panel plastic at an angle. The panel was made from milk jug plastic and sits behind the red clear panel that attaches to the back of the wall at the rear of the passenger compartment:
Tenacontrols Board Placement by trekriffic, on FlickrThis is how the bow looks after you glue the back end of the forward upper hull to the lower hull. The upper hull needs to be forced down over the top of the window frame in the front to try and cover this large gap:
Upper Bow Window and Grill Seam by trekriffic, on FlickrMore to come...
"You broke your little ships."
My albums on flickr: https://www.flickr.com/photos/29607470@N08/sets/
My albums on flickr: https://www.flickr.com/photos/29607470@N08/sets/
-
trekriffic
- Admiral of the Fleet
- Posts: 2746
- Joined: Mon Oct 01, 2012 4:16 pm
Re: Spindrift from Land of the Giants by Polar Lights
Engine lights...
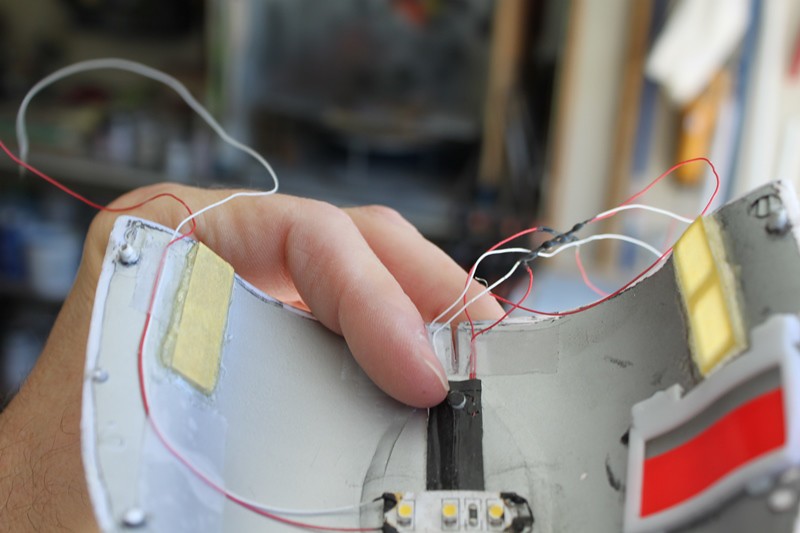
Six LEDs wired in parallel - three on each circuit. The black wire is common while the Tencontrols flasher board has two white wires for each of the two circuits. This is actually the second set of 6 LEDs I soldered for the engine glow effect. The first time I used the red LEDs that came from Tenacontrols but a few burned out over the course of soldering all these wires so I ended up replacing all six LEDs using some high brightness clear white LEDs I had gotten at Radio Shack awhile back:
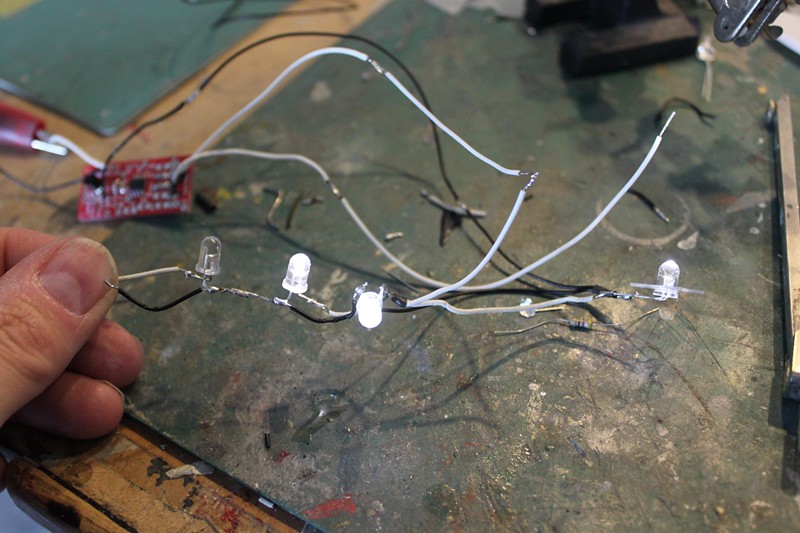 LEDs Wired for Engine Glow Effect by trekriffic, on Flickr
The LEDs in place in the "glow wall". The white LEDs will glow brighter than the original red LEDs:
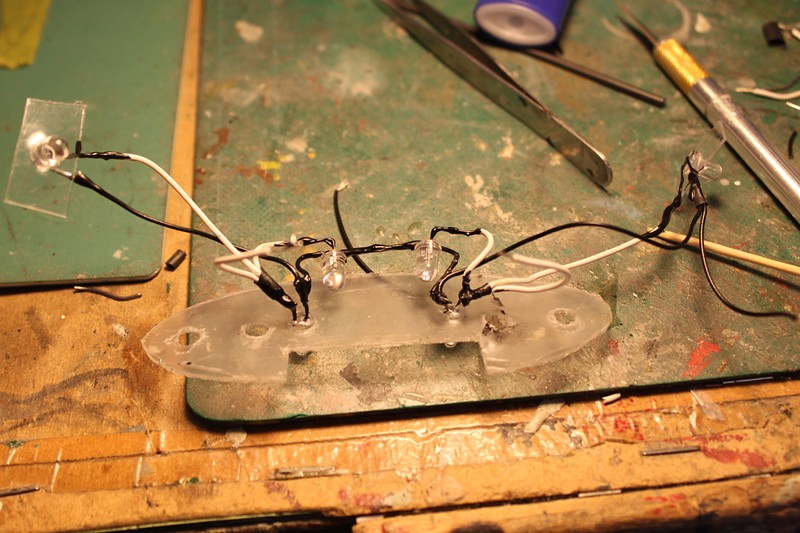 LEDs Mounted in Wall by trekriffic, on Flickr
The two forward and two aft facing LEDs got semi-opaque Glide dental floss tubes slipped over them to even out their glow:
 Floss Tubes for Diffusion of White LED light by trekriffic, on Flickr
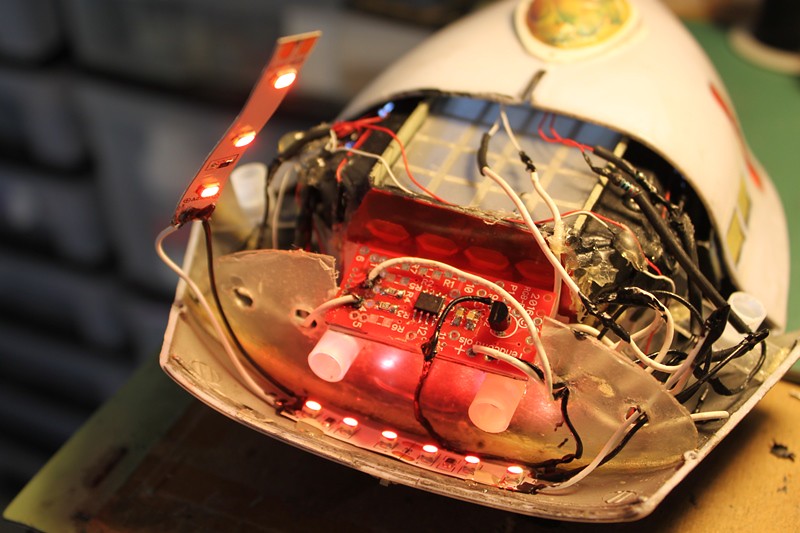
I wasn't getting enough brightness in the engine compartment which prompted me to add two sections of white LED strip to the upper and lower hull halves at the aft end of the model. I tried to be careful not to overpower the pulsing LEDs with the strips:
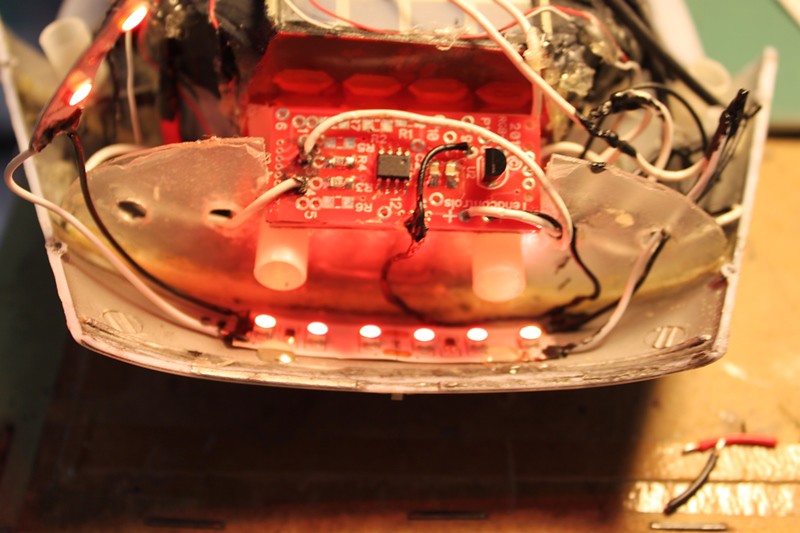 Supplemental LED Strip by trekriffic, on Flickr
 Additional LED Strips by trekriffic, on Flickr
After having to tear loose the glued upper hull due to issues with the engine and pilot cabin lights discovered after I had sealed up the hull (before redoing the wiring) then regluing the upper hull halves after the repairs/changes were made was not a pretty sight. I can see hours of puttying and sanding ahead for me:
 Horendous Seams by trekriffic, on Flickr
More to come...
Six LEDs wired in parallel - three on each circuit. The black wire is common while the Tencontrols flasher board has two white wires for each of the two circuits. This is actually the second set of 6 LEDs I soldered for the engine glow effect. The first time I used the red LEDs that came from Tenacontrols but a few burned out over the course of soldering all these wires so I ended up replacing all six LEDs using some high brightness clear white LEDs I had gotten at Radio Shack awhile back:
LEDs Wired for Engine Glow Effect by trekriffic, on FlickrThe LEDs in place in the "glow wall". The white LEDs will glow brighter than the original red LEDs:
LEDs Mounted in Wall by trekriffic, on FlickrThe two forward and two aft facing LEDs got semi-opaque Glide dental floss tubes slipped over them to even out their glow:
Floss Tubes for Diffusion of White LED light by trekriffic, on FlickrI wasn't getting enough brightness in the engine compartment which prompted me to add two sections of white LED strip to the upper and lower hull halves at the aft end of the model. I tried to be careful not to overpower the pulsing LEDs with the strips:
Supplemental LED Strip by trekriffic, on FlickrAdditional LED Strips by trekriffic, on FlickrAfter having to tear loose the glued upper hull due to issues with the engine and pilot cabin lights discovered after I had sealed up the hull (before redoing the wiring) then regluing the upper hull halves after the repairs/changes were made was not a pretty sight. I can see hours of puttying and sanding ahead for me:
Horendous Seams by trekriffic, on FlickrMore to come...
"You broke your little ships."
My albums on flickr: https://www.flickr.com/photos/29607470@N08/sets/
My albums on flickr: https://www.flickr.com/photos/29607470@N08/sets/
-
trekriffic
- Admiral of the Fleet
- Posts: 2746
- Joined: Mon Oct 01, 2012 4:16 pm
Re: Spindrift from Land of the Giants by Polar Lights
The saga continues...
The gap in the upper hull and window frame was closed about 75% using Plastic Surgery glue and holding for about 1 minute. More glue was then run along the seam for added strength.
The next step is using putty to complete the contours:
 Bow Under the Hood by trekriffic, on Flickr
Did I say there was putty in my future? Nice holes on view in these shotsght:
 More Ugly Seams by trekriffic, on Flickr
 Another Nice Hole to Fill by trekriffic, on Flickr
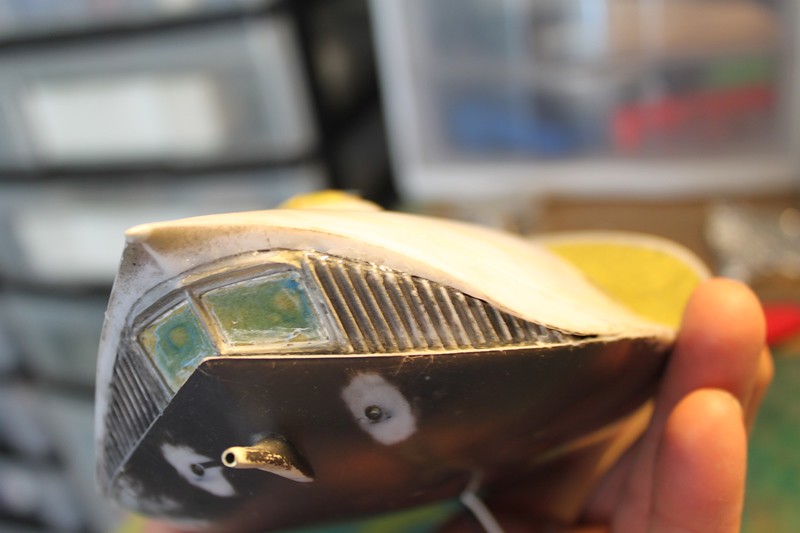
Engine exhaust vent masking:
 Engine Exhaust Vent Masking by trekriffic, on Flickr
I used Tamiya Basic polyester putty to fill and gaps and re-sculpt contours. This dried and was sanded with a medium grit sanding stick:
 Puttied and Sanded by trekriffic, on Flickr
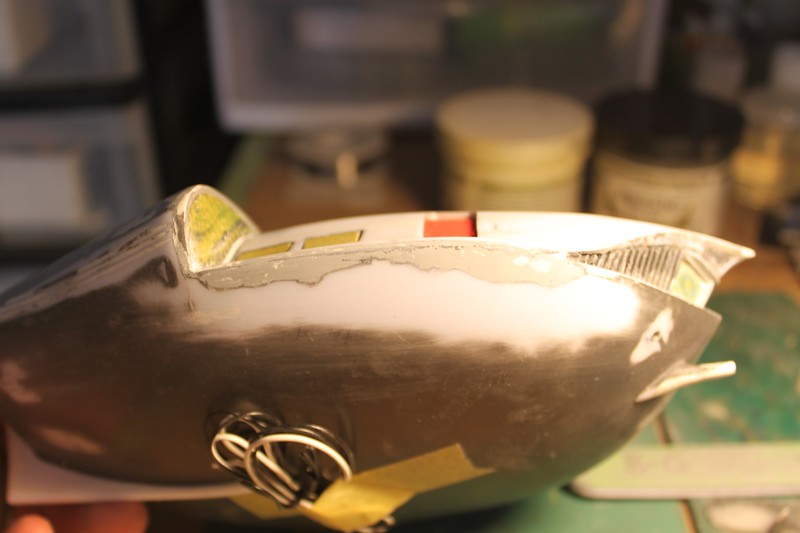 More Purrty and Sannding by trekriffic, on Flickr
Still more sanding to do but I wanted her tailfin attached so I could putty some gaps at the front tip of it:
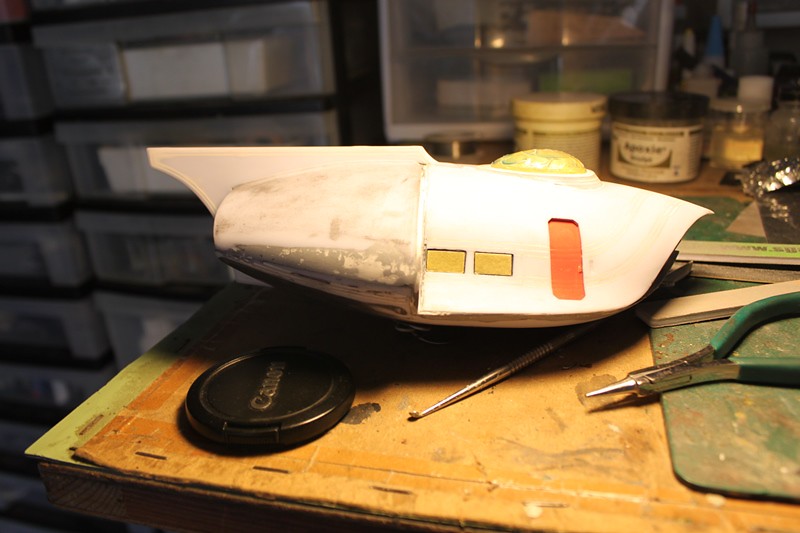 Spindrift Gets Her Tail by trekriffic, on Flickr
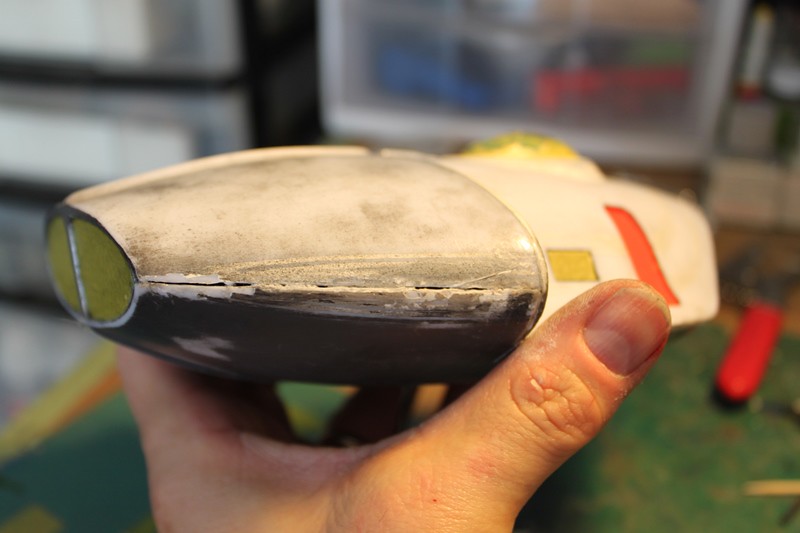
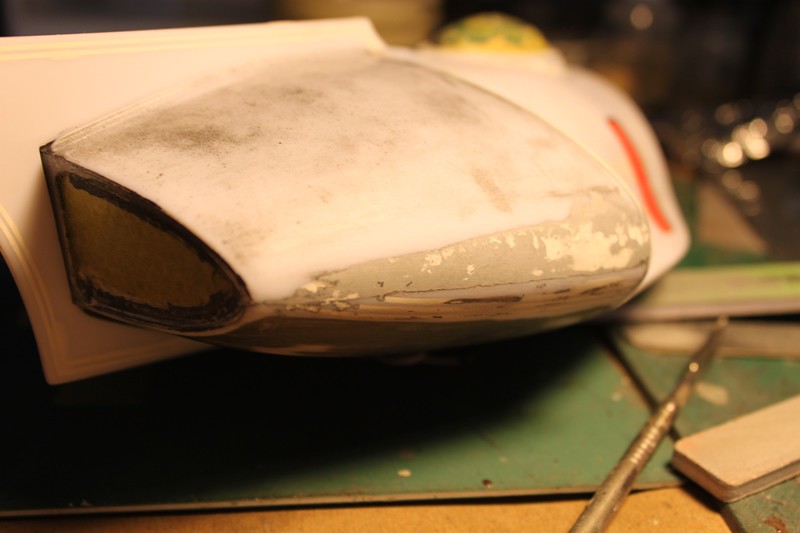
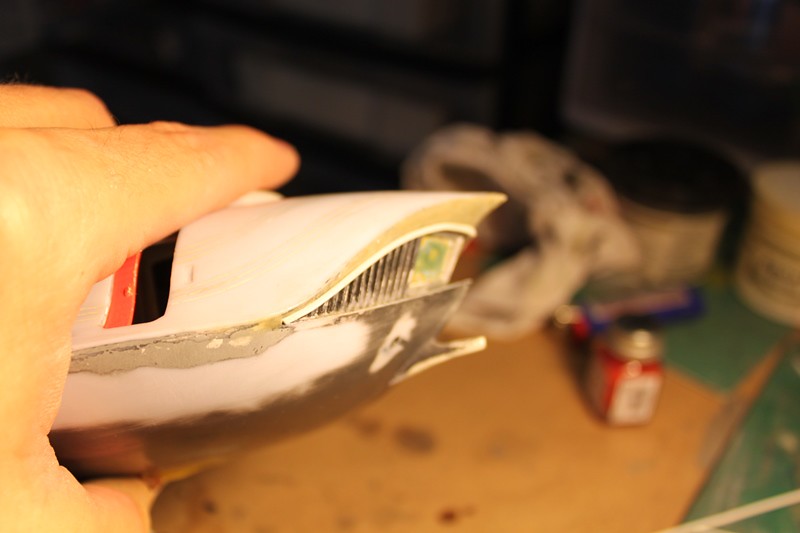
To fill in the area under the nose above the grills and window ports I used AVES. This is the first application of two to cover the seams and give this area the proper contours as seen in profile images of the Spindrift model and the blueprints:
 First AVES Putty by trekriffic, on Flickr
 Close by trekriffic, on Flickr
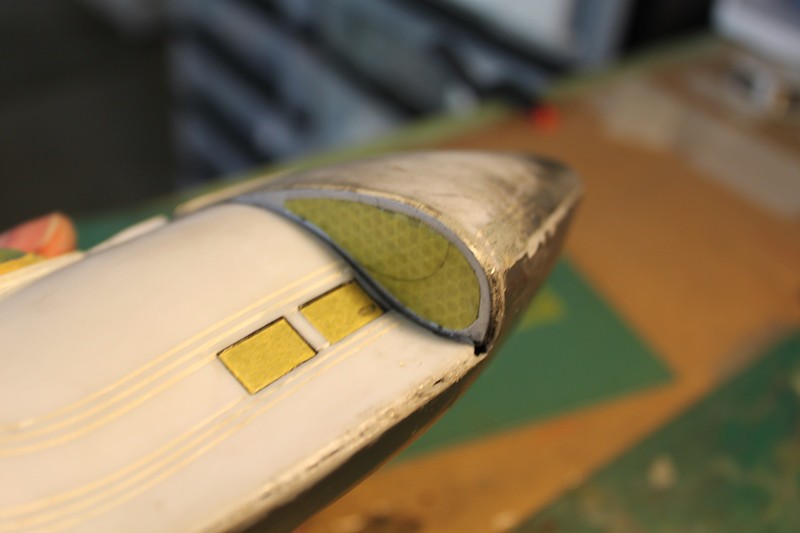
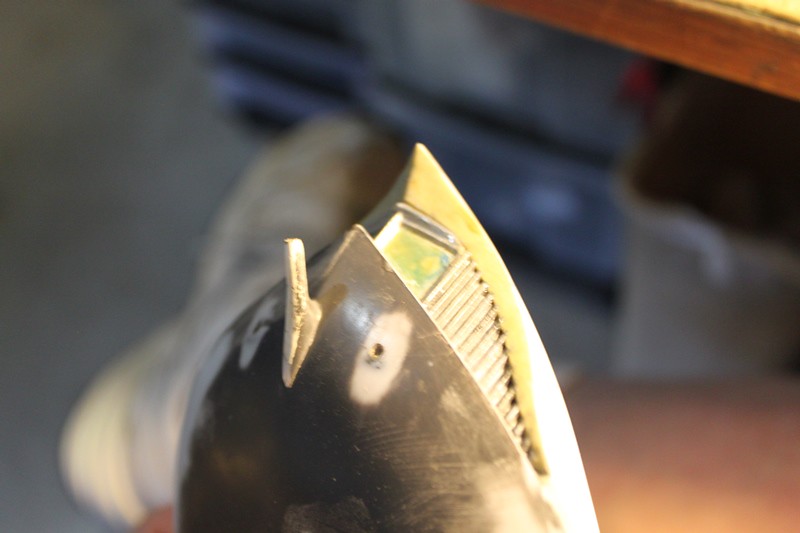
A thin styrene strip was glued to the AVES where it meets the window frames and grills. The last layer of AVES will be laid down over the strip leaving a nice clean edge:
 Styrene Strip by trekriffic, on Flickr
The second layer of AVES was laid down and feathered into the edge of the strip using dental tools:
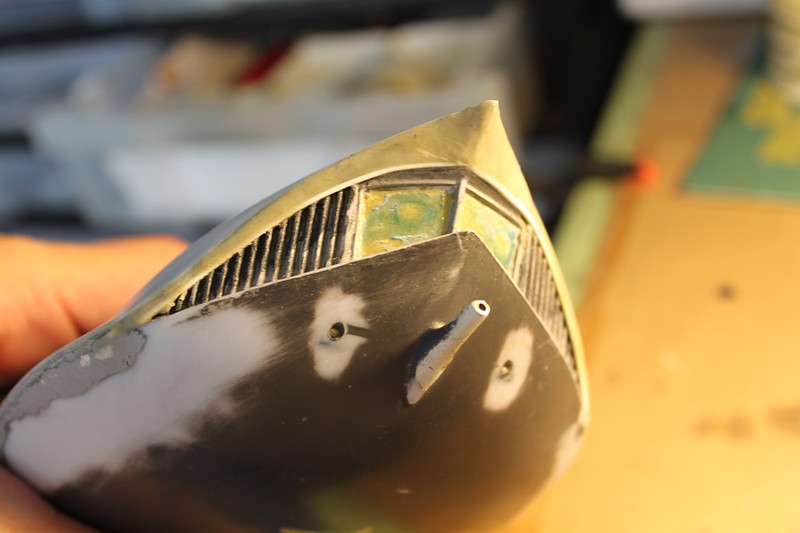 Second Layer of AVES by trekriffic, on Flickr
More to come...
The gap in the upper hull and window frame was closed about 75% using Plastic Surgery glue and holding for about 1 minute. More glue was then run along the seam for added strength.
The next step is using putty to complete the contours:
Bow Under the Hood by trekriffic, on FlickrDid I say there was putty in my future? Nice holes on view in these shotsght:
More Ugly Seams by trekriffic, on FlickrAnother Nice Hole to Fill by trekriffic, on FlickrEngine exhaust vent masking:
Engine Exhaust Vent Masking by trekriffic, on FlickrI used Tamiya Basic polyester putty to fill and gaps and re-sculpt contours. This dried and was sanded with a medium grit sanding stick:
Puttied and Sanded by trekriffic, on FlickrMore Purrty and Sannding by trekriffic, on FlickrStill more sanding to do but I wanted her tailfin attached so I could putty some gaps at the front tip of it:
Spindrift Gets Her Tail by trekriffic, on FlickrTo fill in the area under the nose above the grills and window ports I used AVES. This is the first application of two to cover the seams and give this area the proper contours as seen in profile images of the Spindrift model and the blueprints:
First AVES Putty by trekriffic, on FlickrClose by trekriffic, on FlickrA thin styrene strip was glued to the AVES where it meets the window frames and grills. The last layer of AVES will be laid down over the strip leaving a nice clean edge:
Styrene Strip by trekriffic, on FlickrThe second layer of AVES was laid down and feathered into the edge of the strip using dental tools:
Second Layer of AVES by trekriffic, on FlickrMore to come...
"You broke your little ships."
My albums on flickr: https://www.flickr.com/photos/29607470@N08/sets/
My albums on flickr: https://www.flickr.com/photos/29607470@N08/sets/