Klingon Bird of Prey (final pics page 9)

Work in progress, completed builds and general 1/350 related discussion.
Post Reply
User avatar
trekriffic
Admiral of the Fleet
Posts: 2742
Joined: Mon Oct 01, 2012 4:16 pm

Klingon Bird of Prey (final pics page 9)

Post by trekriffic »

I've had this kit sitting on the shelf for a number of years. This is the Klingon Bird-of-Prey B'rel class scout ship by AMT first seen in Star Tek III, The Search for Spock...

Box Art:

Image
Box Art by trekriffic, on Flickr

The instructions list it as Stock No. 38389 for those interested.

Parts trees:

Image
Parts Tree by trekriffic, on Flickr

Image
Parts Tree by trekriffic, on Flickr

Image
Clear Parts by trekriffic, on Flickr

All parts are molded in light grey styrene save the warp drive housing and photon torpedo emitter which are clear. The kit also includes a small sheet of decals.
Last edited by trekriffic on Mon Sep 29, 2014 6:50 pm, edited 1 time in total.
"You broke your little ships."

My albums on flickr: https://www.flickr.com/photos/29607470@N08/sets/
User avatar
SingleMind
Charismatic Commander
Posts: 285
Joined: Fri Jun 21, 2013 10:59 am
Location: Naples NY

Re: Klingon Bird-of-Prey

Post by SingleMind »

Cool look forward to seeing what you do. I love the KBOP.
Confidence - that feeling you get right before you fully understand the situation.
User avatar
asmcelhinney
Charismatic Commander
Posts: 270
Joined: Sun Mar 30, 2014 4:45 pm
Location: East Sussex

Re: Klingon Bird-of-Prey

Post by asmcelhinney »

Classic kit, love it! Any idea which wing configuration you'll use? Any plans for lighting?
"No matter where you go, there you are."

My fledgling YouTube channel:
https://www.youtube.com/user/PapanurgleForums
User avatar
trekriffic
Admiral of the Fleet
Posts: 2742
Joined: Mon Oct 01, 2012 4:16 pm

Re: Klingon Bird-of-Prey

Post by trekriffic »

asmcelhinney wrote:Classic kit, love it! Any idea which wing configuration you'll use? Any plans for lighting?
I'll probably go with the wings down in attack mode but haven't quite decided yet. Yes. There will be lights! I plan to build this as the KBOP from ST III; the movie where she first appeared on screen in all her glorious predatory villainy.
"You broke your little ships."

My albums on flickr: https://www.flickr.com/photos/29607470@N08/sets/
User avatar
trekriffic
Admiral of the Fleet
Posts: 2742
Joined: Mon Oct 01, 2012 4:16 pm

Re: Klingon Bird-of-Prey

Post by trekriffic »

A little progess to report...

The parts were placed in a tub and allowed to soak for 5 minutes before being scrubbed with a soft scrub brush using Dawn dishwashing soap and warm water. This should rid them of any residual mold release.:

Image
Washtub Scrub by trekriffic, on Flickr

Afterwards the parts were laid out to dry for a day before priming.:

Image
Parts Drying by trekriffic, on Flickr

I have five LED strips of 3 LED's each left over from my 1/350 TOS Lighting Kit. Thinking one strip might be enough to light the warp engines.:

Image
Warp Engine Lighting Idea by trekriffic, on Flickr

An interesting effect seen in ST III are the flickering warp engines. Using a 50% off coupon at Michaels craft store I bought a set of 6 Flameless Candles for 4 bucks. Not a bad deal. I'll cannibalize one or perhaps two to mimick the effect from the movie. No doubt some experimentation is in the offing.:

Image
Flameless Candles by trekriffic, on Flickr

Anyway, not much to report on at this point.
Next I'll get started replacing some of the external pipes and conduits with metal or plastic rod and tubing.
The wingtip disruptor cannon barrels will need a lot of work in that regard.
I'll also drill out the windows.
I have some screencaps from STIII and photos of the studio model saved on my laptop and uploaded into my Flickr! album to work from which will be a big help.
I also have several images of Richard Long's excellent Bird-of-Prey to refer to; they should be especially useful for the paint scheme and weathering when I get to that point.

Stay tuned KBOP fans! :)
"You broke your little ships."

My albums on flickr: https://www.flickr.com/photos/29607470@N08/sets/
User avatar
asmcelhinney
Charismatic Commander
Posts: 270
Joined: Sun Mar 30, 2014 4:45 pm
Location: East Sussex

Re: Klingon Bird-of-Prey

Post by asmcelhinney »

Love the flickering candle idea! Look forward to seeing how you get on with that.
"No matter where you go, there you are."

My fledgling YouTube channel:
https://www.youtube.com/user/PapanurgleForums
User avatar
trekriffic
Admiral of the Fleet
Posts: 2742
Joined: Mon Oct 01, 2012 4:16 pm

Re: Klingon Bird-of-Prey

Post by trekriffic »

Over the wqeekend I was looking at some stills of the bow photorp launcher and I must confess something has me mysitifed. Comparing thwe two images below there seems to be a discrepancy.

In the image below there appears to be some type of cover in place over the mouth of the tube:

Image
bop-head-st5-lid by trekriffic, on Flickr

Yet when the weapon fires there appears to be some type of grill in place of the cover:

Image
bop-head-front by trekriffic, on Flickr

Has anyone else noticed this cover in the first image before? Are we to asssume that it lifts out of the way somehow before the weapon launches it's torpedo? Anyone have any insights they can share on this?
"You broke your little ships."

My albums on flickr: https://www.flickr.com/photos/29607470@N08/sets/
User avatar
trekriffic
Admiral of the Fleet
Posts: 2742
Joined: Mon Oct 01, 2012 4:16 pm

Re: Klingon Bird-of-Prey

Post by trekriffic »

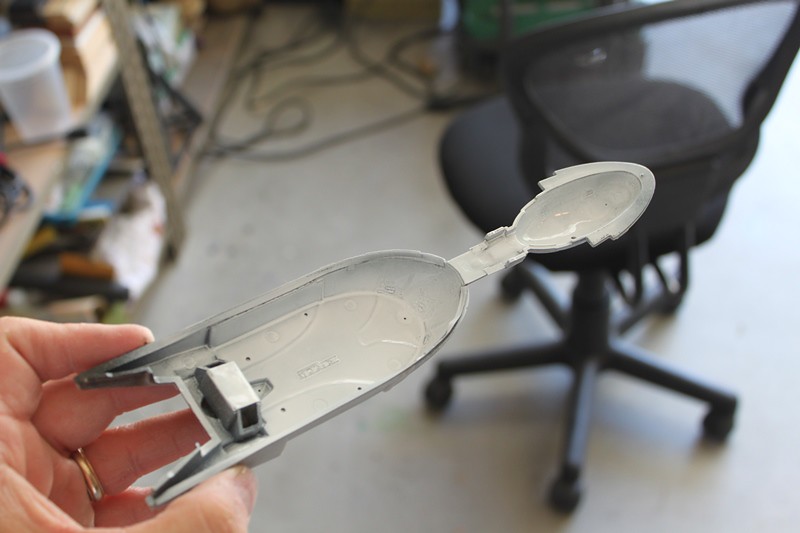
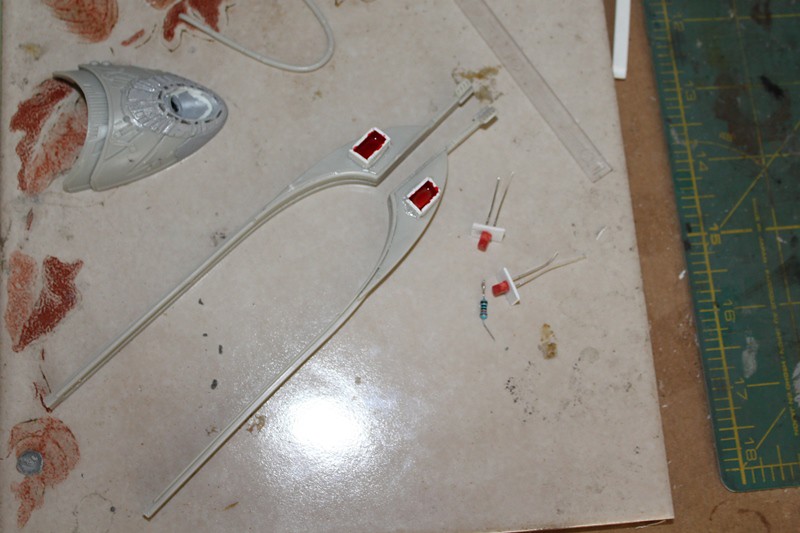
So, after further review, it appears there is no right or wrong way as regards the cover vs. grill question for the photorp emitter. Depending on which movie you reference, the emitter either had a cover, a grill, or nothing at all. So it is totally at the modeller's discretion on which version to go with. For my purposes, since the KBOP in STIII had the grill I'll be going that route. Just need to decide how to construct it. In the meantime, here are photos of my latest progress...

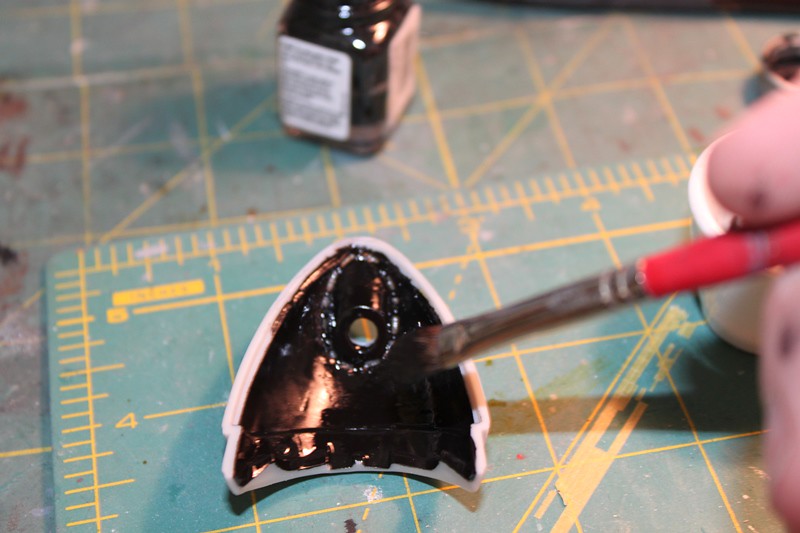
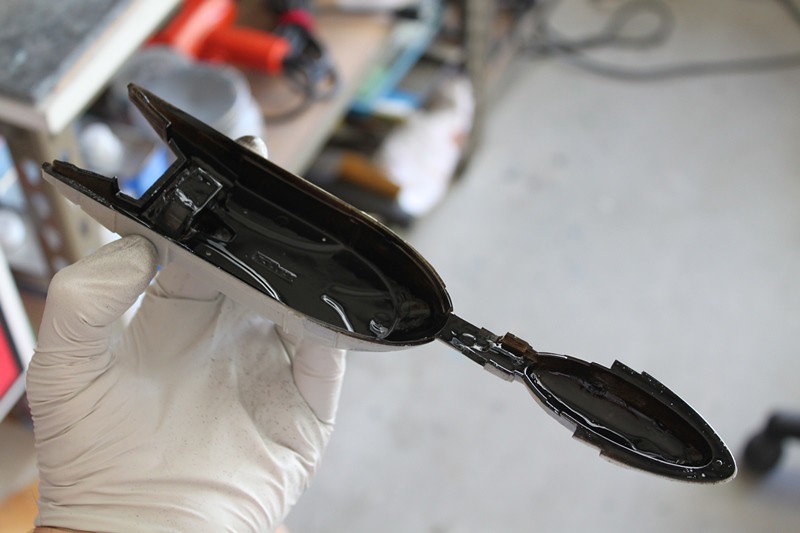
Prior to painitng the emitter I masked off the open areas that will glow when powered up:
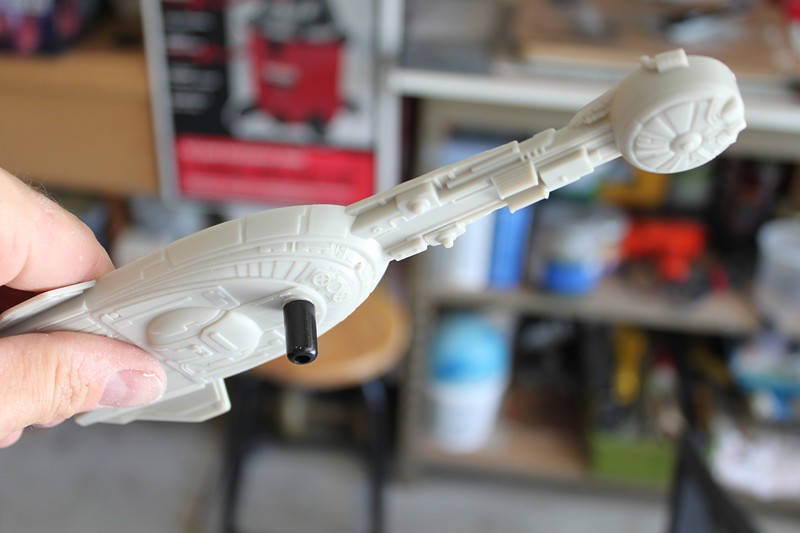
Image
Emitter by trekriffic, on Flickr

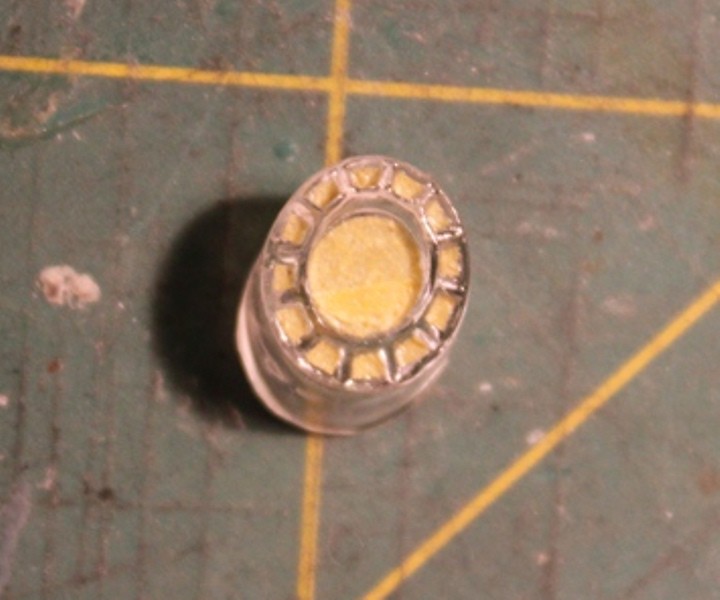
I subsequently sprayed the part with Tamiya Gloss Black and Bare Metal Silver lacquer for light blocking. Not sure yet what the final color will be for the framework. Need to consult what photos I have of the studio model for that.

Moving along...

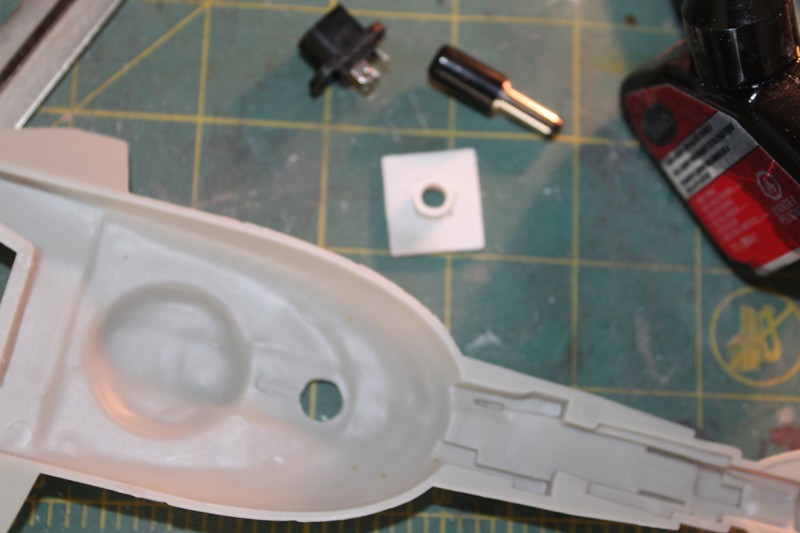
I drilled out the openings in the bow cowling around the mouth of the photorp tube. These will be filled with clear acylic and glow with a red light:

Image
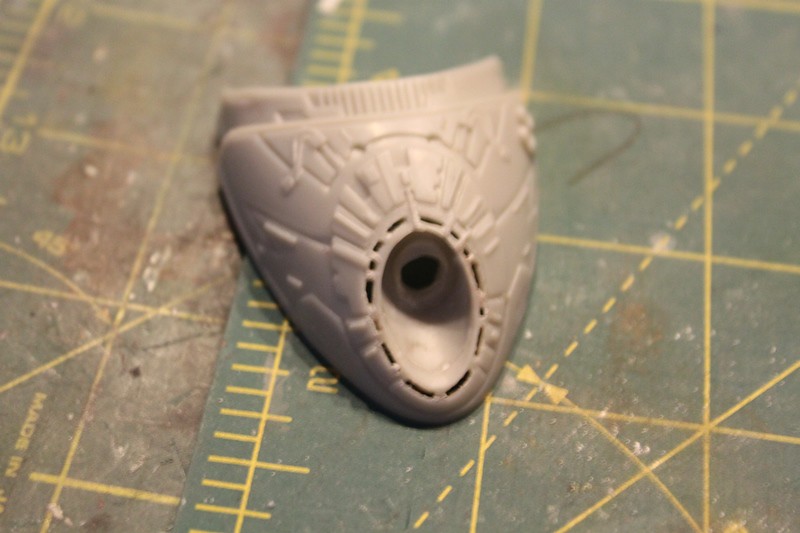
Nose Cowling Drilled Out by trekriffic, on Flickr

After filling with clear acrylic:

Image
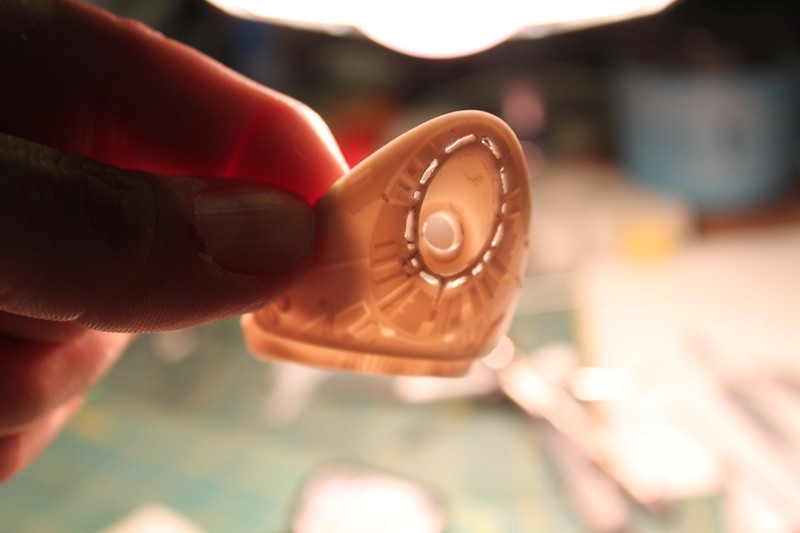
Openings Around Mouth by trekriffic, on Flickr

I used acrylic nail powder for the cowling openings (and the other window slits) filling them with the powder using the spoon side of a metal stirring stick. A strip of Scotch tape was placed over the backside of the opening to prevent the powder from falling thru:
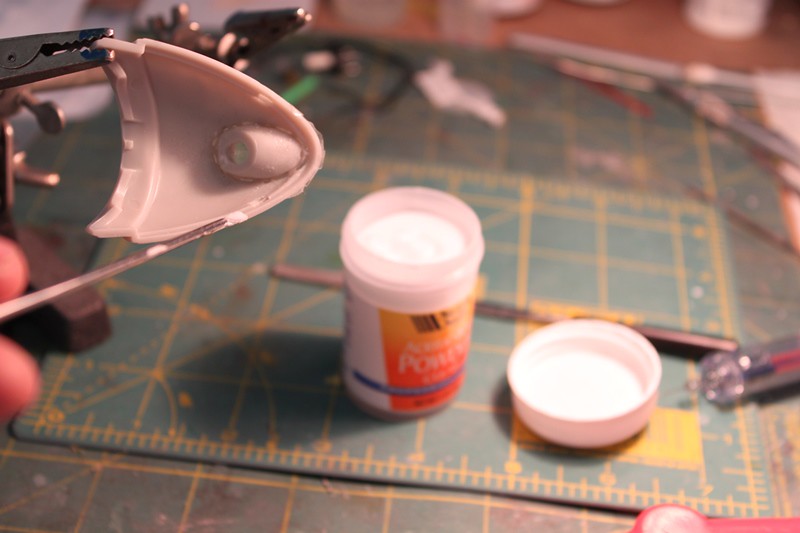
Image
Acrylic Nail Powder by trekriffic, on Flickr

The liquid monomer was sucked up into a syringe...
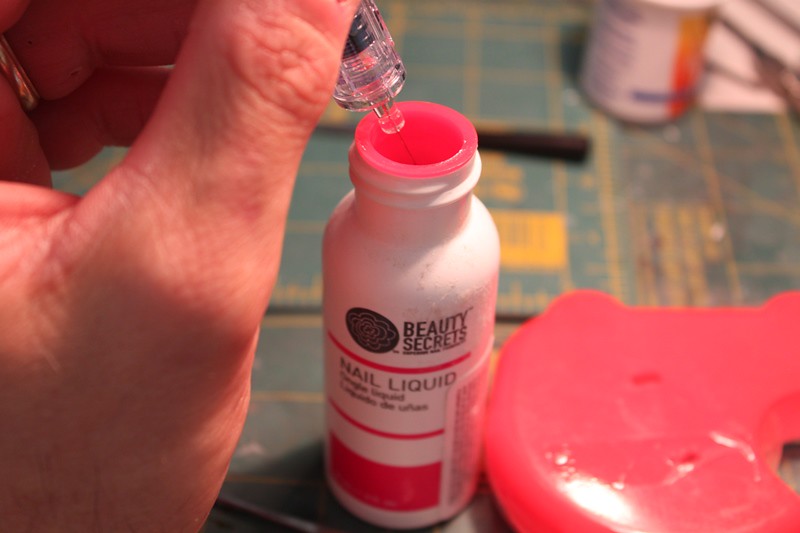
Image
Acrylic Nail Liquid by trekriffic, on Flickr

And injected into the powder:

Image
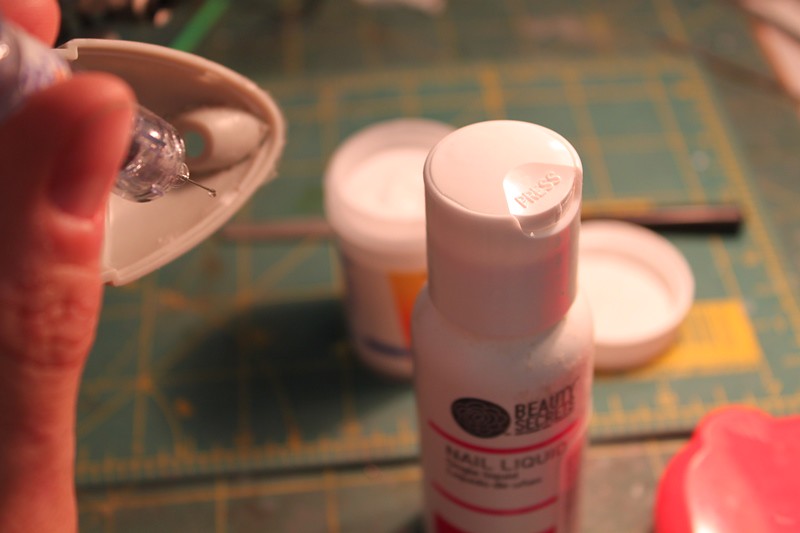
Nail Liquid Application by trekriffic, on Flickr

After 5 minutes the tape was removed and any residual tape adhesive was wiped off using a swab dipped in alcohol. What I was left with were translucent clear windows. The acrylic is very hard, harder than the kit plastic in fact. Luckily there wasn't too much seepage under the tape; what there was, I was able to clean up by scraping with the edge of my exacto knife. I did find a few pinholes which I filled with a second application of powder and monomer. All in all I was satisfied with the results.
Last edited by trekriffic on Mon Jun 23, 2014 6:25 pm, edited 3 times in total.
"You broke your little ships."

My albums on flickr: https://www.flickr.com/photos/29607470@N08/sets/
User avatar
trekriffic
Admiral of the Fleet
Posts: 2742
Joined: Mon Oct 01, 2012 4:16 pm

Re: Klingon Bird-of-Prey

Post by trekriffic »

Using the stand slot as a guide, I drilled and filed out a large hole for insertion of a short section of styrene tubing. A coaxial power plug will feed up thru the tube into a DC power jack mounted inside the lower hull:

Image
Mounting Hole by trekriffic, on Flickr

A box was built around the power jack. I used tube glue to glue the jack into the box:

Image
Power Jack by trekriffic, on Flickr


After a while I packed Milliput around the outside of the box and around the jack:

Image
Power Jack by trekriffic, on Flickr

The power plug fits nice and snug. I'll eventually mount it to a metal tube for mounting in a wooden base:

Image
Power Plug by trekriffic, on Flickr

I brushed on black enamel inside the bow cowling being careful not to paint over my mouth rim openings:

Image
Light Blocking by trekriffic, on Flickr

The upper hull interior was sprayed with Tamiya gloss black lacquer for light blocking. I masked off the window slits from the inside beforehand of course:

Image
Upper Hull Light Blocked by trekriffic, on Flickr

After drying, the black paint was covered with a coat of Tamiya gloss white for even light dispersion when lit:

Image
White Paint by trekriffic, on Flickr

Here you can see a mounting bracket I built inside the rear of the upper hull half:

Image
Mounting for Reostats Swtch by trekriffic, on Flickr

I'll be mounting this rheostat switch into the bracket above:

Image
Rheostat Switch by trekriffic, on Flickr

The last thing I worked on yesterday was construction of these light boxes in the parts that go under the edge of the cowling at the front and down each side of the "secondary" hull. Red LEDs will glow inside the boxes pointing downward and shining thru two pieces of Tamiya transparent red acylic tinted clear styrene panels:

Image
LED Lght Boxes by trekriffic, on Flickr

You can see the red glowing panels in this film image:

Image
bop-head-back by trekriffic, on Flickr

Oh.. almost forgot... I made a short YouTube video of one of the flickering flameless candle LEDs in operation after removing it from the candle housing. Click on the video below to view it:

"You broke your little ships."

My albums on flickr: https://www.flickr.com/photos/29607470@N08/sets/
User avatar
trekriffic
Admiral of the Fleet
Posts: 2742
Joined: Mon Oct 01, 2012 4:16 pm

Re: Klingon Bird-of-Prey

Post by trekriffic »

Upon further review...

I took the plunge and am ordering the wing hinge kit from Don's Light and Magic. After reading the instruction sheet he has posted on his site I realized I was going to have clearance issues between the kit parts and the position of the power jack in the lower hull. So I spent a good 10 minutes removing the power jack; figured better to do it now than later when the putty has fully cured. I'll hold off until I have the hinge kit before attempting to reorient the power jack. I may end up having to hard wire the model to the dispaly stand if I can't get it to fit. We'll see.
"You broke your little ships."

My albums on flickr: https://www.flickr.com/photos/29607470@N08/sets/
Post Reply

Return to “1/350”