
You do know that DLM has a Reliant Bridge as well as the Refit Bridge?toejrb wrote:I'm still deciding what to do about the bridge. I chopped up the kit part, and put on sheet styrene to shrink down the dome, to widen the pronounced "shelf" that's level with the back of the bridge, and to sharpen up the detail aft of the dome. The results are mixed. I may try another round of styrene discs, or just go with the DLM Constitution Refit bridge so I can get on with the numerous other things that need doing. Either way it's been a good learning experience.
*another* another lighted Reliant
-
andyh
- Can-Do Captain

- Posts: 877
- Joined: Tue Apr 22, 2014 11:08 pm
- Location: Adelaide, South Australia
Re: re-worked Reliant bridge
-
toejrb
- Lighting Fast Lieutenant JG

- Posts: 44
- Joined: Tue Jul 28, 2015 8:58 pm
Re: re-worked Reliant bridge
Yup, I do, thanks. Did you do the master for it? Thinking I may yet go that way (in clear, natch), since I'm also thinking about getting an officer's lounge from Don. Right now, there's a big gaping hole behind the photoetch windows at the back of the b/c deck section. Plus I want to keep Don in business for my future builds, so there's that too!andyh wrote:You do know that DLM has a Reliant Bridge as well as the Refit Bridge?
All that said, a Connie bridge can look just fine on a Miranda. Clock this this DeBoer hull buildup:
- DeBoer hull bridge
I'm pretty sure that model has a Constitution's bridge. Note the raised panels on the bridge side, and the grilles on the sloping dorsal bits to either side of the bridge dome, and the small insets on either side of the horizonal window vent things just above the B deck. All Connie bridge features not found on the Miranda studio model. Still looks amazing.
-
andyh
- Can-Do Captain
- Posts: 877
- Joined: Tue Apr 22, 2014 11:08 pm
- Location: Adelaide, South Australia
Re: *another* another lighted Reliant
Yes, I mastered he Reliant Bridge for Don. It is also ever so much shorter from front to back than the Connie bridge, but yes, you are correct, the Refit bridge does look just fine on the Reliant B/C deck 
This is the B/C deck and Bridge I molded for myself before I sent the masters all off to Don.
Andy
This is the B/C deck and Bridge I molded for myself before I sent the masters all off to Don.


Andy
-
toejrb
- Lighting Fast Lieutenant JG
- Posts: 44
- Joined: Tue Jul 28, 2015 8:58 pm
Reliant edge window alignment?
One of the things the picture of the DeBoer build up (above) brings home is that the windows on the side of the reliant have to be very closely aligned block-to-block. Also, the windows on the flat bits fore and aft of the nacelle pylons have to align with each other, and with the saucer windows. Otherwise they won't fit neatly with the sensor band decals. An error of even a fraction of a mm will be *very* noticeable.
I have the Paragrafix templates, so that's a start. But even small variances in how I position those will, as noted above, be painfully obvious. Was thinking maybe I'd get a sacrificial set of sensor band decals that I could put on the hull as a guide. Seems like a pricey solution, though. Maybe use the DLM inserts from the 1/537 refit for the saucer bits? Anyone have any other bright ideas for getting everything to line up? Is there maybe already a thread on this to which someone could point me?
I have the Paragrafix templates, so that's a start. But even small variances in how I position those will, as noted above, be painfully obvious. Was thinking maybe I'd get a sacrificial set of sensor band decals that I could put on the hull as a guide. Seems like a pricey solution, though. Maybe use the DLM inserts from the 1/537 refit for the saucer bits? Anyone have any other bright ideas for getting everything to line up? Is there maybe already a thread on this to which someone could point me?
-
toejrb
- Lighting Fast Lieutenant JG
- Posts: 44
- Joined: Tue Jul 28, 2015 8:58 pm
Re: *another* another lighted Reliant
Tempting. For the final model I'll either use the Connie DLM part, or buy the DLM (your) Miranda part.andyh wrote:Yes, I mastered he Reliant Bridge for Don. It is also ever so much shorter from front to back than the Connie bridge, but yes, you are correct, the Refit bridge does look just fine on the Reliant B/C deck
Andy
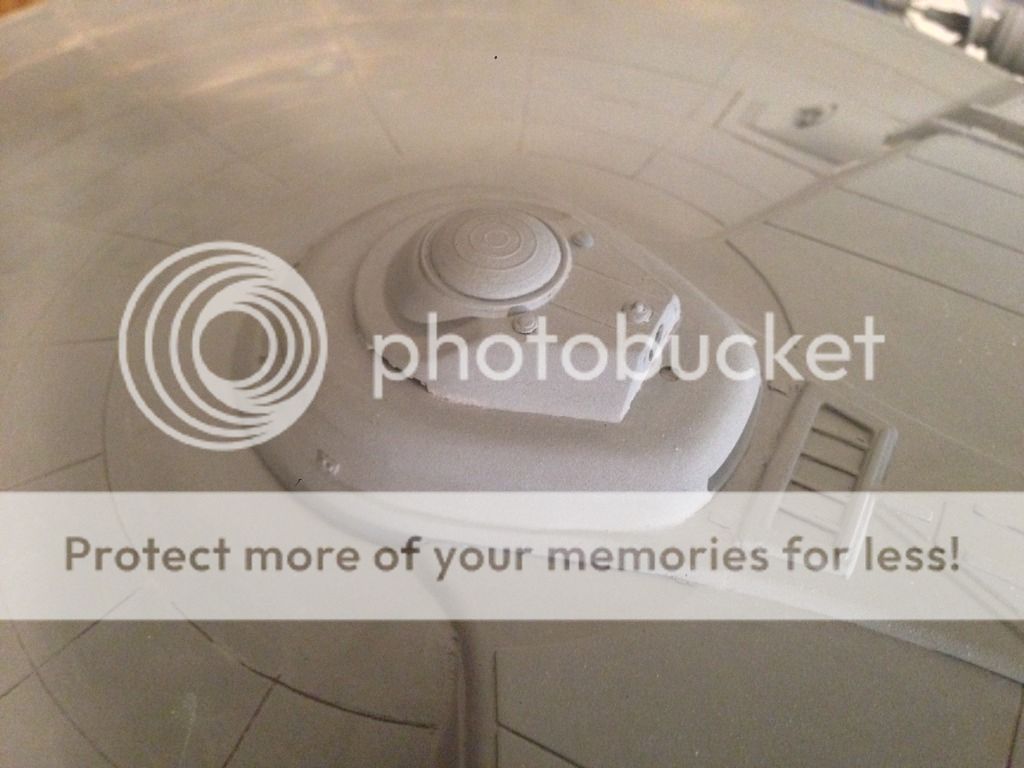
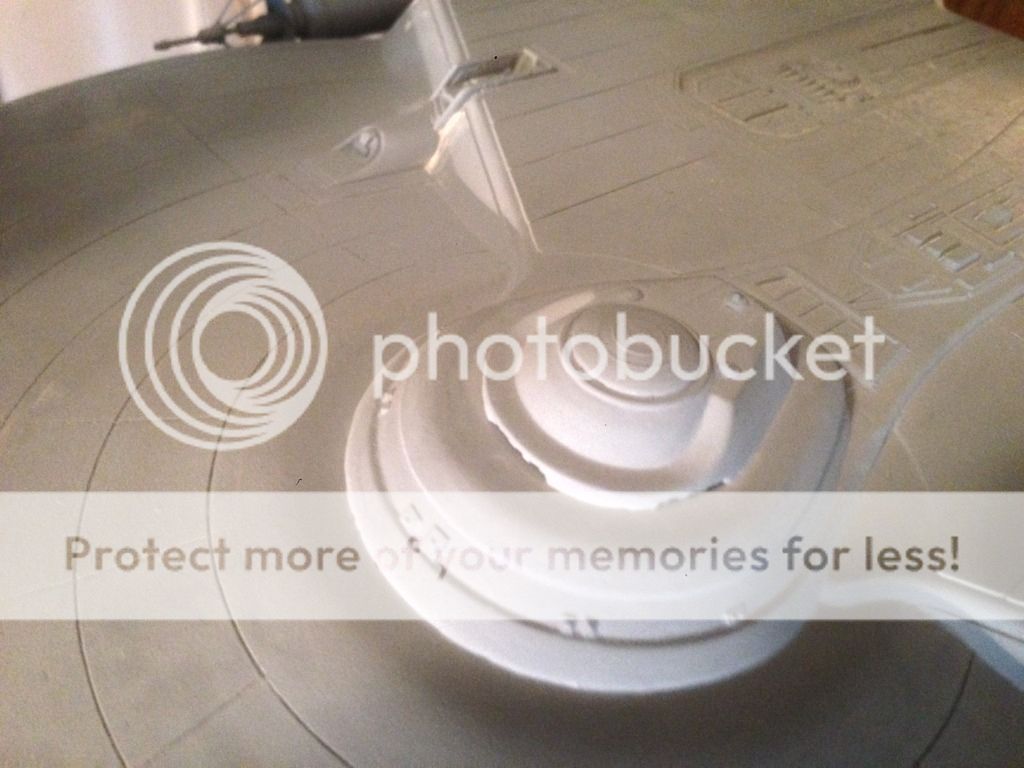
Notwithstanding, I've continued futzing with the kit bridge; new pics below. Sanding stuff so it stays perfectly round is an art I haven't mastered. And that cut line midway up the dome is giving me fits. This is pretty much just practice now, tho; I dont' see any way this comes out better than the DLM option.
- more reliant bridge
- image.jpeg (115.58 KiB) Viewed 3158 times
- reliant bridge off b/c deck
- image_1.jpeg (116.18 KiB) Viewed 3158 times
- is this my good side?
- image_2.jpeg (117.01 KiB) Viewed 3158 times
-
toejrb
- Lighting Fast Lieutenant JG
- Posts: 44
- Joined: Tue Jul 28, 2015 8:58 pm
Roll bar uppers
Did some work on the roll bar uppers today. Boxed the cut-outs for the ribbed material in, using strip styrene. Man is that stuff great!
- port and starboard roll bar uppers
- image.jpeg (112.76 KiB) Viewed 3139 times
- before priming, showing bondo and styrene strip
- image_2.jpeg (91.66 KiB) Viewed 3139 times
- after primer and sanding
- image_1.jpeg (100.85 KiB) Viewed 3139 times
- closeup of primed side
- image_3.jpeg (100.93 KiB) Viewed 3139 times
-
andyh
- Can-Do Captain
- Posts: 877
- Joined: Tue Apr 22, 2014 11:08 pm
- Location: Adelaide, South Australia
Re: *another* another lighted Reliant
Excellent. I'm going to have to do the same eventually, so it's interesting to see how you have gone about it 
Andy
Andy
-
toejrb
- Lighting Fast Lieutenant JG
- Posts: 44
- Joined: Tue Jul 28, 2015 8:58 pm
Re: Roll bar uppers
I'd say these are pretty much baked for now. Still need color, decals, and lighting, of course!toejrb wrote:Did some work on the roll bar uppers today. Boxed the cut-outs for the ribbed material in, using strip styrene. Man is that stuff great!
- roll bar w/white finish coat
- image.jpeg (103.84 KiB) Viewed 3111 times
- another of the roll bar uppers
- image_2.jpeg (106.98 KiB) Viewed 3111 times
-
toejrb
- Lighting Fast Lieutenant JG
- Posts: 44
- Joined: Tue Jul 28, 2015 8:58 pm
Reliant lighting test
Tried out the Starling board today. Works perfectly!
For the flashers, I'll pair two LEDs with one resistor in series, then have lots of pairs runing in parallel with each other, per the Starling instructions. For the strobe, I'll have a single LED and associated resistor, and run fiber optics off to the strobe locations.
Now to determine what lights go where . . .
- reliant lighting 1
- reliant lighting 2
Now to determine what lights go where . . .
- Seems like the saucer section is easy -- red flashers on port, top and bottom. Green flashers on starboard, top and bottom. White flasher at the bow, top only.
- Strobes go on the top back of the bridge, and on the top stern of each nacelle.
- After that it gets more complicated. From a recent TWOK viewing it looks like the red lights on the top and bottom stern section flash. The red and white lights on the fantail around the hanger bay doors are static. As are the red lights sprinkled around the roll bar.
-
toejrb
- Lighting Fast Lieutenant JG
- Posts: 44
- Joined: Tue Jul 28, 2015 8:58 pm
b/c deck windows
Put some pilot holes in place for the b/c deck windows. Hurray for circular windows! I'm procrastinating on the balance of the windows because I can't get the lozenge-shaped ones to look right.
While I was on the b/c deck, I finished cleaning out the kit plastic behind the etch officer's lounge window. Gotta do something with the space now. Leaning towards making the lounge double as a garden, since the Mirandas don't seem to have a dedicated arboretum.
- empty lounge
- image.jpeg (90.5 KiB) Viewed 3081 times
- image_1.jpeg (86.66 KiB) Viewed 3081 times