


This is a project that I've spent a ton of time and effort researching. I started by drawing up an early version of my plans for this model back in 2007, and followed it up with two study models (here and here) at two-thirds scale to help refine my plans (and improve my model building abilities). Originally I had wanted to build this model out of the same materials as the original (which was mostly made out of kiln-dried sugar pine), but I don't have any of the equipment or experience to deal in wood, so I'll stick with what I know I can do.
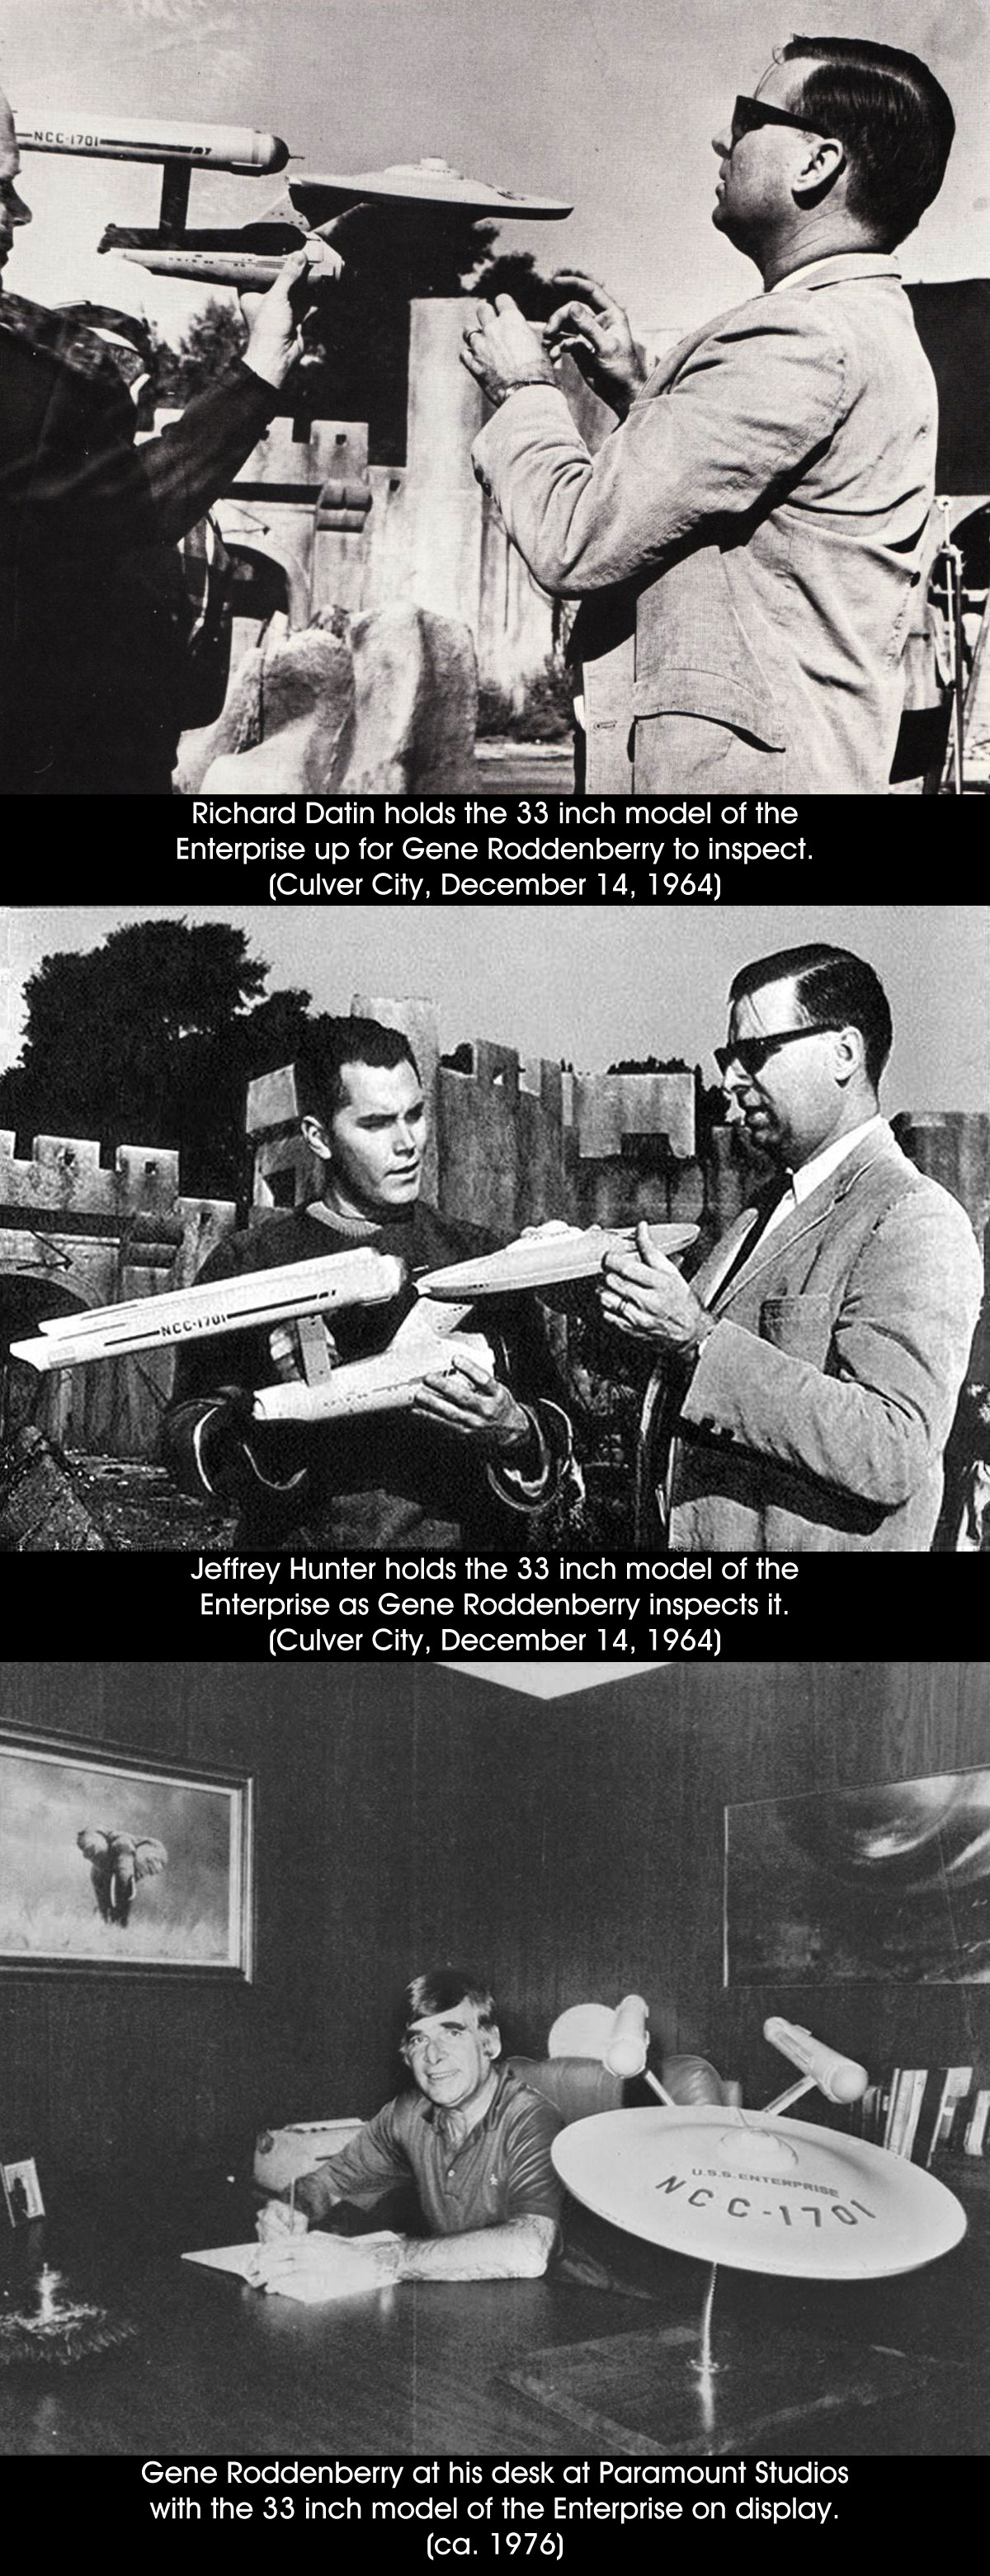
For a bit of history on the original model, you can check out this page I put together.
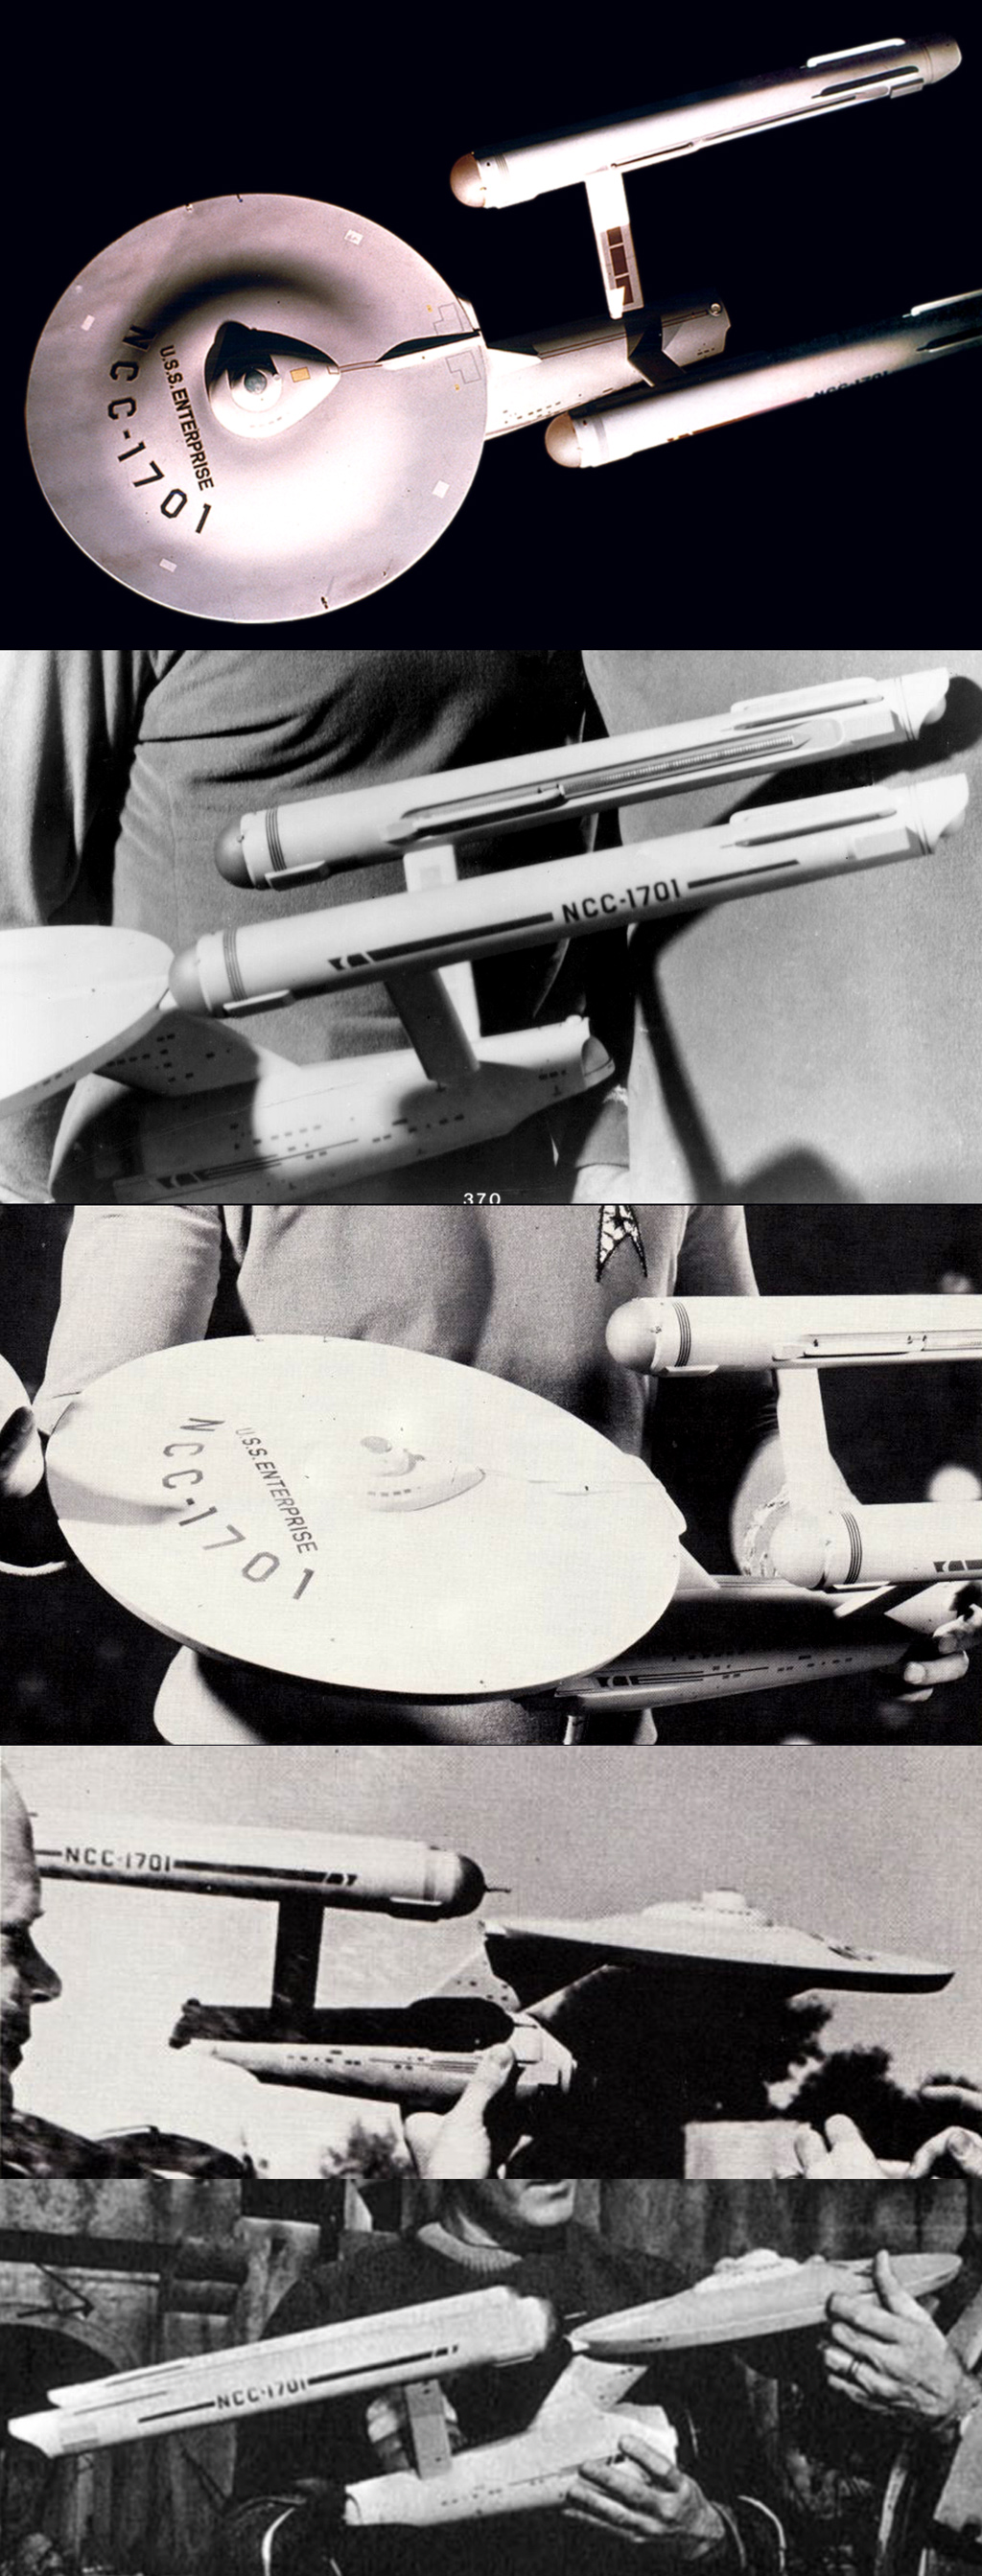
Here are some additional reference images I've collected since I did my original plans back in 2007 (which helped me iron out some issues while building my second two-thirds scale study model)...
Click to enlarge
Click to enlarge
And how the model looked in 1974...
Where to start?
I decided that I'd begin with the secondary hull. The series of images below show the steps I've taken to start building a master.
It started with cutting out pieces of foamcore board and building a base structure. Because this will be the master for both sides, I've included holes and alignment channels for both sides for the nacelle support pylons to slide into. It is easier to build the parts with both holes and fill in the extra later than to build it without any and add them later or build two of these. I'll be doing this exact same thing when I build the inboard nacelle master so I only have to build it once.
Next I put blocks of styrofoam in to the openings and used a hot wire to cut them to the general shapes I needed. And then with them glued into place, I used a template of the secondary hull shape to lay out a surface made of hydrocal. I let that dry/cure and then filled in any gaps that showed up.
This isn't all that different from how I made my primary hull for my one-sixth studio scale 11 foot TOS Enterprise, but I figured I'd show how these same steps could also be used to make a little more complex shape... so here is the start of the (pre-)master to the secondary hull of my Phase II Enterprise kit (as an example).
It was made the exact same way, just requiring a different template for the shape and the alignment channels for the nacelle support pylons are at a different angle. And this is them together...
And no, this model is not going to become a kit... nor could it's parts be used to convert the Round 2 1/350 TOS Enterprise (which is smaller than this model by more than an inch... 32.4 inches compared to 33.75 inches).
Once the hydrocal has completely dry/cure I'll add on a surface that I can work to a smoother finish. When I'm all done, I'll make a mold and cast two parts.
Below are shots of the start of the inboard and outboard nacelle masters, first together and then separate.
There isn't a lot of stuff going on with the outboard master. The inboard master has the channel (which is started above) and the attachment points for the nacelle support pylons. So there is going to be a bit of work needed to engineer all that before I get anywhere close to making molds.
A lot of this is going to look like the 11 foot model, but I'll point out where the 33 inch model differs as it becomes easier to see. One thing that is different here is that the inboard channel extends further back (running into the rectangular box features). I think this was a result of the channels originally facing downwards. Datin seemed to have changed the orientation while building this model, and then carried the changes over to the 11 foot model (making adjustments) when they started it a few weeks later.
The main reason that I believe this is the case is that had the channel originally been on the inboard side of the nacelle, the nacelle supports would run into them. And I don't think this was the only change as the top of the support pylons need to be fitted to the attachment point, so I believe that they were also swapped at the same time... which is why I think that the inboard vents on the pylons were originally supposed to be pointing outwards (like in many of Jefferies drawings and how he went back to this configuration when designing the Phase II Enterprise).
I continued to make some more progress on the nacelles, mainly gluing many of the inboard nacelle parts together.
I cut the openings and started the slots for the nacelle support pylons attachment points. These slots are intended to help align the parts and are the same size as those on the secondary hull master. I cut out a piece of foamcore board that fit into those openings and tested the nacelle masters together with the secondary hull master to see how things are working.
The secondary hull master is on it's side, but the main thing I was looking for was the center lines of both the masters to be parallel to each other.
I've left myself enough maneuvering room to make adjustments with the final parts later on, but I wanted to have the masters (and molds) be as close to a perfect fit as I could (specially given that all this is hand made... but then again, so was the original model).
I haven't documented most of what I've been doing as it is essentially the same things I did on my one-sixth studio scale 11 foot model.
Here are some progress shots...
I included a test pull of my Enterprise name plaque (which I kept to try out painting/aging ideas on). There has been some more work on the inner nacelle channel, mostly sculpting the ends.
I started making the forward rings (which are currently just four disks). Building those is pretty straight forward... cut out a disk of thin styrene and a smaller disk of thick styrene, glue them together and fill in the stair step between. It doesn't take much effort and when I put all four together I get what I needed.
Because it took longer to do, I did take a series of images of the rear nacelle cap being constructed. For this I cut three disks... two were annulus, with holes large enough for the rear cap's sphere. I cut the annulus into two parts off center which gave me a total of five structural pieces to help hold the ribbed outer styrene sheet in the form of a cylinder. I later added a few more pieces of styrene to close up some openings and then used Aves apoxie sculpt to fill in the remaining open face... being sure to keep the hole needed for the sphere.
And again, these are all masters... none of these parts are going to actually be on the final model. This model will be made mostly of TC-1630 A/B UltraCast and Alumilite White, but for the masters, what ever works to make the shape.
I continued working on the nacelles and started on the primary hull masters. The nacelle halves and secondary hull half will be mounted to wood boards before I make the molds (though they aren't mounted just yet).
I'm using 18 inch circular table tops as the bases for the upper and lower primary hull masters. I'll be using hydrocal on those to get the primary shapes I need.
A great tutorial on how I'm making some of these shapes can be found here.
This is a little progress on the lower primary hull master...
I realized I need to fix a flaw in the pattern piece, and I noticed that one of the boards I was using warped, so I decided to build two lower primary hull masters and see which one turned out the best.
The top primary hull master is now at about 95% done in that shot.
I'd drawn on the underside rings to make sure that they match up with all my research. The best thing is that the NCC-1701 decals that go between the engraved rings and flat edge fit perfectly compared to photos of the original model, so I'm happy with them.
In this set of progress shots I've included the start of the B/C deck structure on the top primary hull master to get a feel for how it is progressing.
I got the contours to where I needed, but I wanted to cross check the shapes/sizes against the decals to make sure everything will fall into place.
A lot of this has been puttying, sanding, primering and then repeating the process... attempting to get the surfaces to the best state I can.
Also added in the engraved rings on the lower primary hull in the set above.
I started in on the bridge and continued working on the secondary hull master. I included a shot of the original model for comparison in the series of images below. Both the bridge and the B/C deck structure are riding a little high, they'll sit lower and flush to each other (and later the upper primary hull with the actual parts) as I get closer to finishing them.
The biggest thing was that I pulled my first parts for the model... the nacelle domes.
These are the main references I've been using for the domes...
The bridge and B/C deck structure are now a single piece (the dome in the images below is a stand in for sizing purposes). I've continued work on the rear nacelle end cap assembly and made quite a bit of progress on the front nacelle end cap assembly (now that I have nacelle domes). I've also started in on the lower sensor dome platform, intercooler and deflector masters.
I've continued to work on the surface of the upper and lower primary hull masters, the secondary hull master and the nacelle masters, and I'm feel pretty good about their progress. I figure I'm not too far off from making molds from those.
Here is a test assembly of the rear nacelle parts to see how everything is coming together...
Still a work in progress, but at least it sorta looks like what it is supposed to be.
Here is a series of images of the upper primary hull with the bridge/B/C deck structure sitting in place to see how things are going with these parts...
And another series of the lower primary hull with the sensor dome platform (and a stand in dome) in place...
For both the upper and lower domes I'll be casting them in clear with a small amount of transparent green. I don't have transparent green dye right now, so I'll have to wait to actually make the final parts.
Made a mold of the lower primary hull and cast the first part from it (though I'm not sure if this is a final part or just a test)...
At least I know the mold produced a nice part and is still in great shape. The material (TC-1630 UltraCast) is really hard... much harder than Alumilite White. Having let the part fully cure for 24 hours, I don't think I needed to make the surface as thick as I did (the stuff is also very heavy). The nice thing is that I'm not as worried about flexing in the secondary hull were the nacelle support pylons will attach.
I finally have molds for both the upper and lower primary hull.
I now have primary hull parts!
And the best part of this is that these two halves weigh about the same as the first lower primary hull pull I did.
I cleaned up the edges (this is the primary hull top with the first lower half so I could experiment with cutting) to see how things fit together...
Still a bit thicker than it should be, but at least it is really starting to feel the part.
Based on what I learned from the spare lower primary hull, I cut down the main lower primary hull and did a test fit of the top and bottom together...
I threw in a shot of the original model from approximately the same angle for comparison. The clamps aren't actually clamping in those images. I had set them to the target thickness I was aiming for for the outer edge. They pretty much freely slide around the rim at this point.
Got the upper and lower halves of the primary hull together, this is my first primer pass to see how my putty work turned out...
There is still a bit of refining to do, but I'm pretty happy with the results so far.
Little more progress... About to start another round of putty/sanding, but here is some shots of the top of the primary hull (with the bridge/B/C deck master set in place)...
Still a long ways to go, so back to my grindstone.


